Introduction
Over the years I have worked with many different kinds of microscopes, ranging from most basic educational microscopes to research laboratory microscopes. At a certain point I realized that, when it comes to image quality, there is actually not a big difference between a classroom student microscope and a research microscope that you find in a laboratory. Research microscopes can be equipped with special applications like for instance phase contrast, Differential Interference Contrast (DIC) and fluorescence microscopy. With a student microscope you will be more limited but when using brightfield illumination, the difference in image quality between such a simple microscope and a research microscope is not that big as you would image. When the illumination is right, that is. And unfortunately, To avoid any misunderstandings, with a simple student microscope I mean any basic (monocular) stand with achromatic objectives. The mention of achromatic optics here is important as this defines the boundary between a proper and toy microscope. It is amazing how much you can see with a simple student microscope. This is something that many beginning microscopists and even some experienced microscopists don't realize. People that are new to microscopy often seem to think that they need expensive objectives that are higher corrected like fluorite or apochromatic objectives in order to produce good images. Or that they need Köhler illumination and even an aplanatic achromatic condenser. For good quality images, you don't need any of the things I mentioned above. It's not about how advanced the microscope is, it's how you use it. For this article I intentionally used a very simple microscope that had no sub-stage optics. Just a mirror, ordinary achromatic objectives, tube and eyepiece. That's it. What can we see and photograph with such a microscope? Well, a lot! Every time I use such a simple microscope I am pleasantly surprised how good the image quality can be. With a little optimization of the illumination you will have a fine microscope that you can buy at the second hand market for very little money.
The key to good images: proper illumination
Sometimes it seems that microscope manufacturers take the illumination for granted, even in some professional research microscopes. Fact is, when the illumination is bad, image quality will suffer severely. Proper illumination is more than anything else responsible for a good quality microscope image. It's not about using the most expensive optics. We used to learn that for a good microscope image, you need to set up Köhler illumination. Köhler illumination has little added value when using a student microscope and you will usually find it on a more advanced microscope. In a research microscope, (where you can adjust almost anything) Köhler illumination ensures that everything is well centered and it gives an even illumination when it is set up in the right way. There are some persistent misconceptions about Köhler illumination, even among experienced microscopists. Some believe Köhler illumination is necessary for phase contrast microscopy or that it will give the highest resolution in brightfield. In fact, Köhler illumination in some cases will prevent you from getting high resolution with objectives that have a high numerical aperture (NA) when an Abbe condenser is used. When using objectives that have a higher NA than 0.65, a microscope with a dry Abbe condenser (NA <1.0) set up for Köhler illumination will often not deliver the highest resolution. This is because by closing the field iris, the usable aperture will be restricted. To get the most out of higher NA objectives with such a setup it is usually better to open the field iris beyond the field of view (FOV) and set the condenser at a higher position. With these settings, there is no strict Köhler illumination anymore. At the time, Köhler illumination was developed to solve the problems with uneven illumination caused by lamp filaments and to enhance image contrast from microscope objectives that did not yet have decent anti-reflective coatings.
With simple microscopes, the use of diffusers does wonders. With a diffuser, you will enhance resolution and generate an even illuminated FOV. A diffuser is especially useful for low power objectives in order to achieve a homogeneous illuminated FOV because with such objectives, this can sometimes be challenging. A diffuser can be placed anywhere between light source and aperture diaphragm. It is important to maintain a certain distance from the light source to ensure complete light scattering. When optimizing microscope illumination, an essential part to have is a phase telescope or Bertrandlens. With such a device you can judge the illumination at the back focal plane of the objective.
Optimizing illumination and resolution
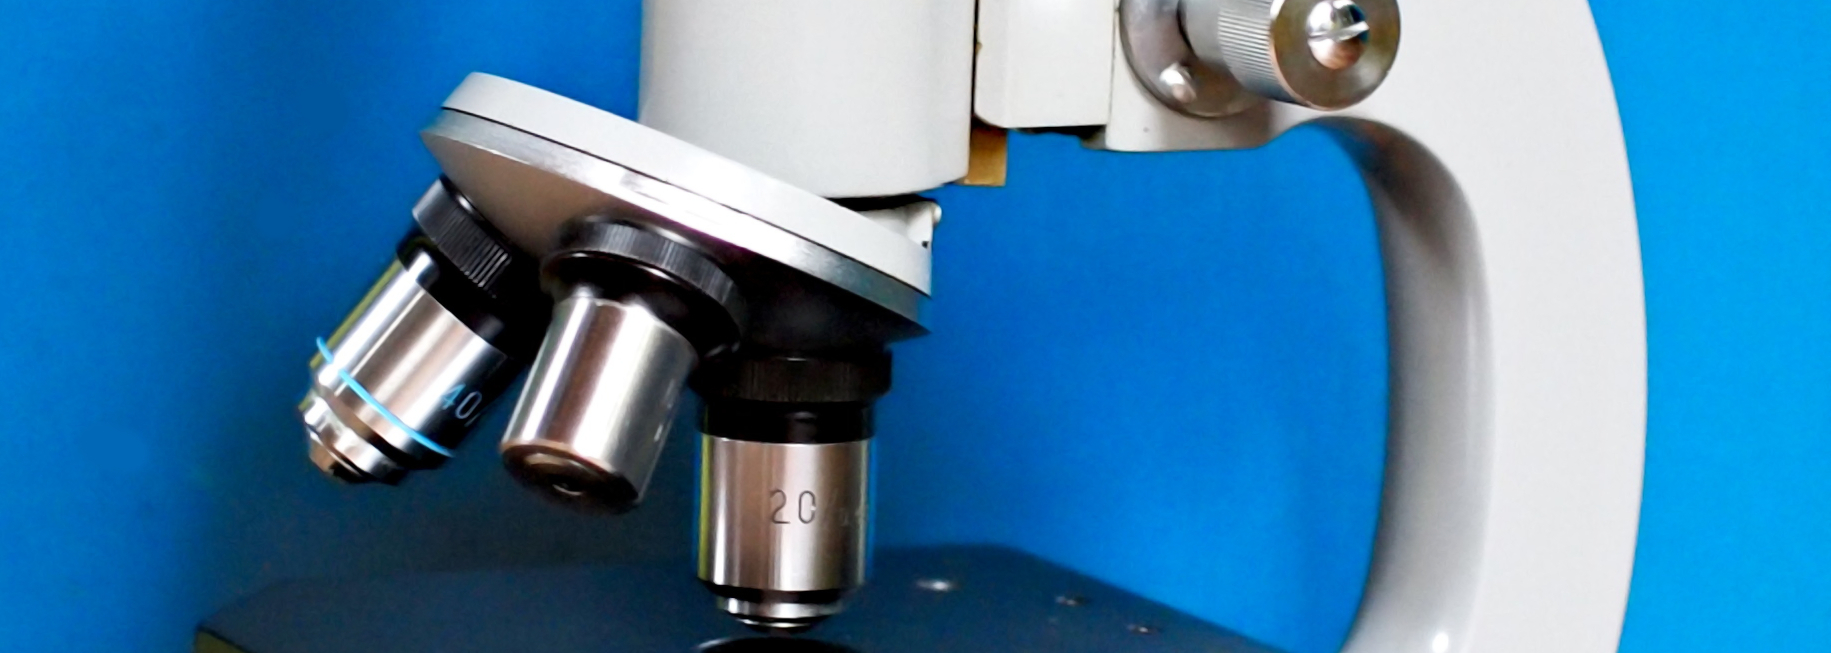
Simple microscopes come in different flavors but what they often have in common is that there is little or no sub-stage optics. Mostly, there is no condenser and usually there is just an iris diaphragm or a rotating diaphragm containing a set of aperture holes to regulate the aperture. Sometimes there is just a single lens built into the stage or above the aperture iris. The light source is either a mirror or a simple light bulb in a housing. When there is no condenser or lens built into the stage, the surface area of the illuminating part of the light source becomes important. The bigger this area, the better the resolution will be as a larger part of the objective's back focal plane will be illuminated. Without sub-stage optics it is important to increase the illuminating surface of the light source. Figure 1 shows an iris diaphragm below the stage of a basic horseshoe microscope stand. There is no substage optics, so the illuminating area of the light source will determine resolution. This microscope had a simple lamp with a frosted upper surface and with the iris fully opened, the illumination at the back focal plane of a 40 / 0.65 objective is insufficient as seen through a phase telescope in figure 1B. Only a small portion of the aperture is filled with light. In figure 1C, a diffuser is placed beneath the iris, thereby increasing the illuminated area which has a dramatic effect on the achievable resolution.

Figure 1. Increasing the resolution of a 40/0.65 objective by improving illumination with a diffuser. A: fully opened diaphragm resulting in poor resolution with default illumination. B: illumination at the back focal plane of the objective photographed through a phase telescope showing that only a small portion of the aperture is used. With a diffuser (C), a larger area of the back focal plane is illuminated resulting in higher resolution.
Mirror or lamp?
The good old mirror deserves more appreciation than it gets. All too often, the mirror is seen as an inferior way to illuminate the specimen. But actually, the mirror is superior to many electrical lamps that you find in basic microscopes. In older microscopes, the lamp is usually an incandescent light bulb, often operated at 230V. When placed in a metal housing, the metal gets so hot that you could burn your fingers on it. Many of those lamps are pretty useless I have to say. With a mirror, you can use any light source and you have the possibility to use a good LED light. Mirrors have a flat and a concave side. The concave side is meant to illuminate the specimen when there is no condenser in order to get focussed light. Without any substage optics and when no diffuser is used, it is best to use the concave mirror with a bigger sized light bulb that gives diffused light. You will be able to completely illuminate the aperture of a 10/0.25 objective but as NA increases, there will be insufficient light. As already mentioned, a way to increase resolution is to use a diffuser. As soon as a stringent diffuser is in place, you can use any of those bright LED lights, even with the concave side of the mirror. A diffuser protects the eye from harmful bright light. Several things can be used as a diffuser. I find that many of the 32 mm frosted glass diffusers that come with microscopes are not stringent enough when using bright LED lights with a small illuminating area. When you have a bright LED light, they don’t scatter the light sufficiently. It is better to use plain white paper or tape, but you will need a bright light for this otherwise the light intensity will become too dim.
Another way to use the mirror is to cover the flat side with white paper. The paper reflects the light and this way you can achieve a very homogeneous illumination. It goes without saying that in this situation no additional diffuser in the pathway is needed, the reflected light is already diffused. The Jansjö LED lamp is a great light source to use in a setup like this. In order to obtain enough resolution this way with a 40/0.65 objective, at least a single lens that acts as a condenser is needed. This has to do with the fact that the distance between the mirror and the specimen is relatively large, so the illuminating surface area appears small. Therefore, some substage optics is needed. There is a very useful trick that you can do with a paper covered mirror: you can regulate the light intensity very easily by just changing the mirror from an angled position (brighter) to a horizontal position (weaker), see figure 2.

Figure 2. Regulating light intensity using a mirror covered with white paper. By altering the tilted position of the mirror (left) to a horizontal position (right), light intensity will slowly decrease.
The basic microscope
Figure 3A shows the microscope that I used for this article. It has no condenser, no sub-stage optics at all. It’s purely diffused light that was used for making the images. The microscope was a Euromex SA, a simple horseshoe microscope from the seventies that was used in high schools. The microscope came with 3 achromatic objectives: 10/0.25, 20/0.40 and a 40/0.65 and 3 Huygens eyepieces 6x, 10x and 15x. As far as I know, microscopes like these were produced in China. A common misconception among microscopists is that the optics on such microscopes are inferior and are incapable of delivering decent images. But with some proper illumination, you will be surprised what you can see with a microscope like this. All microscope images in this article were taken with this microscope. Underneath the stage of this microscope, there is a rotating diaphragm with 5 holes (apertures) that have different diameters. The higher the NA of the objectives becomes, the bigger the diameter of the hole to choose should be. Diaphragms like these you will find typically on very basic microscopes. Also on toy microscopes (which I will not mention any further) you will see those kind of devices, although they are not really useful there. While the iris diaphragm is seen as better device for regulating the aperture I would argue in favour of such a rotating diaphragm. In fact, it is a very useful, flexible and convenient device, not only to regulate the aperture, but also to achieve oblique illumination and darkfield illumination. I covered the apertures with Tesa tape to achieve diffused light. I left one position uncovered, just to show one of the apertures in figure 3B. I later used this position to insert a darkfield stop and perfect darkfield illumination was achieved with the 20/0.40 objective. There is some functional similarity between such a rotating diaphragm and a universal phase contrast condenser. The mirror was used in combination with a Jansjö LED lamp. Using the flat side of the mirror gave sufficient light for the lower power objectives, with the 40/0.65 more light was needed and switching to the concave side ensured a more comfortable viewing.

Figure 3. Left: basic student microscope without substage optics (Euromex SA). Right: rotating diaphragm with apertures of different sizes, 4 of them covered with Tesa tape that acts as a diffuser to optimise illumination.
In figure 4, proper illumination can be seen at the back focal plane of a 40/0.65 objective ensuring sufficient resolving power from this lens.
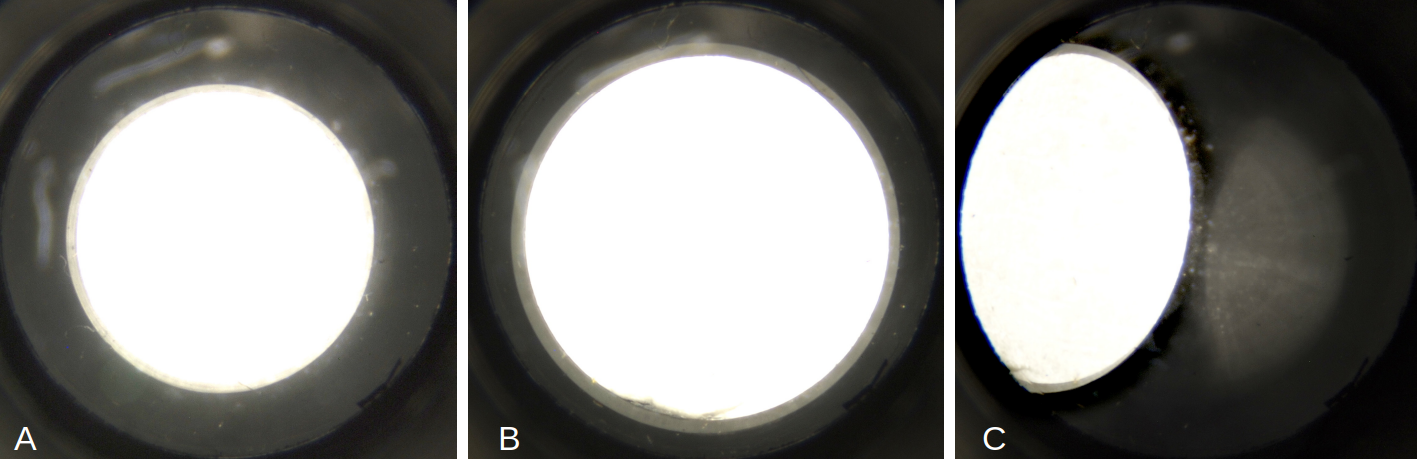
Figure 4. Illumination at the back focal plane of a 40/0.65 objective as seen through a phase telescope. A: using the diaphragm aperture with the second largest diameter gave a decent brightfield illumination ensuring sufficient resolution. The faint outer ring defines the aperture boundary of the objective. B: illumination using the largest diaphragm aperture. Here, a large portion of the objective’s aperture is used, giving high resolution at the cost of contrast. This setting would be sufficient to achieve decent brightfield viewing with a 60/0.85 objective. C: off-axis setting of the largest diaphragm aperture. With this setting, a nice oblique illumination is achieved.
Resolution with the different diaphragm settings was tested on a slide with Pleurosigma angulatum, the results can be seen in figure 5.
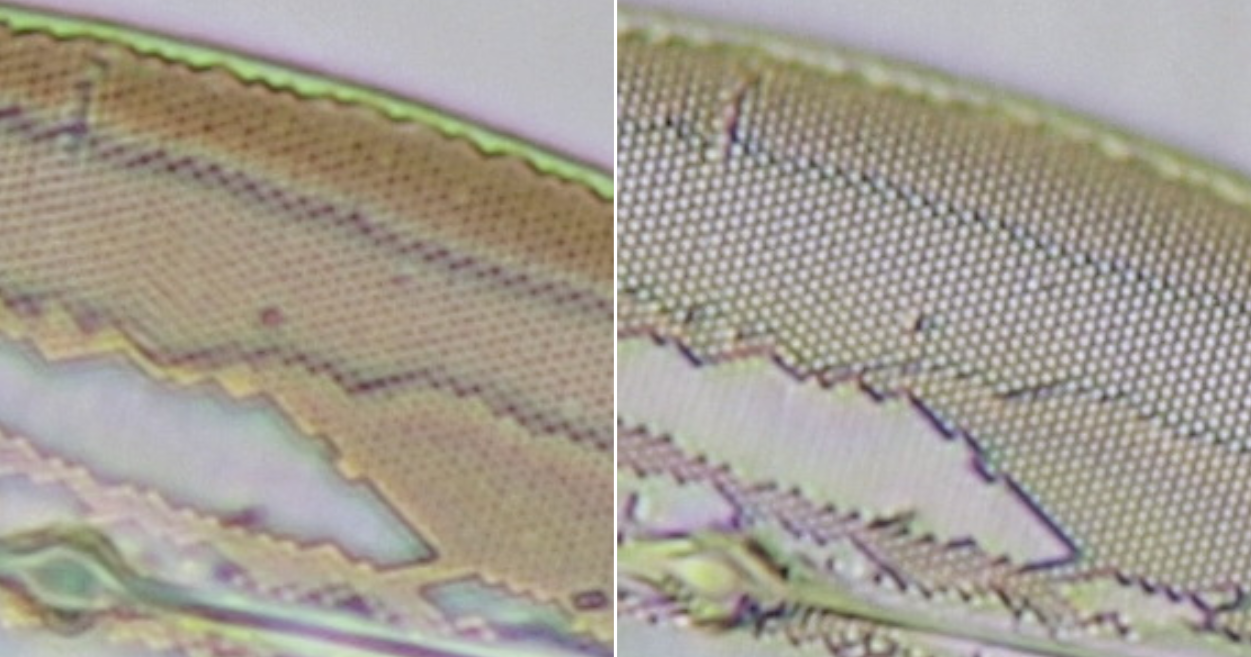
Figure 5. Left: Resolving the structure of Pleurosigma angulatum with diaphragm setting as in figure 4A. Right: oblique illumination achieved with off-axis setting of the largest diaphragm aperture (setting as in figure 4C).
Eyepieces for viewing and photography
Microscopes like the Euromex SA often come with Huygens eyepieces 6x, 10x and 15x. Huygens eyepieces have a simple construction and the field of view is quite small. It is a matter of taste, but when using a monocular microscope, I find a Huygens eyepiece more pleasant to look through than a Wide Field (WF) eyepiece. With a smaller field of view you have a better overview and that is easier on the eye, especially with a monocular microscope, because looking with one eye can sometimes be a challenge in itself. The 10x and 15x eyepieces have little compensation and work fine with low power objectives. The 6x is clearly a more compensating eyepiece and should be used with the 40/0.65 objective. Using a compensating eyepiece with low power achromats (4/0.10 to 10/0.25) will mostly result in over-correction of those objectives and lead to chromatic aberration, see also 'The right combination of objective and eyepiece'. It makes perfect sense to use higher magnifying eyepieces with low power objectives and the lesser magnifying eyepiece with the 40/0.65 objective. Empty magnification is sooner reached with high NA objectives than with low NA objectives. For viewing in general, I find a lower than 10x magnifying eyepiece with a 40/0.65 or 100/1.25 objective more convenient. The image is brighter, total magnification is less and therefore image quality will subjectively improve. Modern no-name monocular or binocular educational microscopes often come with WF eyepieces that barely compensate. Using these, image quality with objective 4/0.10 and 10/0.25 will be fine but with objective 40/0.65 or 100/1.25 one starts to see image deterioration towards the edge of the field of view. An inexperienced microscopist will probably barely notice this. But when you inspect the image critically you will see the difference as soon as compensating eyepieces are inserted. For instance, Olympus WF10x or P7x - P10x eyepieces are well suited for this. These eyepieces were made for Olympus objectives with 36.65 mm parfocal length. With all no-name 40/0.65 achromats I have tested over the years I have seen image improvement when using those Olympus P- or WF eyepieces. I am not sure how many microscopists use different eyepieces for different achromats but I am inclined to think that this practice is not very common. Maybe most people think that there should be only one type of eyepiece for all objectives. But that scenario only works in case the microscope is equipped with objectives that all need compensation, like some planachromats and most (plan) fluorite or (plan) apochromats.
The Horseshoe stand
These days, you will probably not find any horseshoe microscopes in classrooms anymore. More likely, they have been replaced by more modern microscopes with an inclined tube. Unfortunately. I strongly favor the use of a horseshoe stand, simply because it’s quality wise a better design for both viewing and photography. In a horseshoe stand, there is no prism in the optical pathway. Especially, when buying second hand, this is an important thing. Many times I have seen severe image deterioration caused by prisms that were either dirty, delaminated or de-adjusted. But also in new microscopes the prism could possibly deteriorate the image when the glass is not of good quality. And in general, the less glass there is in the optical pathway, the better. So, it’s possible that a prism in certain situations may degrade the image from otherwise good quality objectives and eyepieces. With a horseshoe stand there is a direct connection between objective and eyepiece, it’s basically a photo tube. When doing polarised light microscopy, with a horseshoe stand you can simply put a polarising filter (the analyser) into the eyepiece. That’s not possible when there is a prism in the optical pathway as the prism will de-polarise the light. With a microscope that has an inclined tube, you have to remove the tube first and place the analyser into the microscope head so that it is located underneath the prism. Not a comfortable thing to do routinely. When a system camera is used, having a straight tube can be an advantage. A DSLR camera that has a substantial weight can put considerably strain on an inclined tube. Furthermore, with a vertical tube it is possible to use the camera without the need to have it mechanically connected to the microscope. Figure 6 shows a setup that I use regularly. An Olympus PEN E-P1 camera with a Sigma 30 mm lens is simply positioned on a silicon gasket that is placed on a Ihagee microscope adapter. When using a Huygens eyepiece, centering is easy because you are able to see most of the FOV on the camera screen, it’s only about positioning the visible circle in the middle, which takes just a few seconds. After that, you can take a picture and remove the camera to continue normal viewing. The Sigma 30 mm objective is very suitable for a setup like this since it has no moving outer parts, focussing happens internally. Any eyepiece (also the ones with a very low eyepoint) can be used with the Sigma lens, which is very convenient.
Figure 6. Using an Olympus PEN E-P1 camera on a horseshoe stand. The weight of the camera provides stability when it is positioned on a silicon gasket. This setup can also be used with a smartphone that can rest on the gasket to achieve more stability.
Small and invisible stuff
Some people think that in order to see bacteria, you need an oil immersion objective and 1000x magnification. And that you need phase contrast as well to see those bacteria and transparent cells even better. This implies having a more advanced microscope. But also with a student microscope it is possible to see more challenging objects like these. In this article, some images from more difficult subjects like bacteria, cheek epithelial cells and blood are shown.
The images
All following images were made with the Euromex SA microscope and a Olympus PEN E-PL1 camera. Only minimal image processing was done, just a white balance correction, exposure correction and a little bit of contrast enhancement. No stacking was done.
Figure 7. Brightfield image of Cymbella. Objective 40/0.65.
Figure 8. Pleurotaenium, darkfield image (left) and oblique illumination (right). Objective 20/0.40.
Figure 9. Sand grains (left) and part of a moss leaf (right). Objective 10/0.25.
Figure 10. Live Pinnularia in normal brightfield (upper image) and oblique illumination (lower image). Objective 40/0.65.
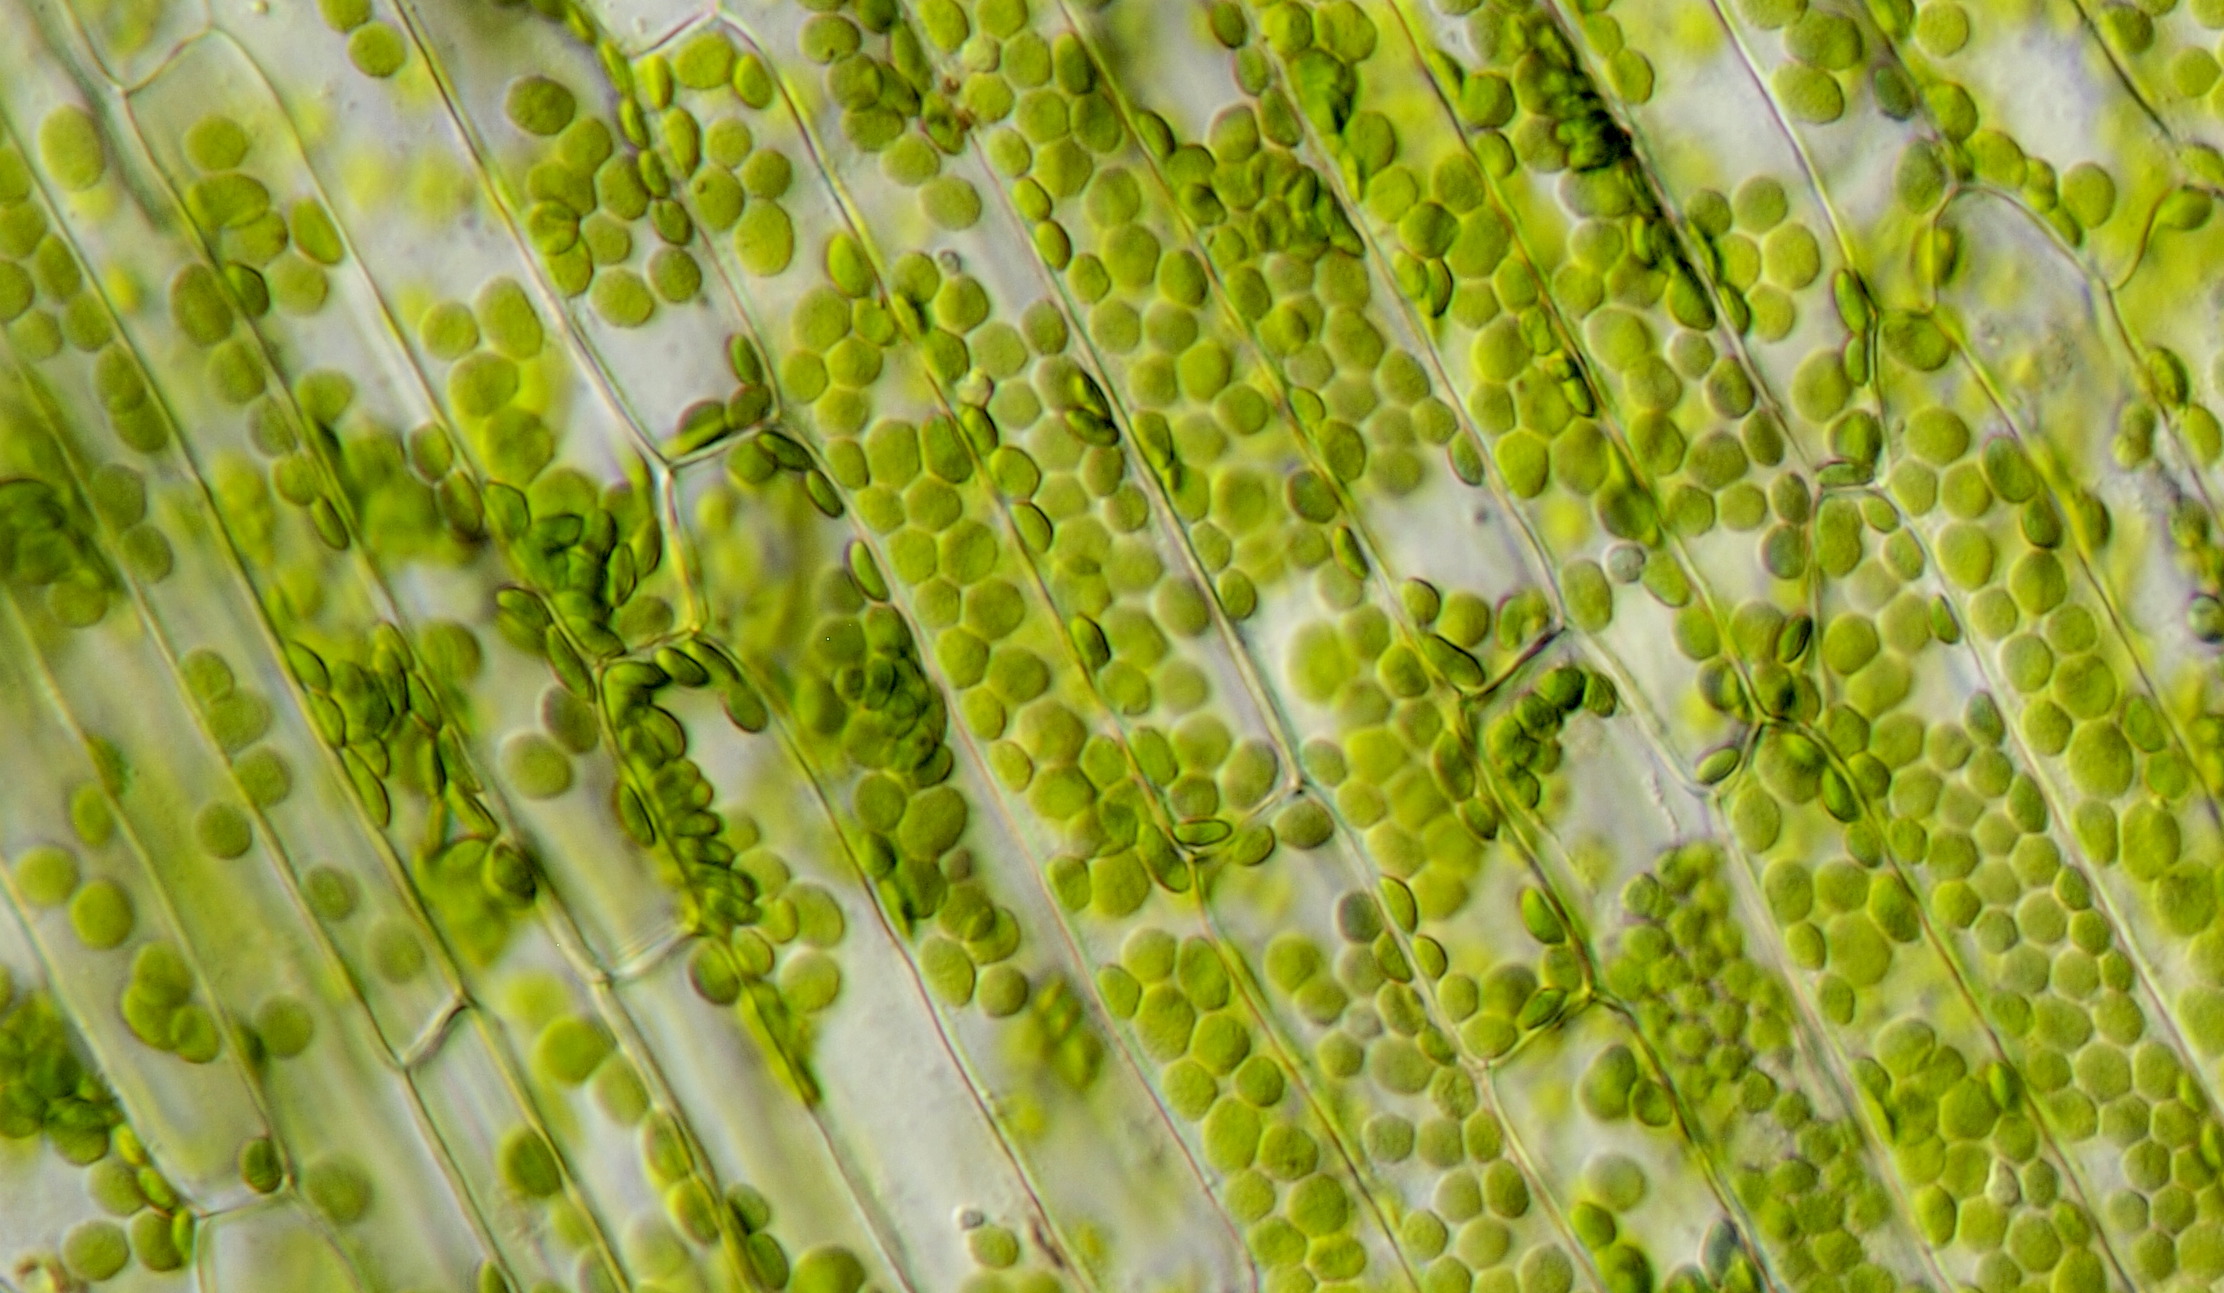
Figure 11. Chloroplasts in cells from Elodea. Objective 40/0.65

Figure 12. Cymatopleura, an interesting looking diatom. Objective 40/0.65.
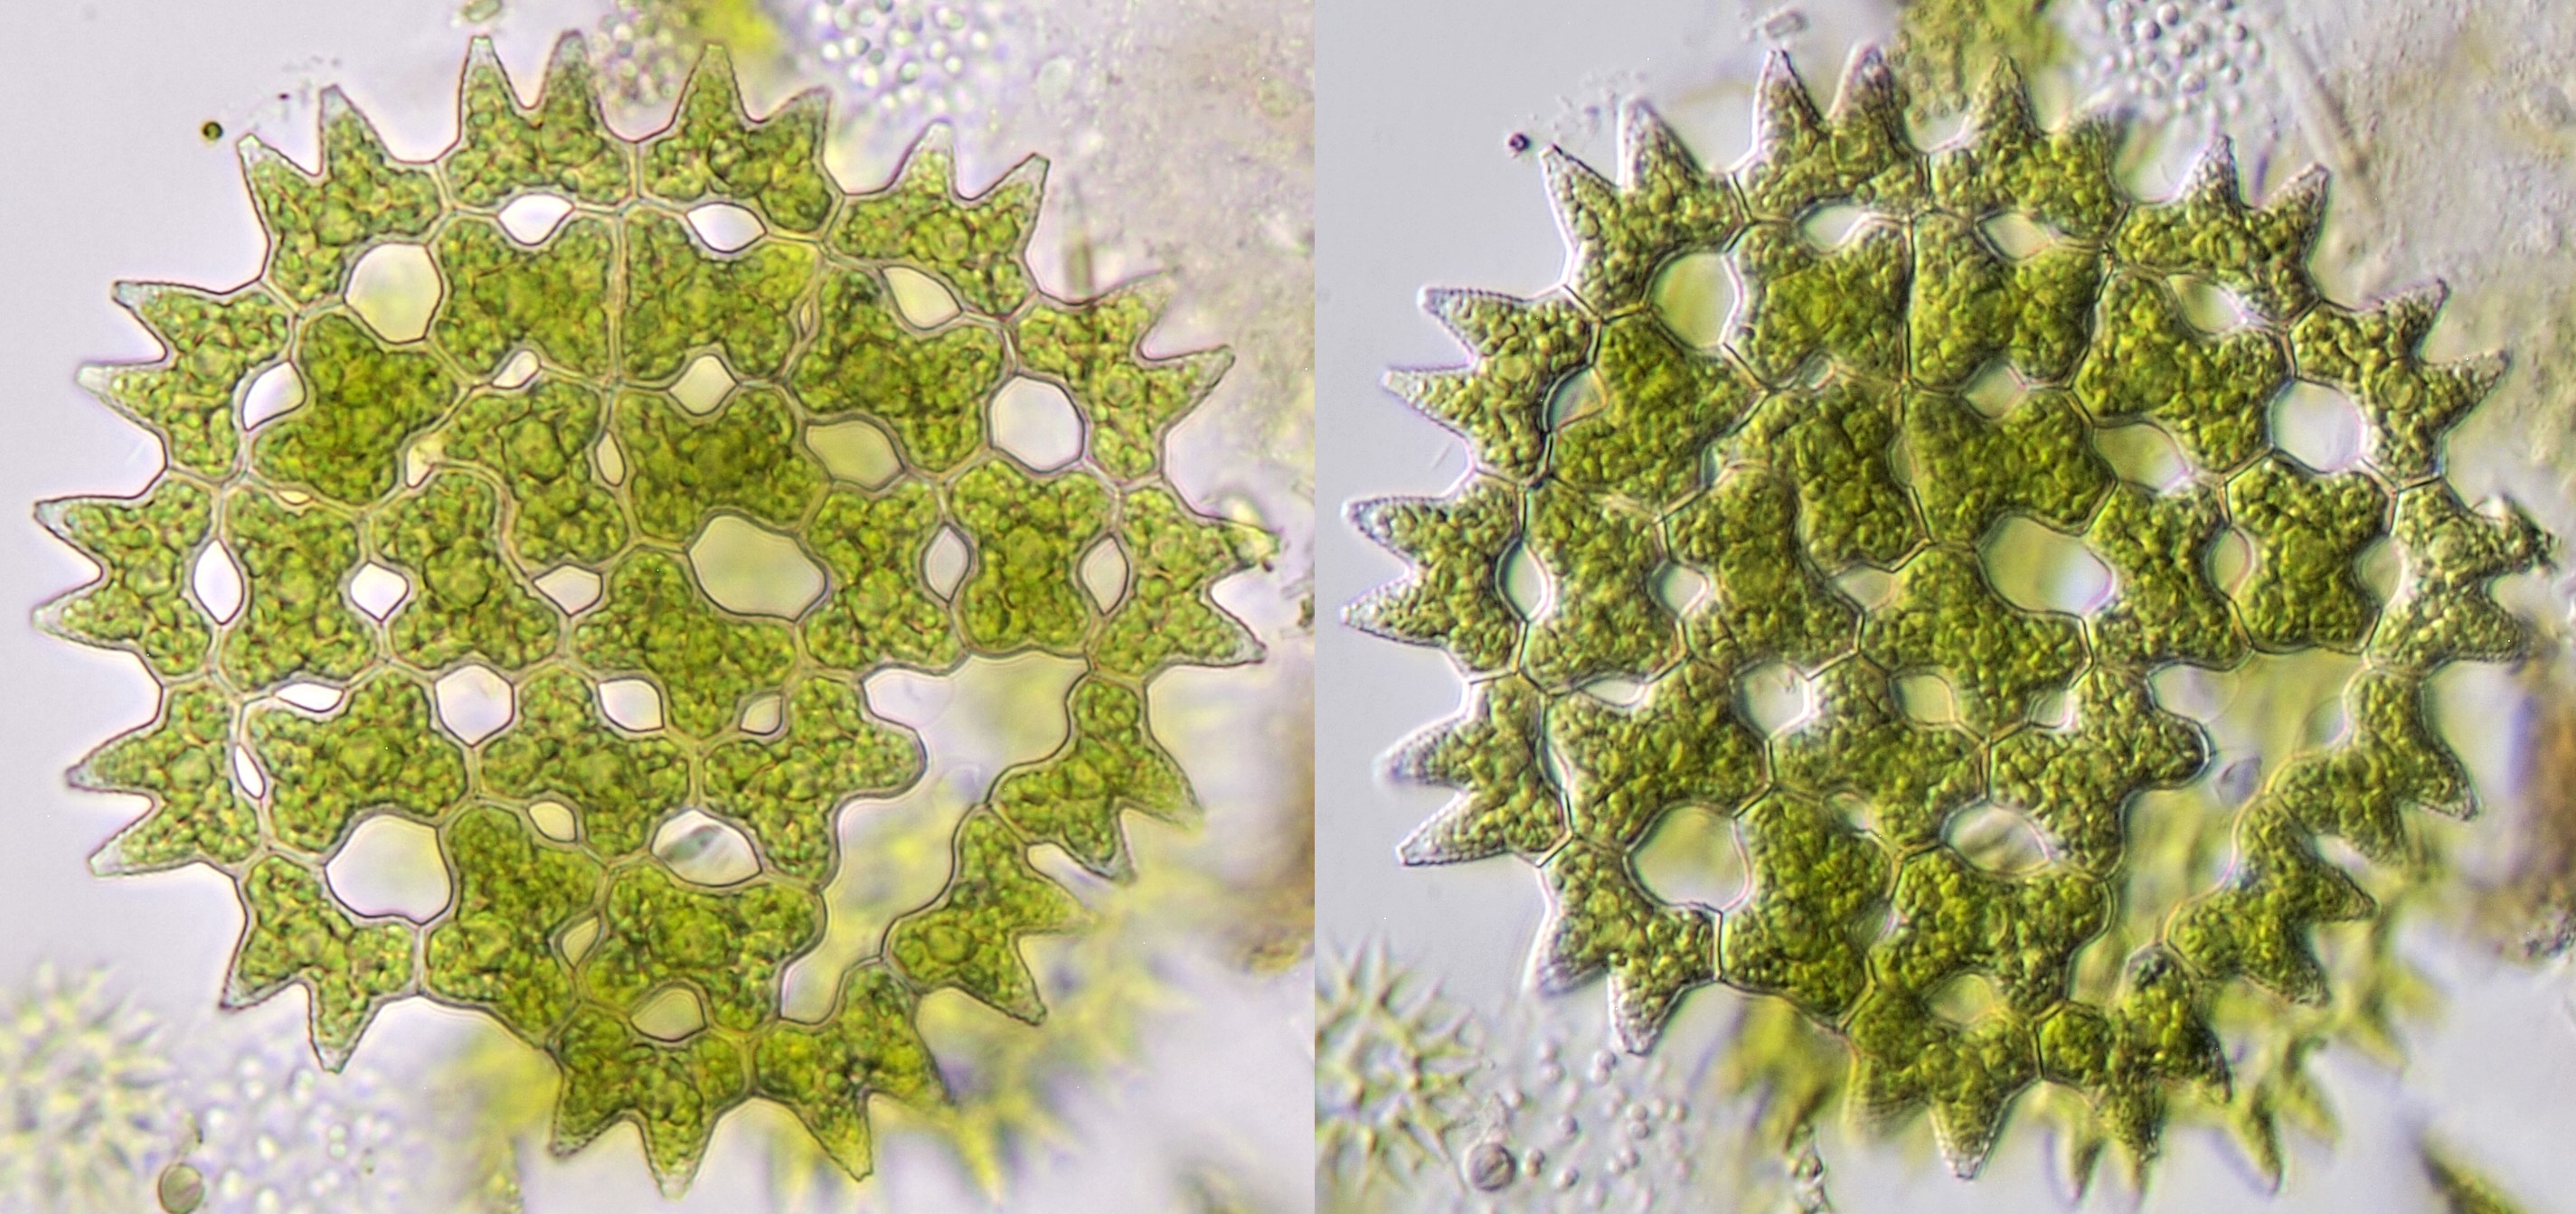
Figure 13. Pediastrum seen in brightfield illumination (left) and oblique illumination (right). Objective 40/0.65.
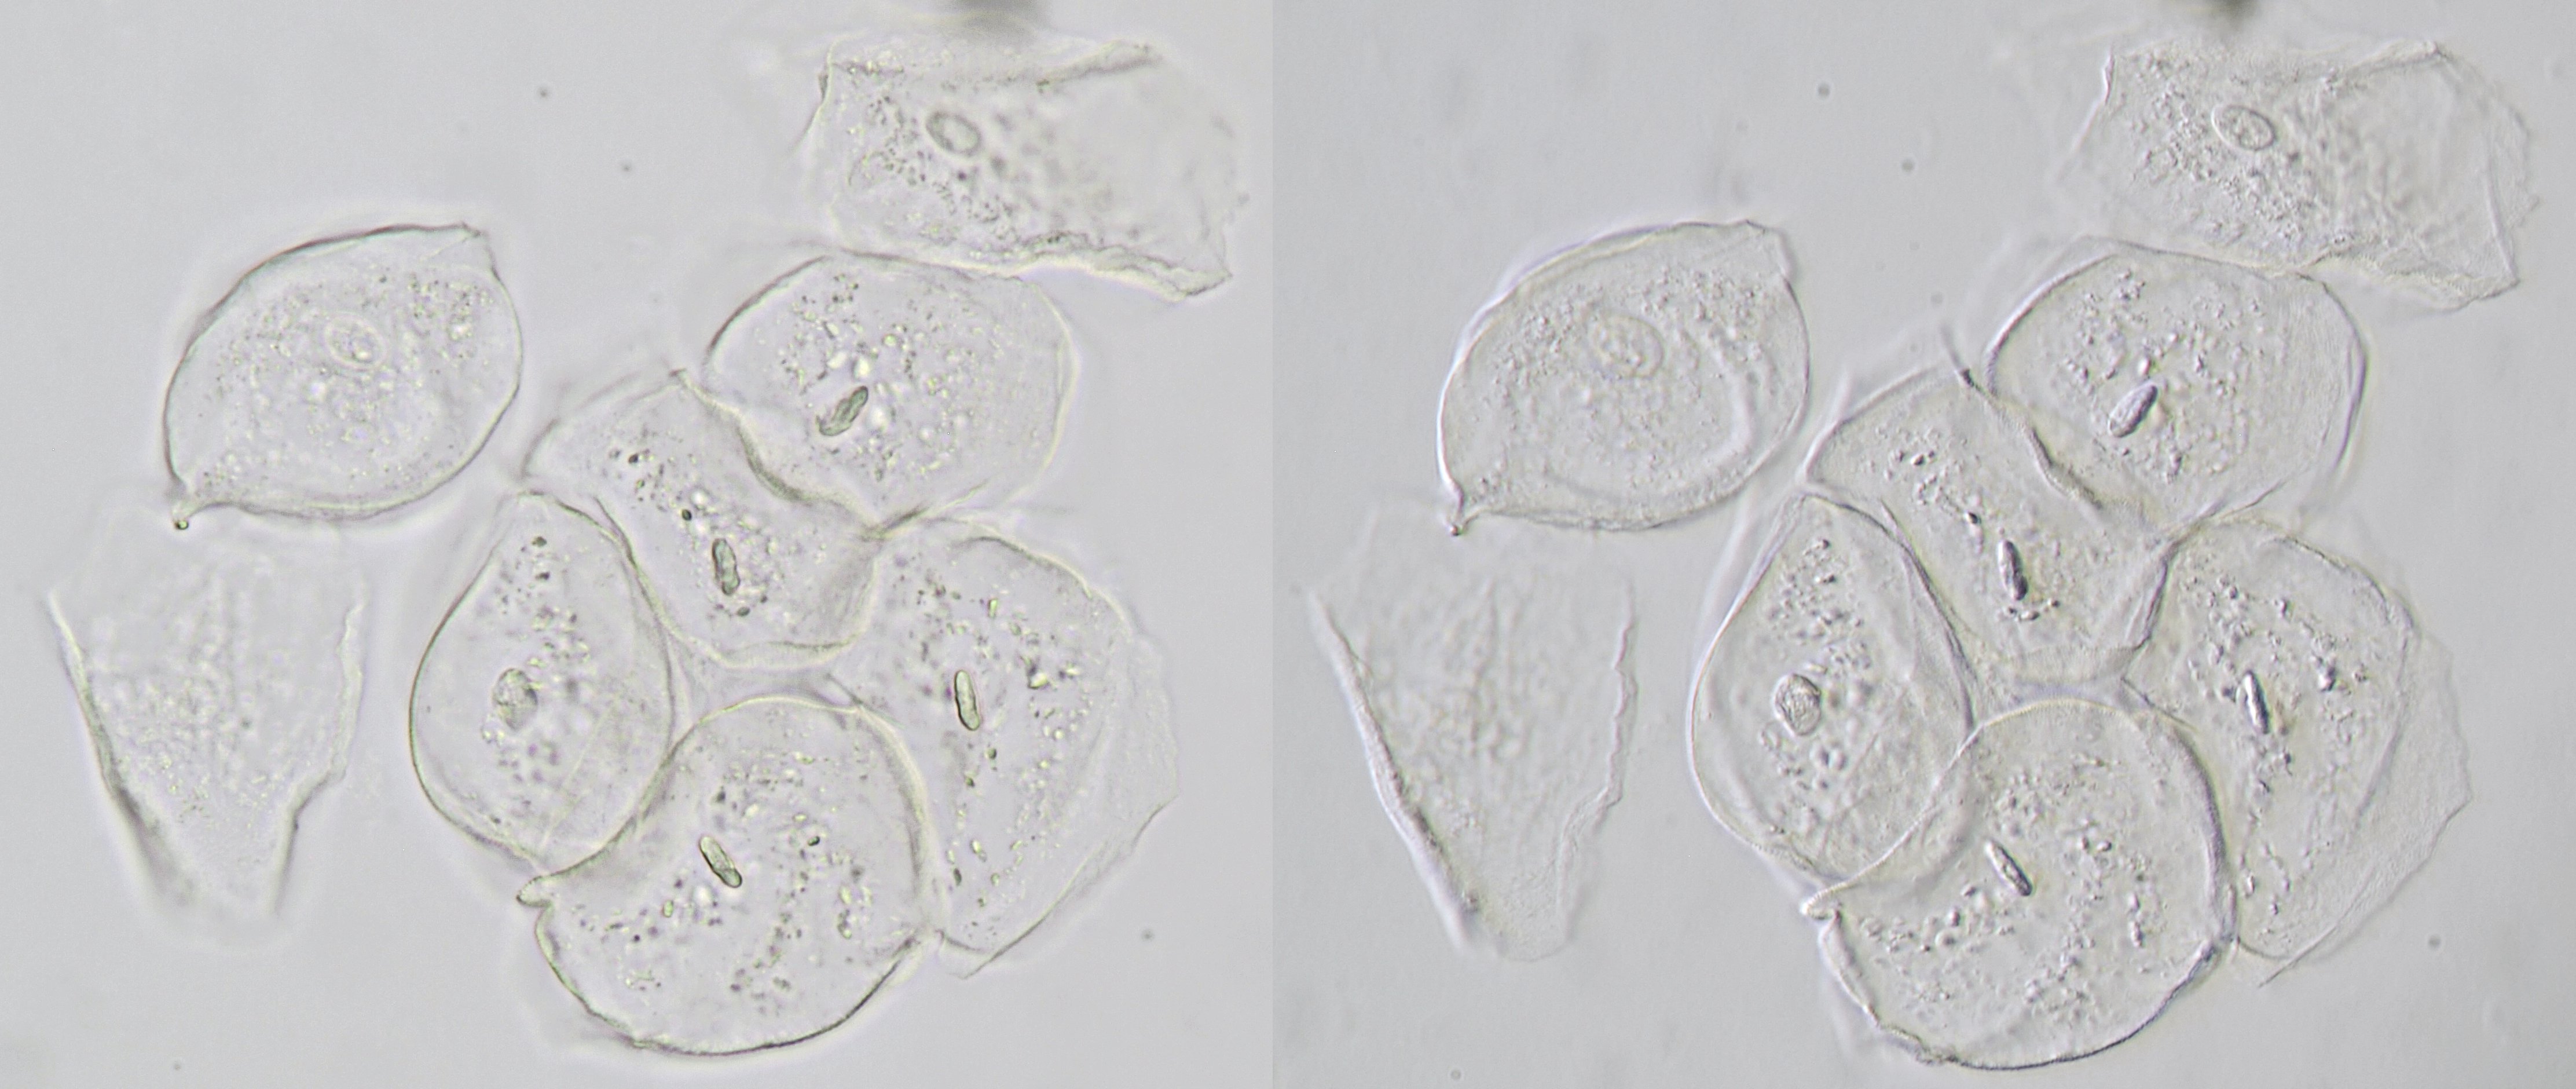
Figure 14. Cheek epithelial cells seen in brightfield (left) and oblique illumination (right). Objective 40/0.65.

Figure 15. Human blood with, upper left from the center, a white blood cell. Oblique illumination with objective 40/0.65.
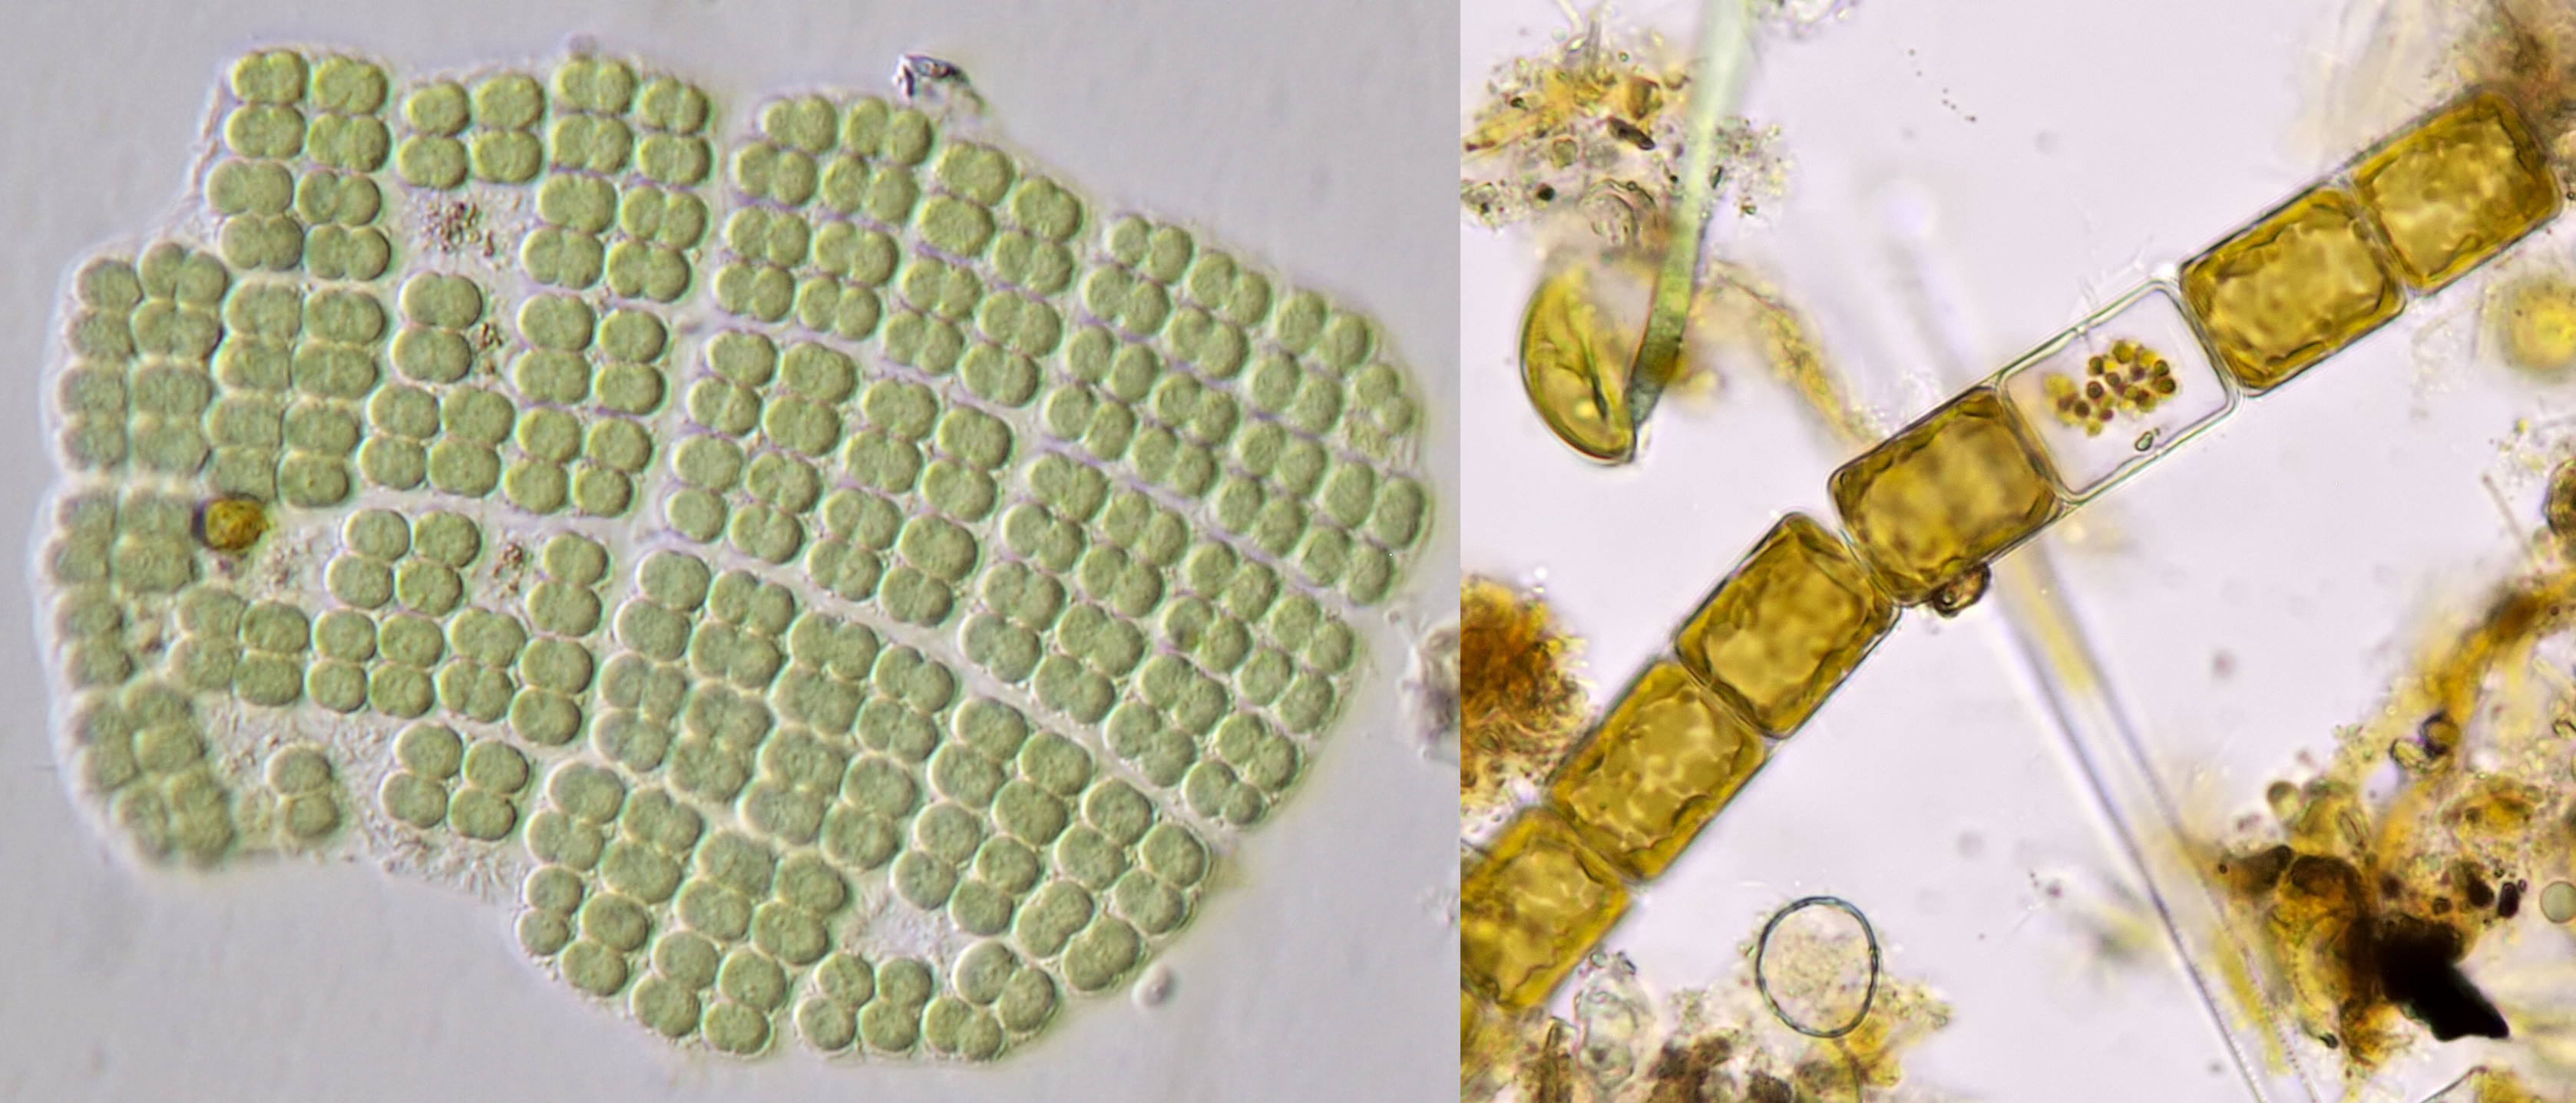
Figure 16. The blue-green alga Merismopedia (left) and diatom Melosira (right). Objective 40/0.65.
Video from bacteria in a sample from decaying spinach leaves. Objective 40/0.65.
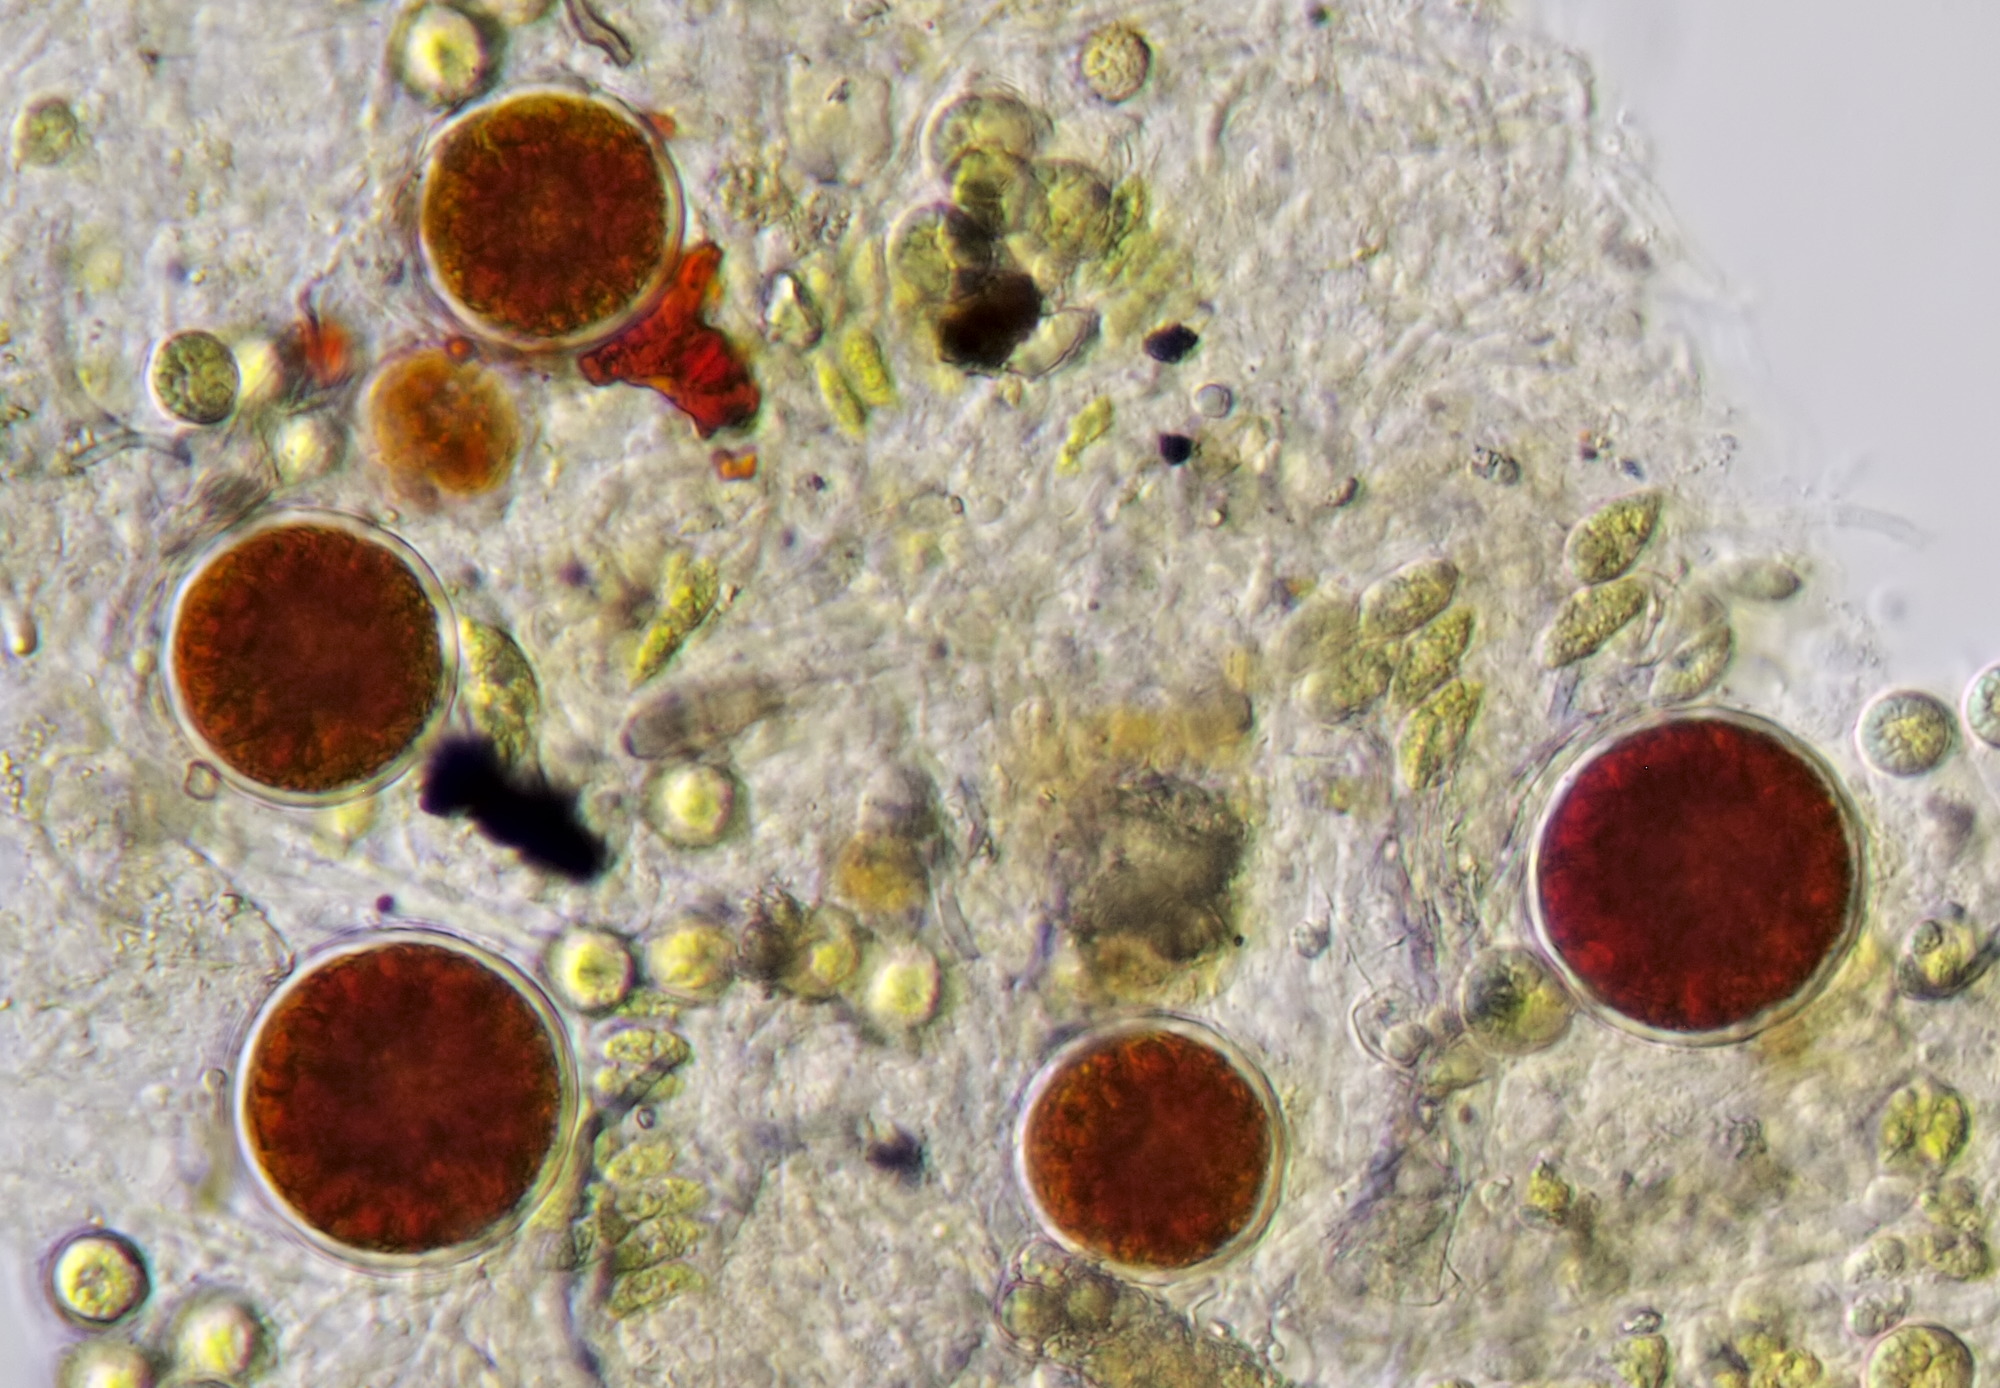
Figure 17. Haematococcus in water from a birdbath. Objective 40/0.65.

Figure 18. A Rotifer (left) and Arachnoidiscus (right). Oblique illumination with objective 20/0.40.
Concluding remarks
A lot can be seen with a simple student microscope that has a proper illumination. A microscope like the one I used in this article would even be suitable for some professional tasks like for instance in a veterinary clinic. I think there are many misconceptions about which equipment one needs for certain tasks. Beginners often think they need a research grade instrument with higher corrected optics. The reason for that may be partly due to the fact that a lot of experienced microscopists only use the best optics available. So, someone new to this may like to follow that not realizing that it is not only the optics that is responsible for producing great pictures. It's not about the microscope but how you use it.
The original version was published in MicScape Magazine and can be downloaded as PDF at:
http://www.microscopy-uk.org.uk/mag/artnov19/rv-basic-microscope.pdf