Introduction
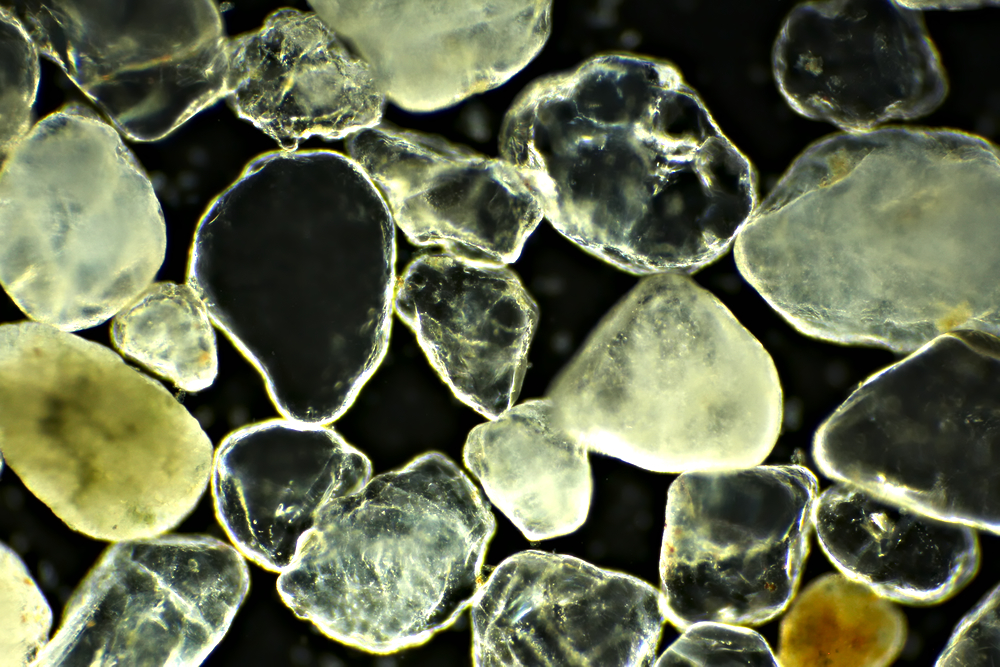
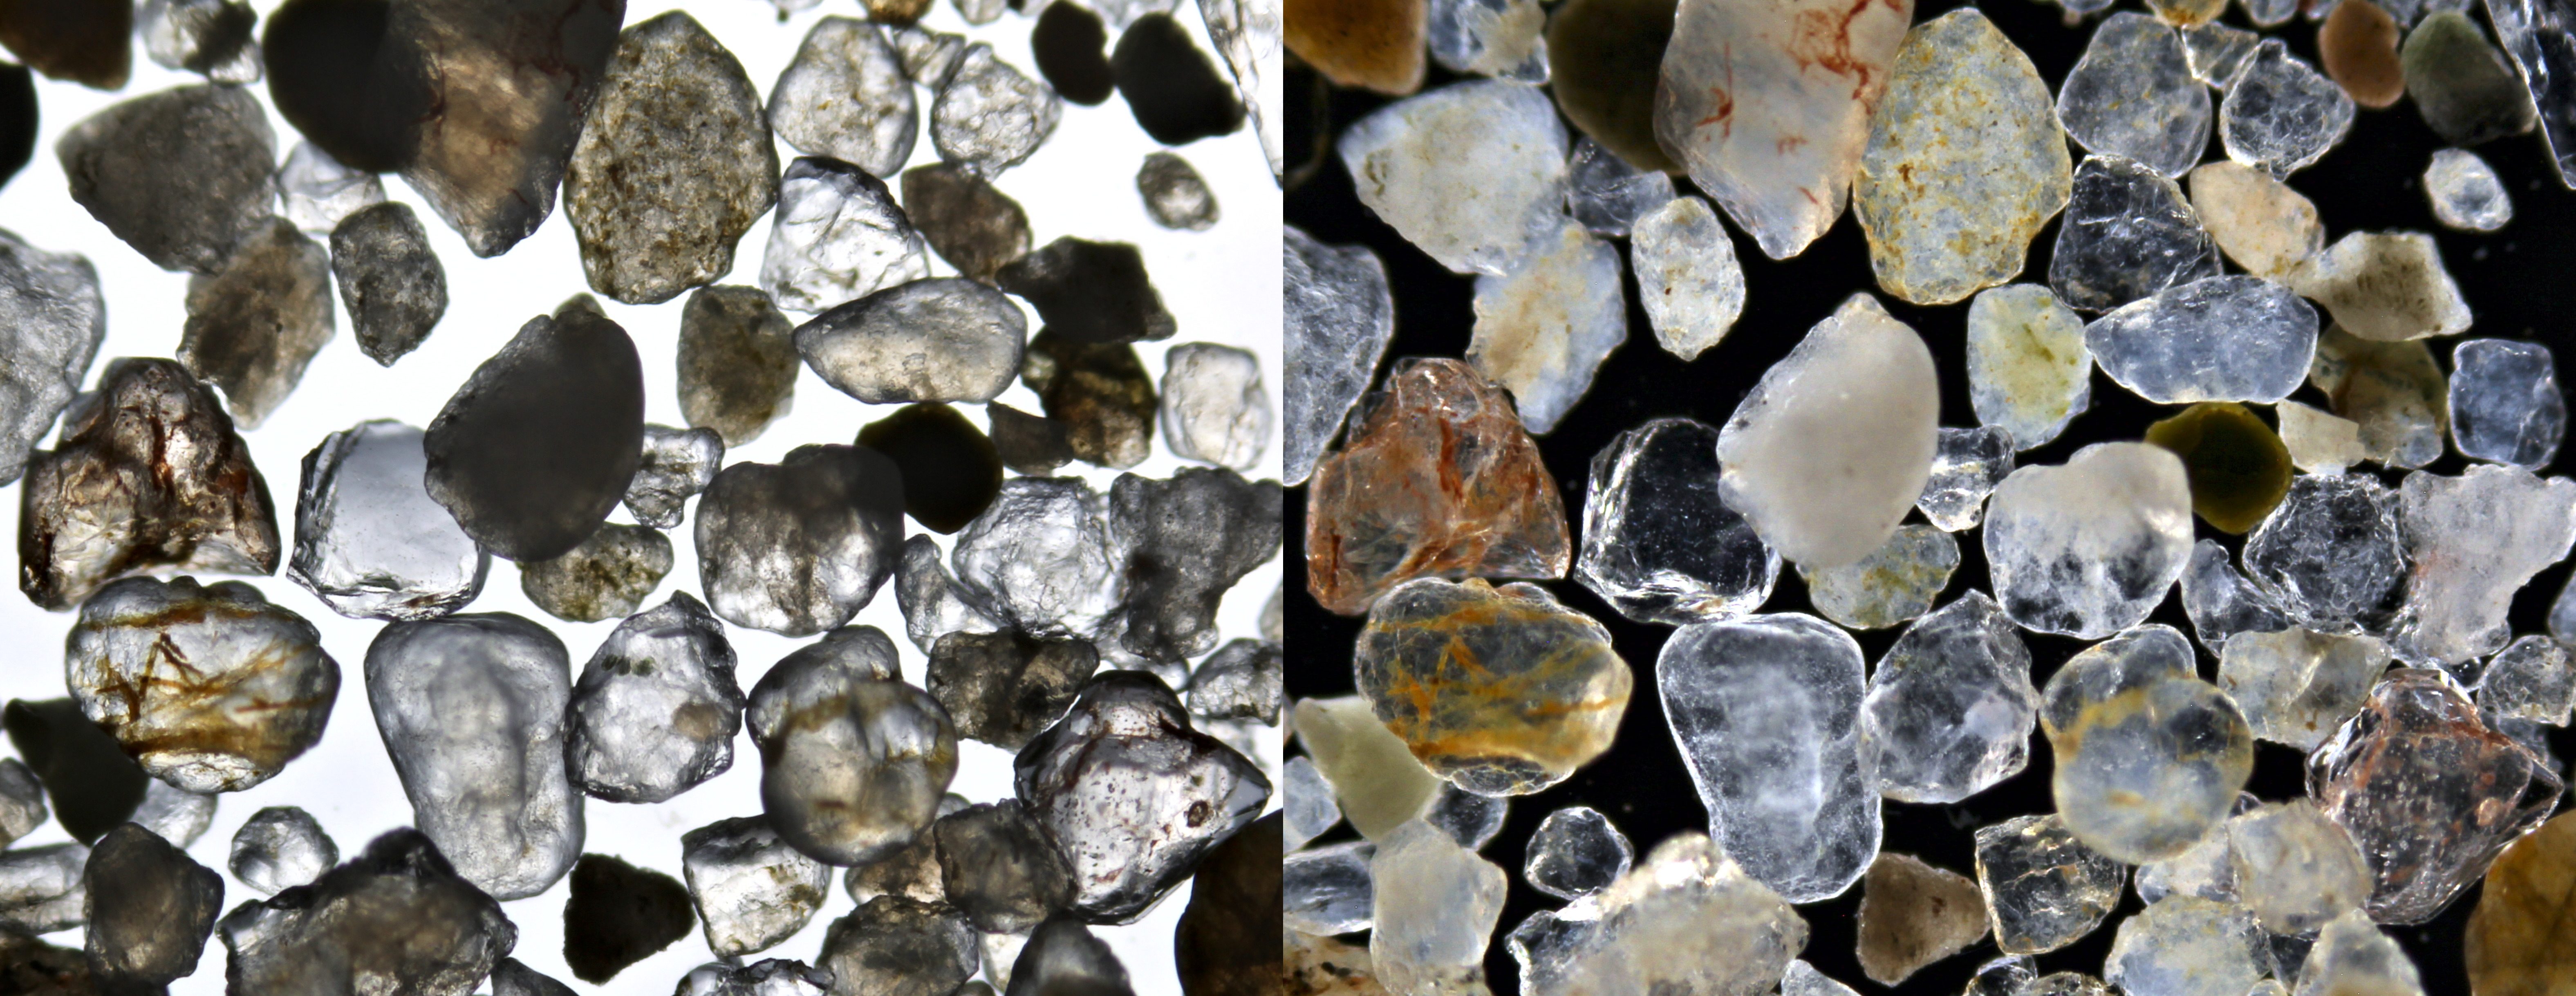
Sand can look beautiful under the microscope. Of course there are many different types of sand and I studied various types with the microscope. When someone I know goes on a distant vacation, I usually ask to bring back some sand. The colours of sand grains indicate which minerals they contain. Red sand grains, for example, derive their color from the presence of iron-containing minerals. The purer the sand, the whiter. White sand consists largely of quartz (silicon dioxide, SiO2) and the less contaminants it contains, the whiter it will be. The mineral olivine is a silicate containing magnesium and iron, (Mg, Fe) 2SiO4, and its presence causes a green color in sand grains. On islands with a volcanic past you can find black sand on the beach and this sand consists largely of basalt, which was formed by the rapid solidification of lava.
Australia
Here are some photos of sand from Australia.
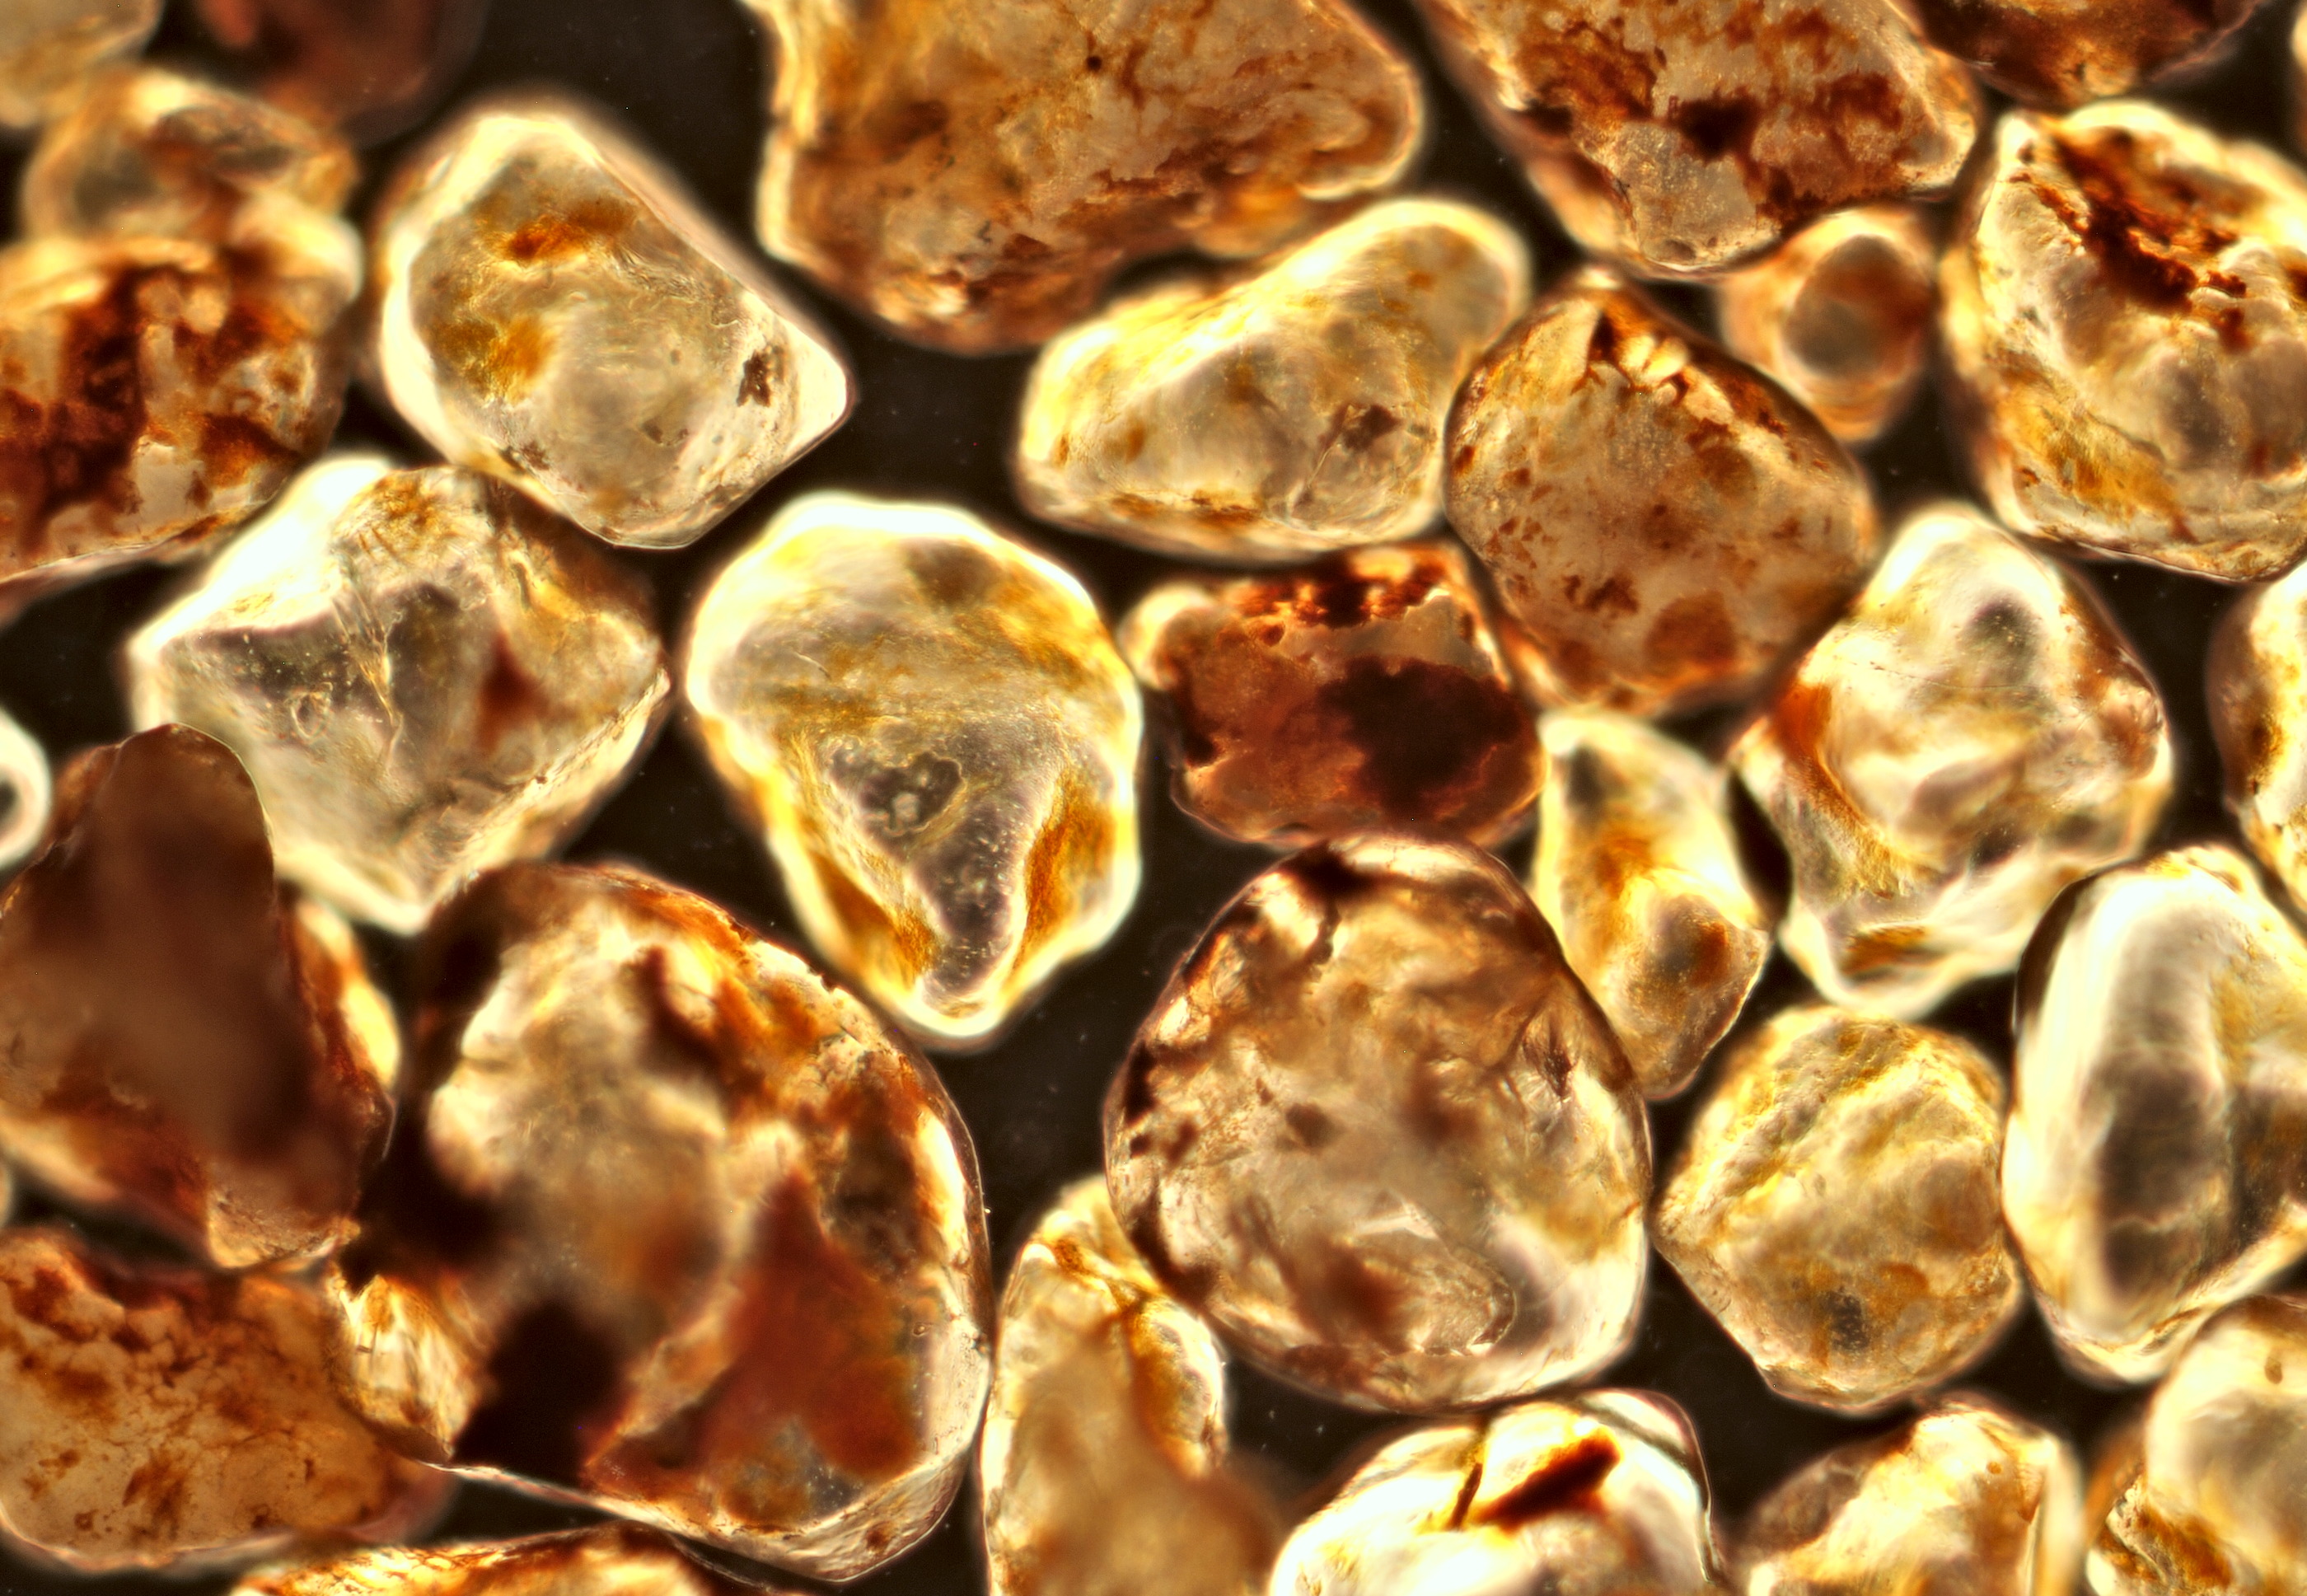
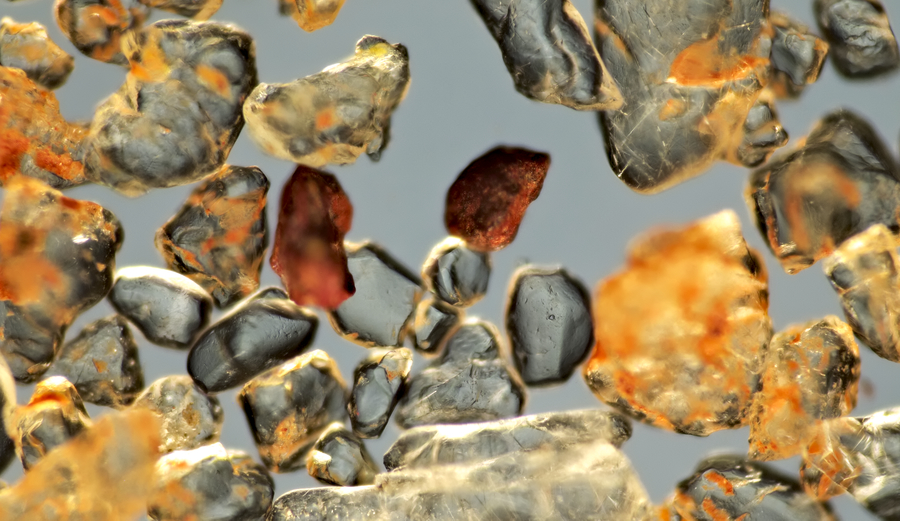
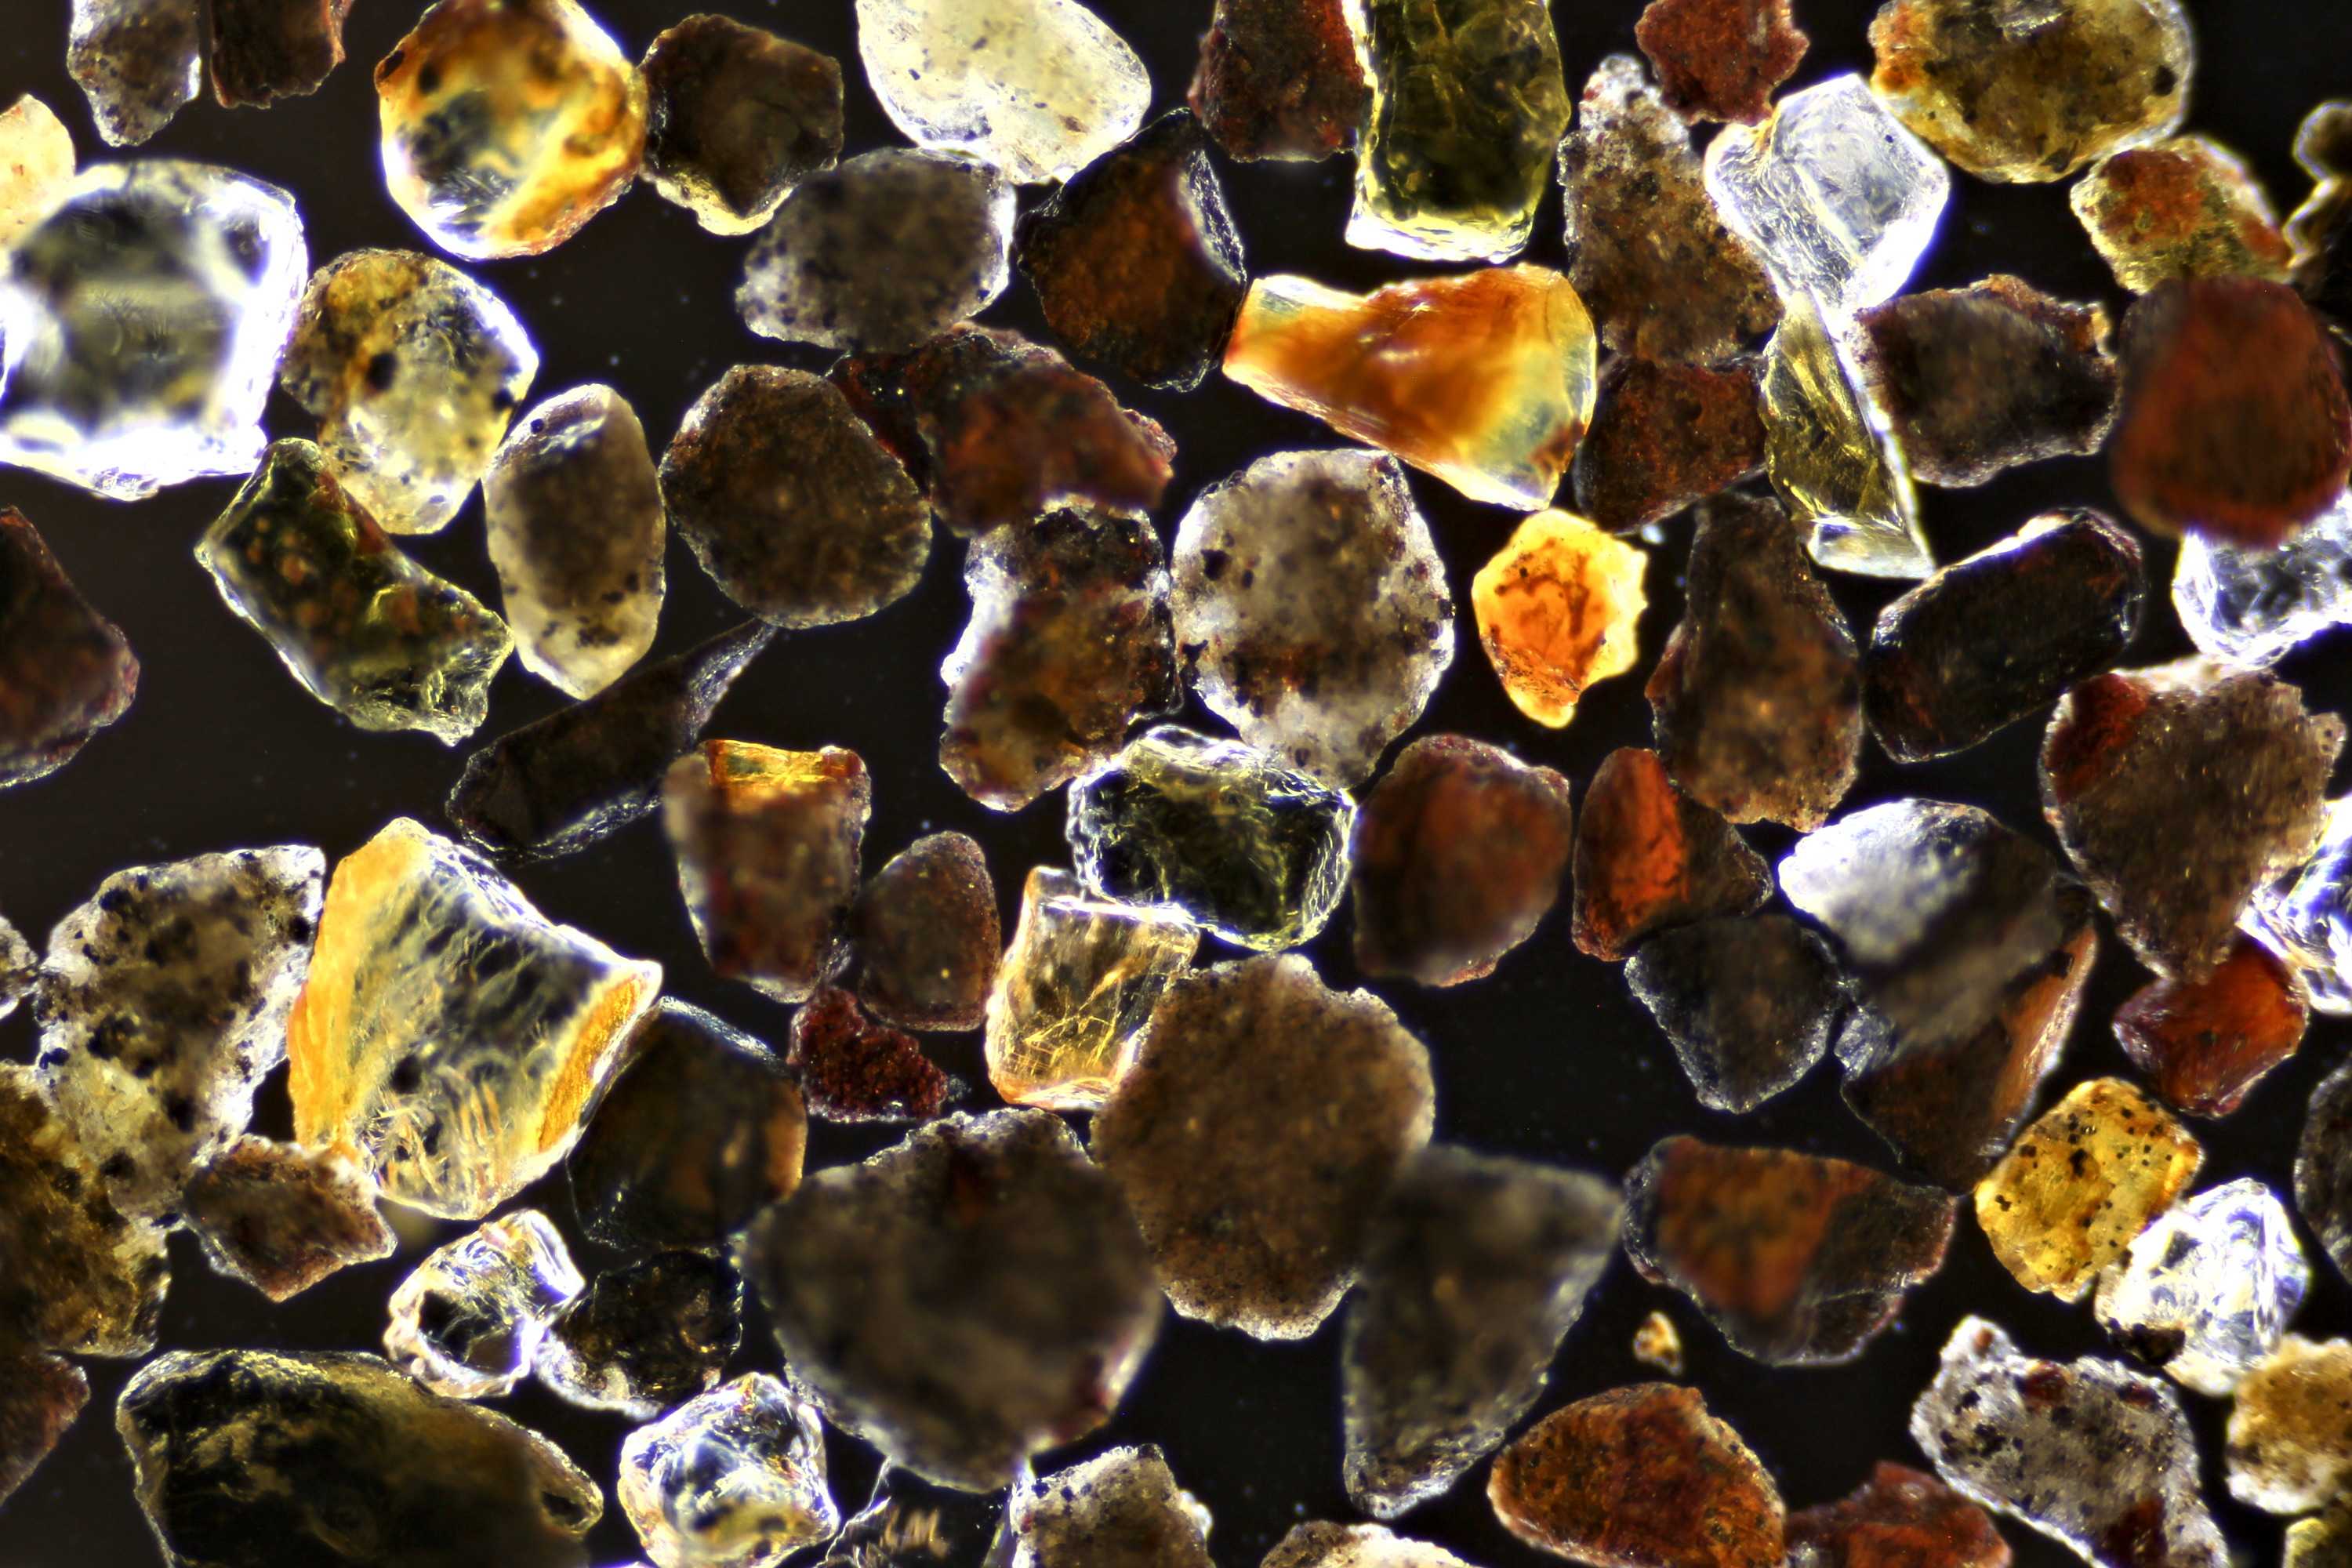
Red sand from the Outback in Australia fotographed in darkfield illumination. Objective: Olympus 10/0.25 (37 mm).
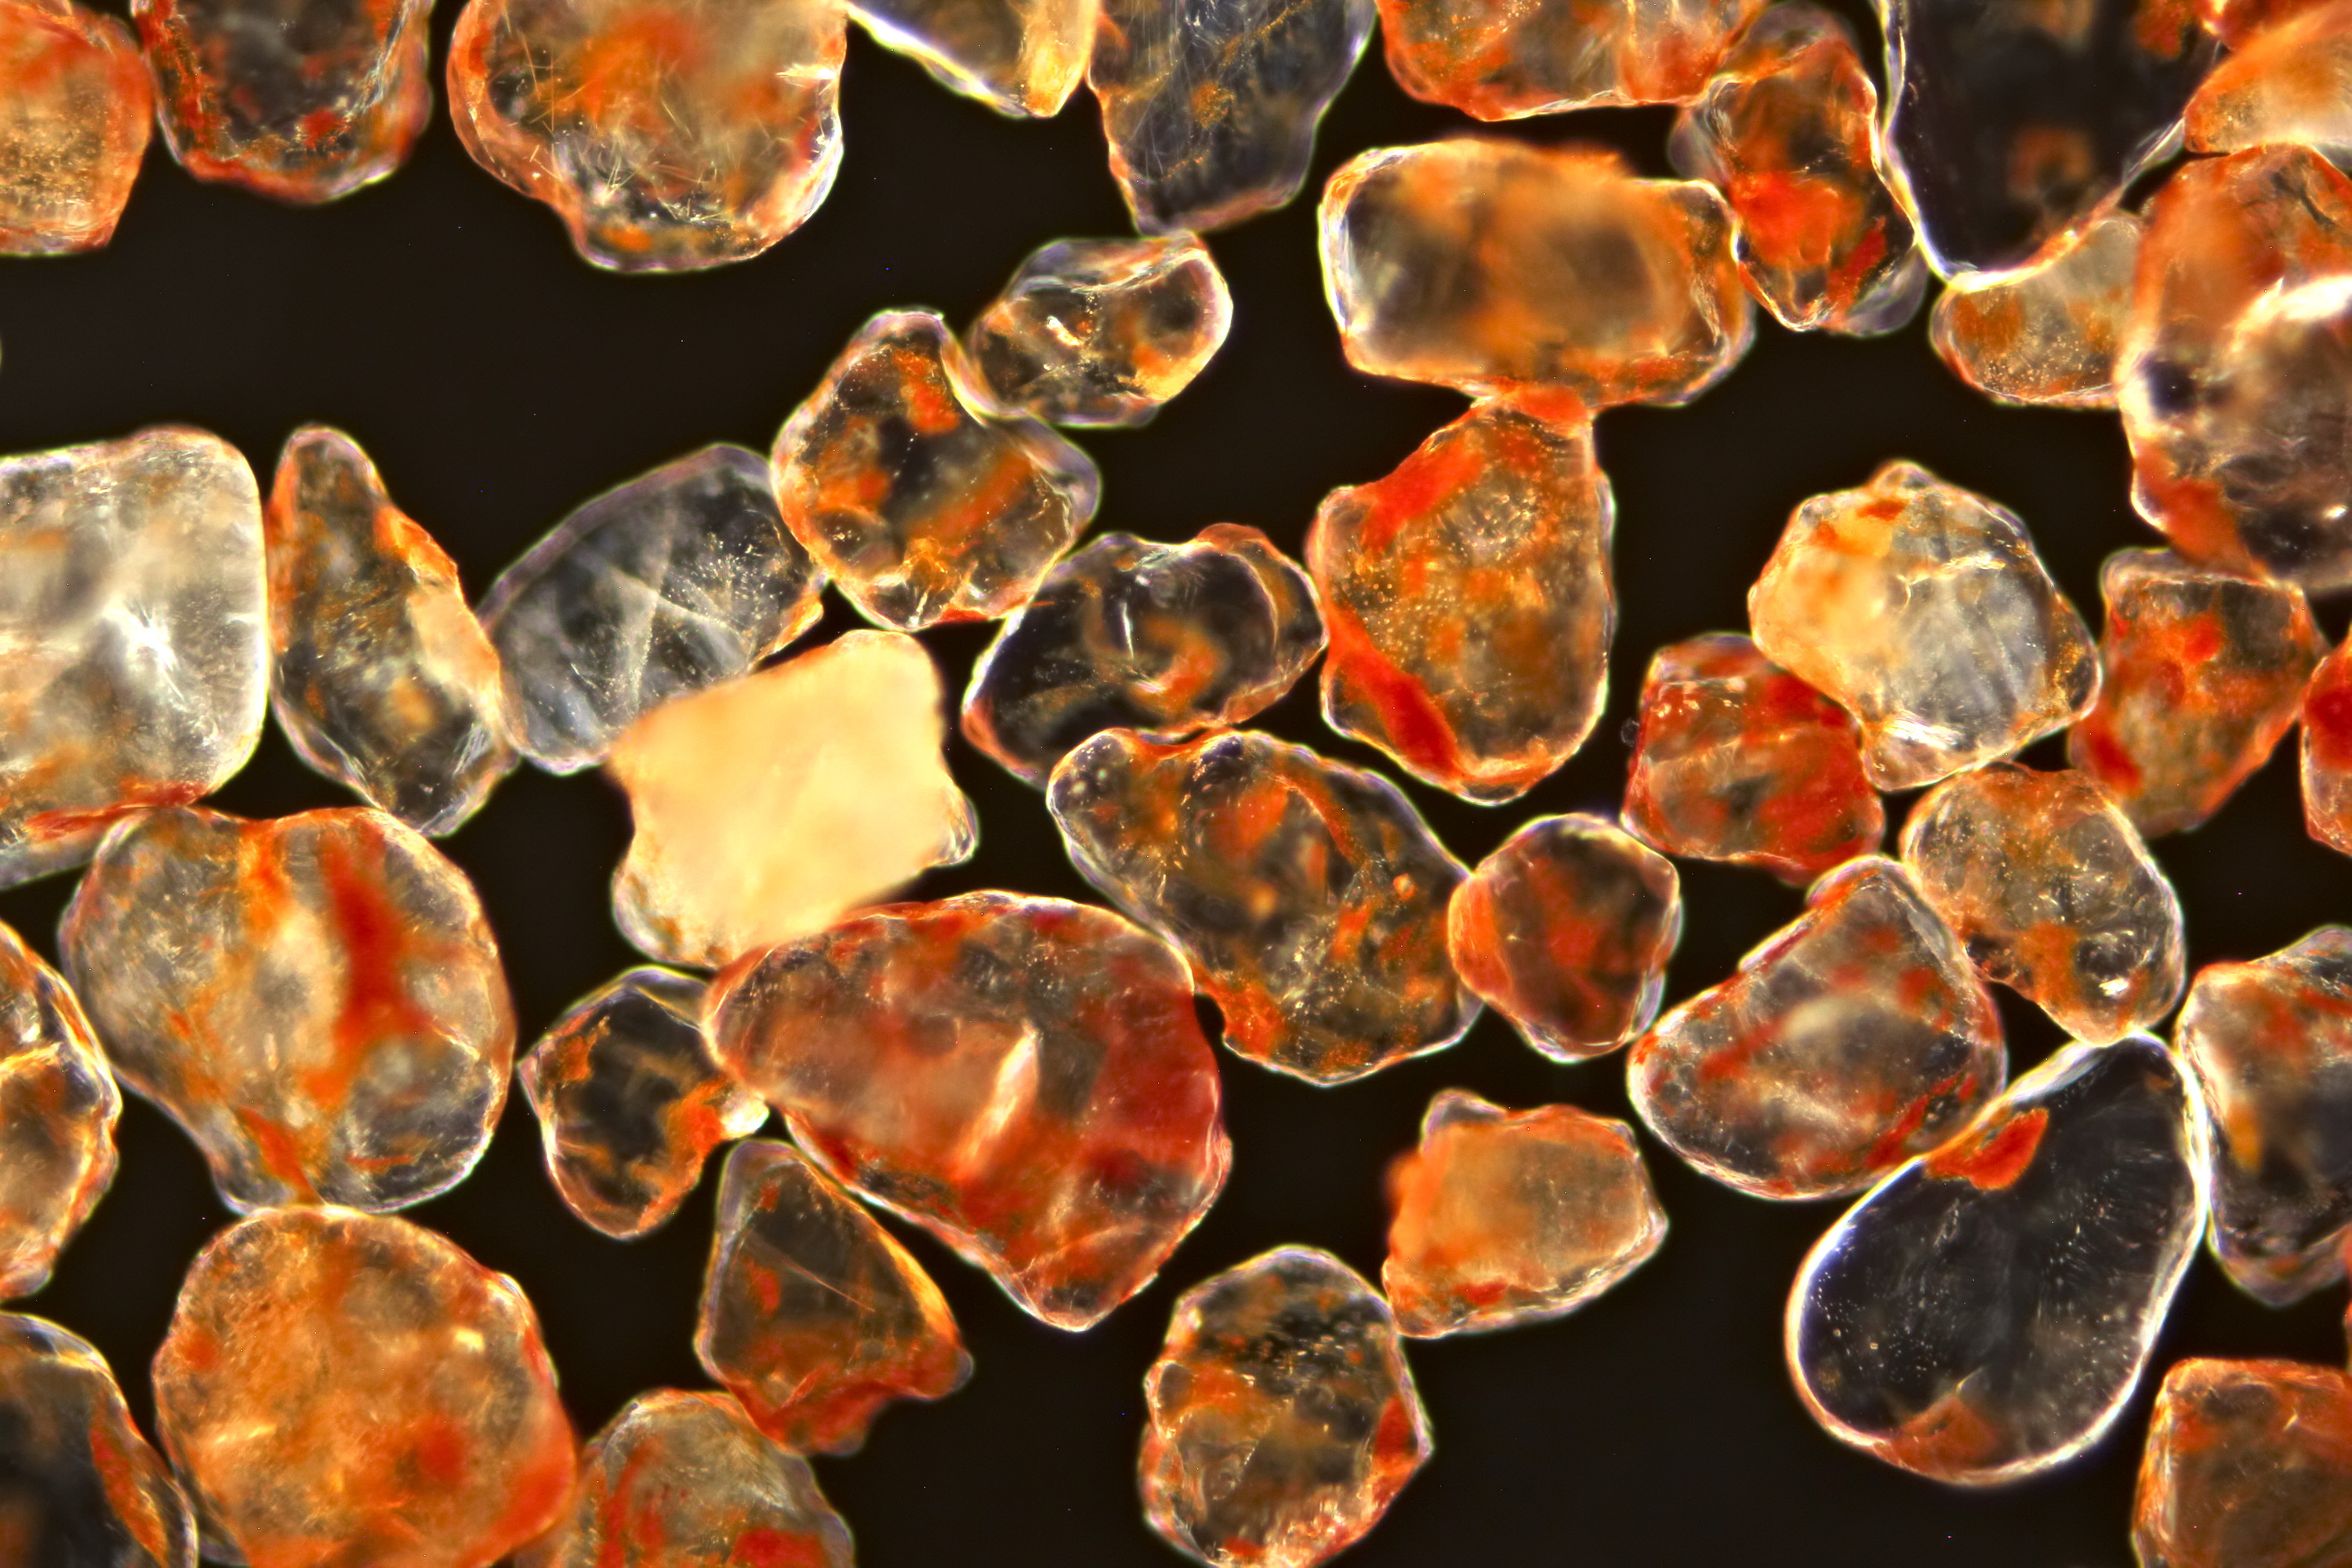
Red sand from Australia photographed in darkfield illumination with a Leitz dry darkfield condensor. Direct projection with Olympus objective 10/0.25 (37 mm).
Red sand from the Outback in Australia. Plan 4/0.10.
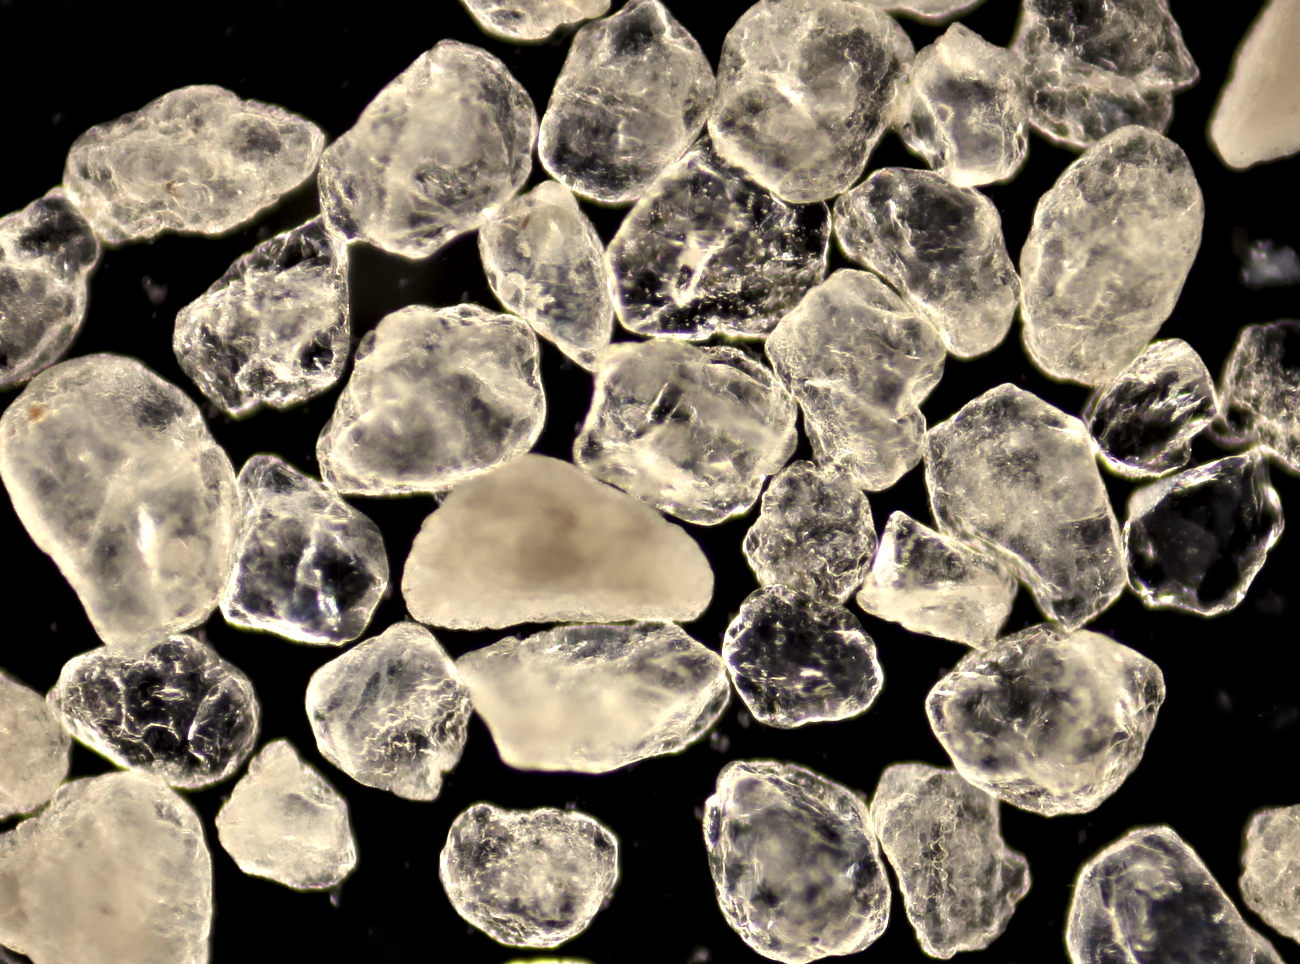
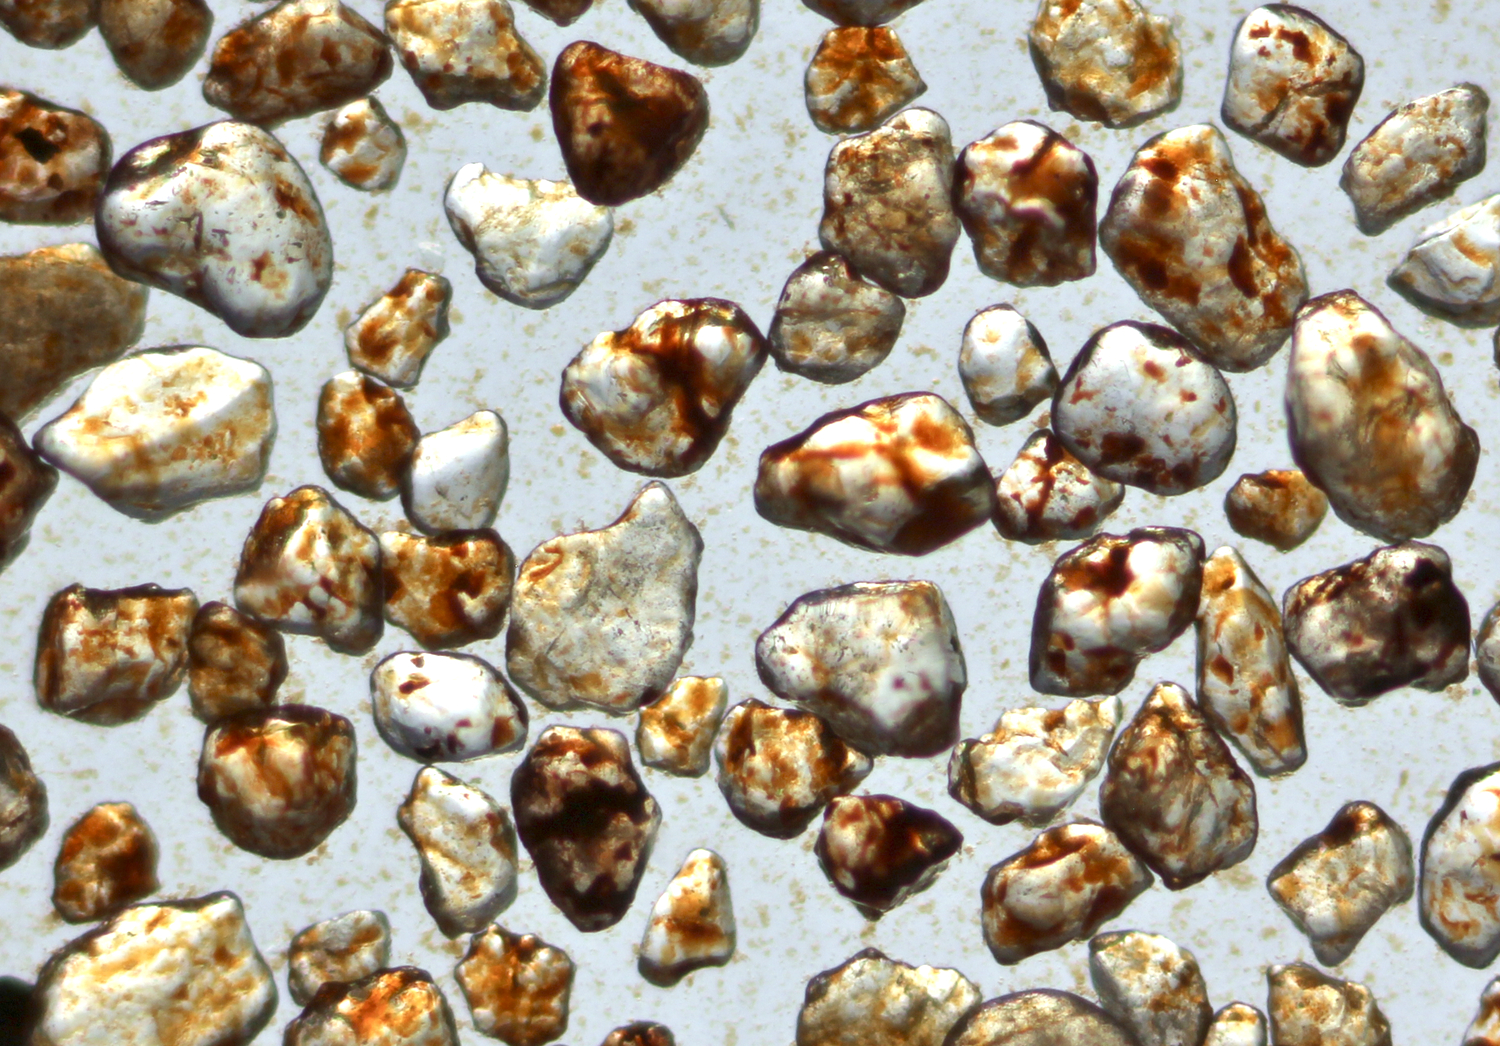
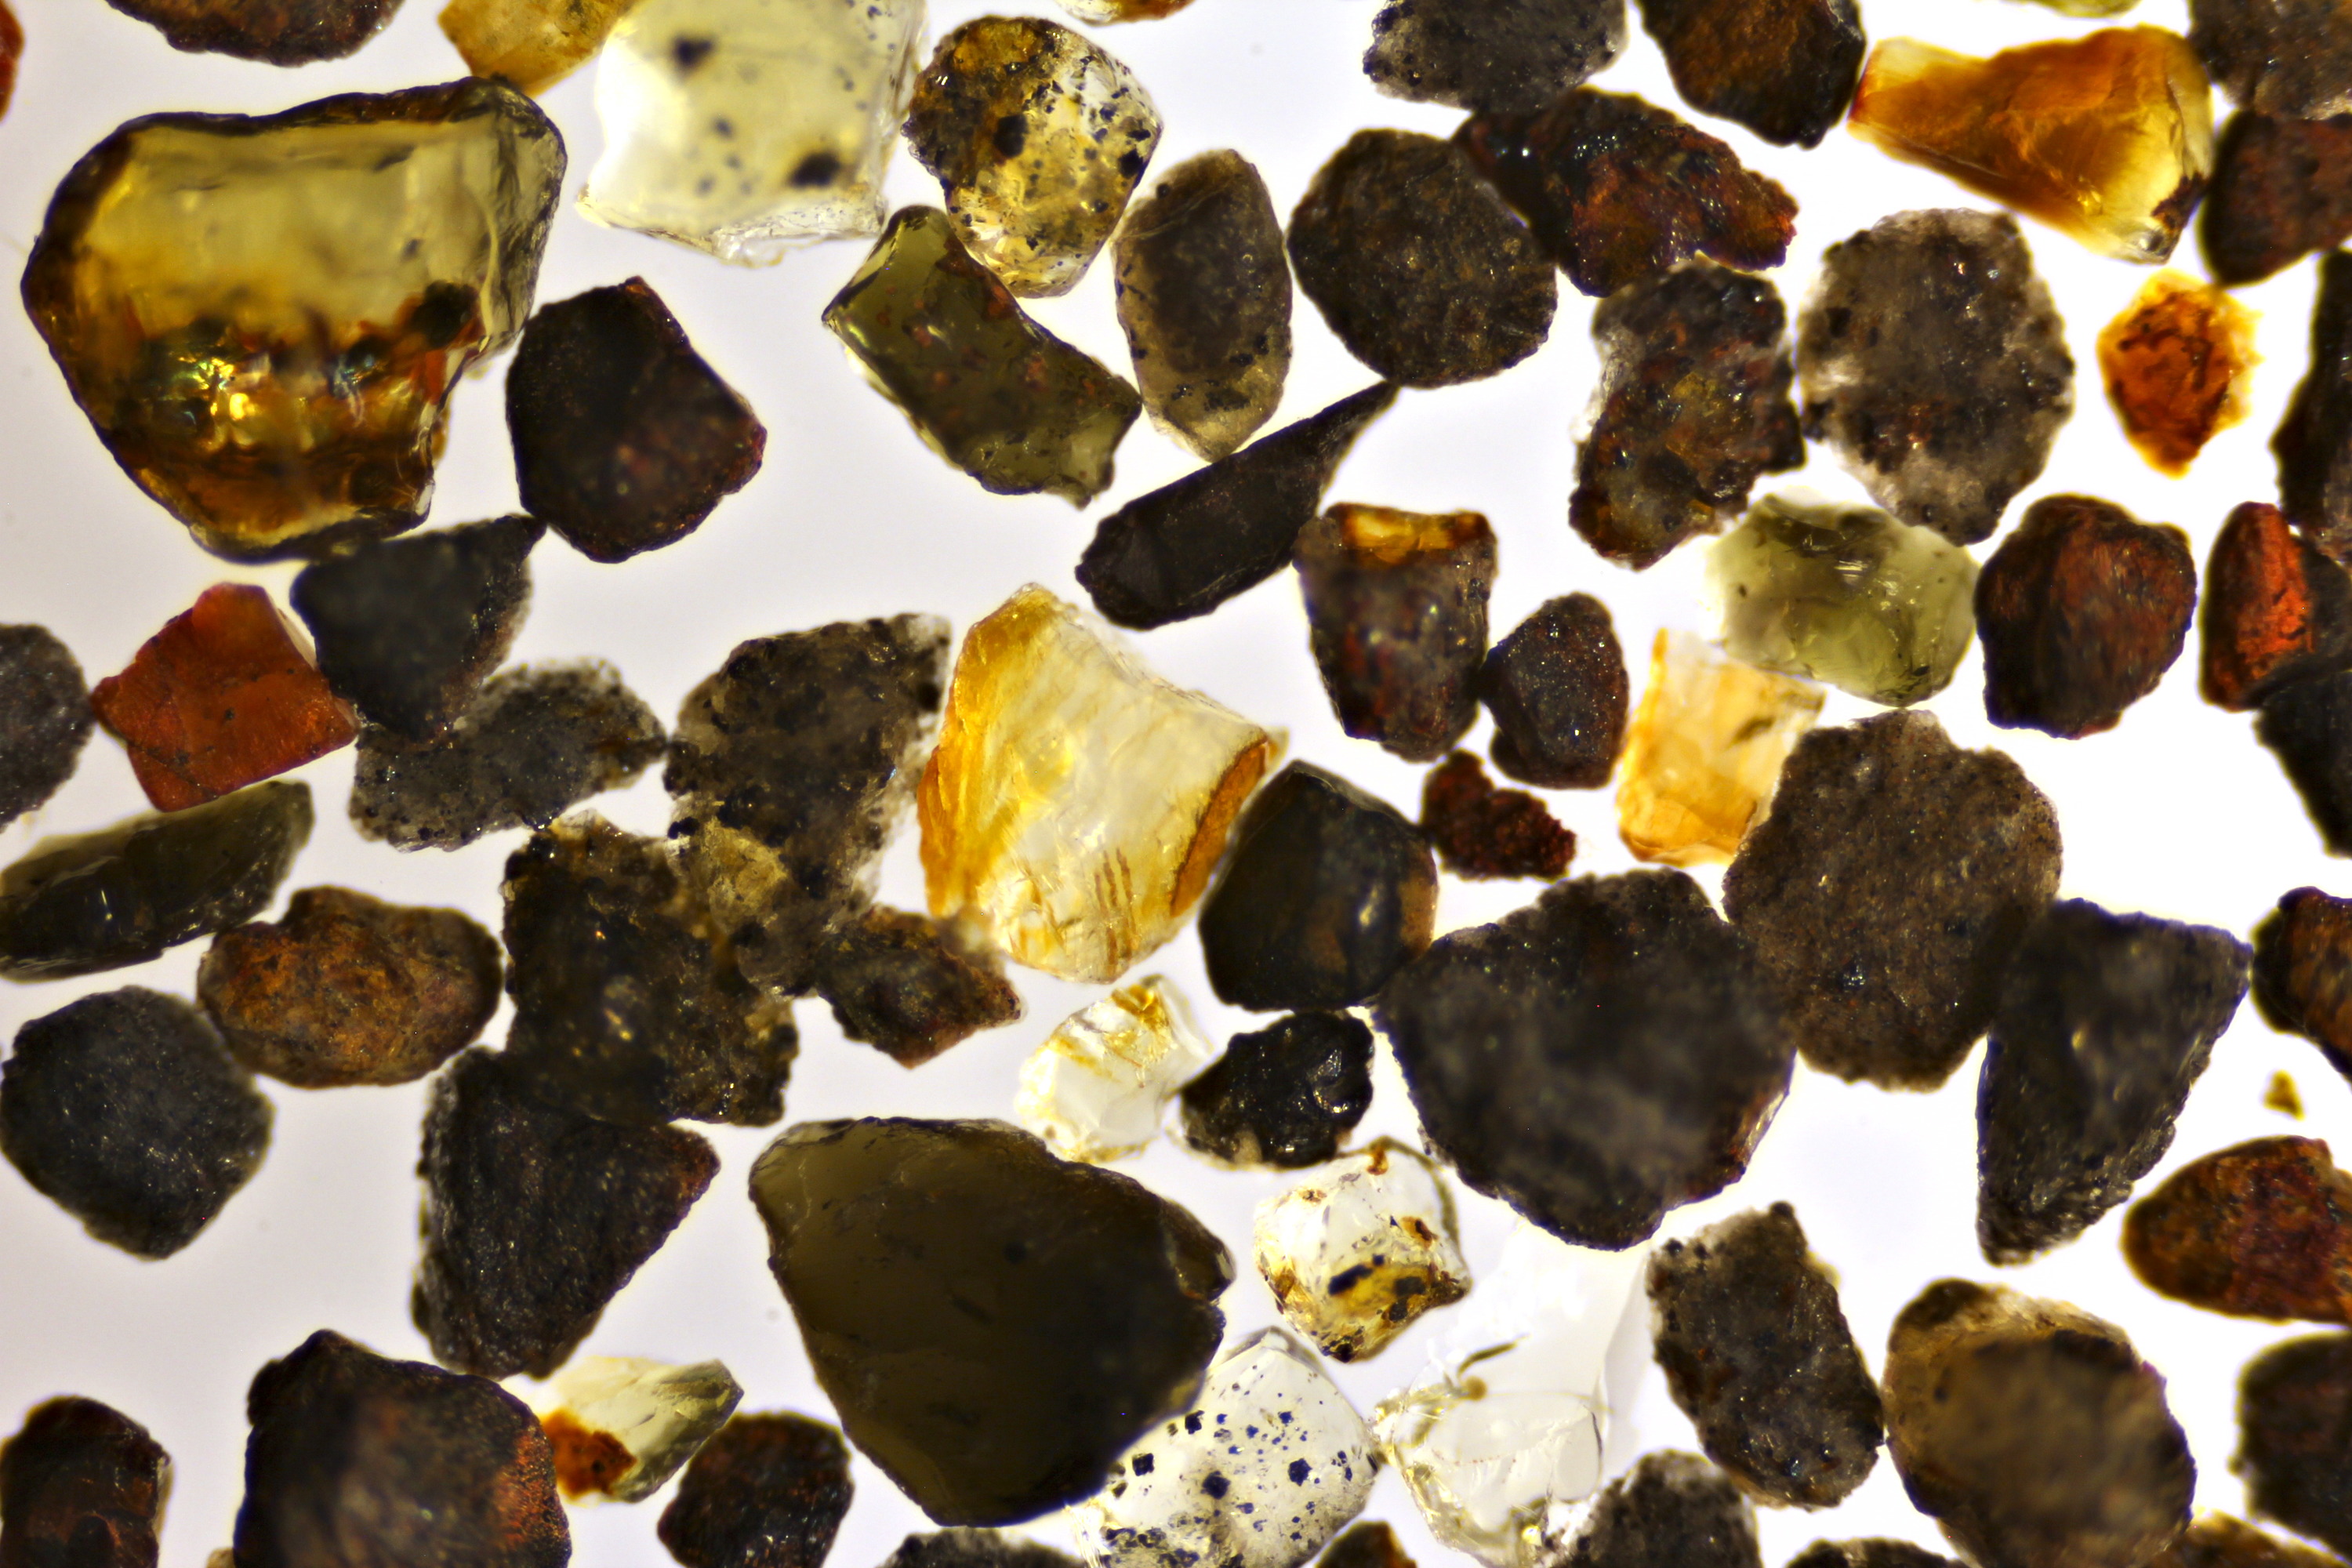
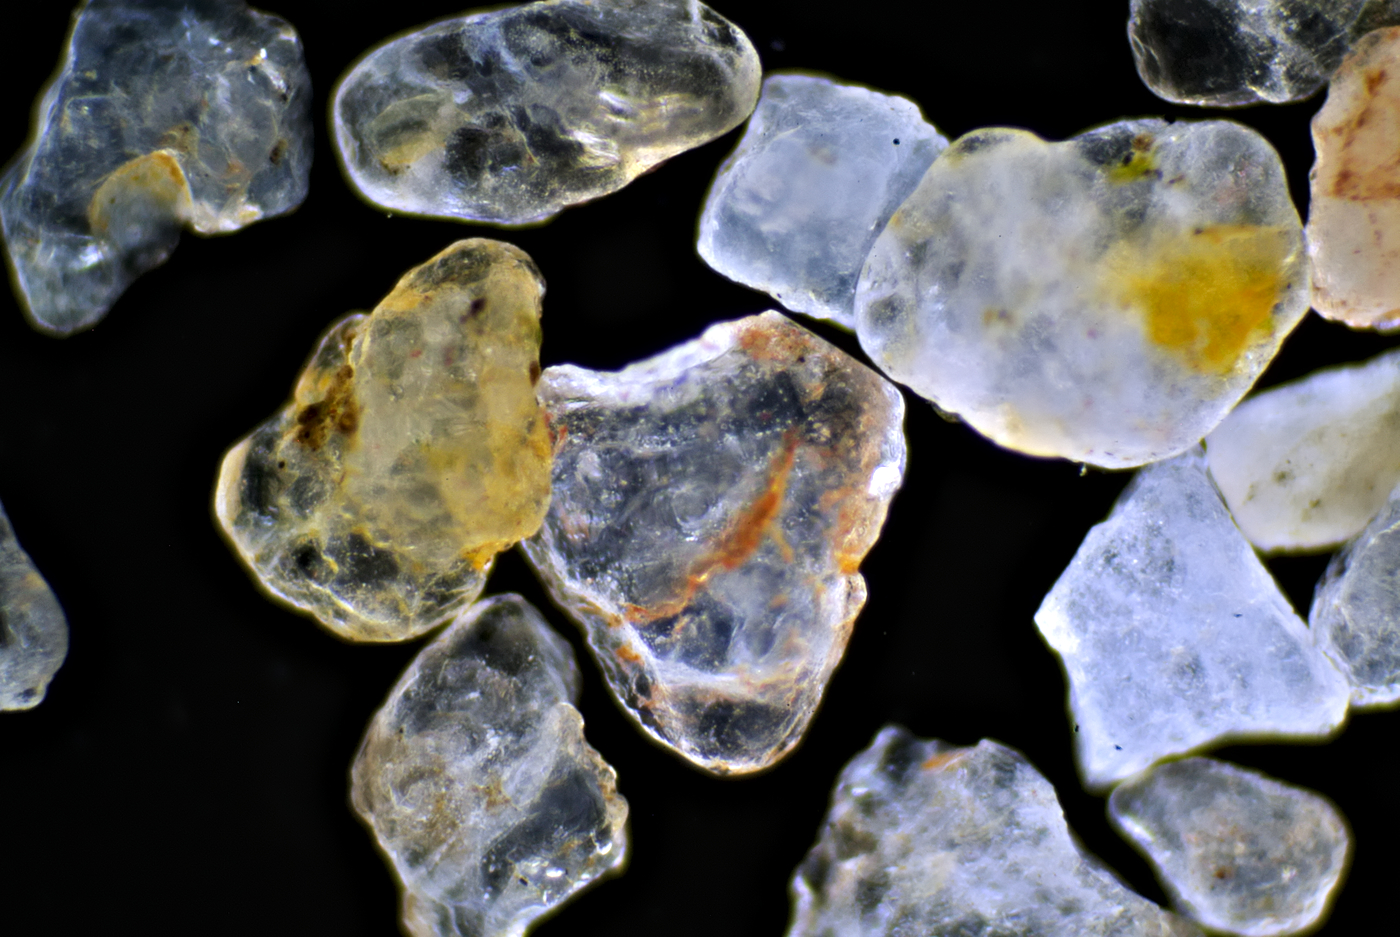
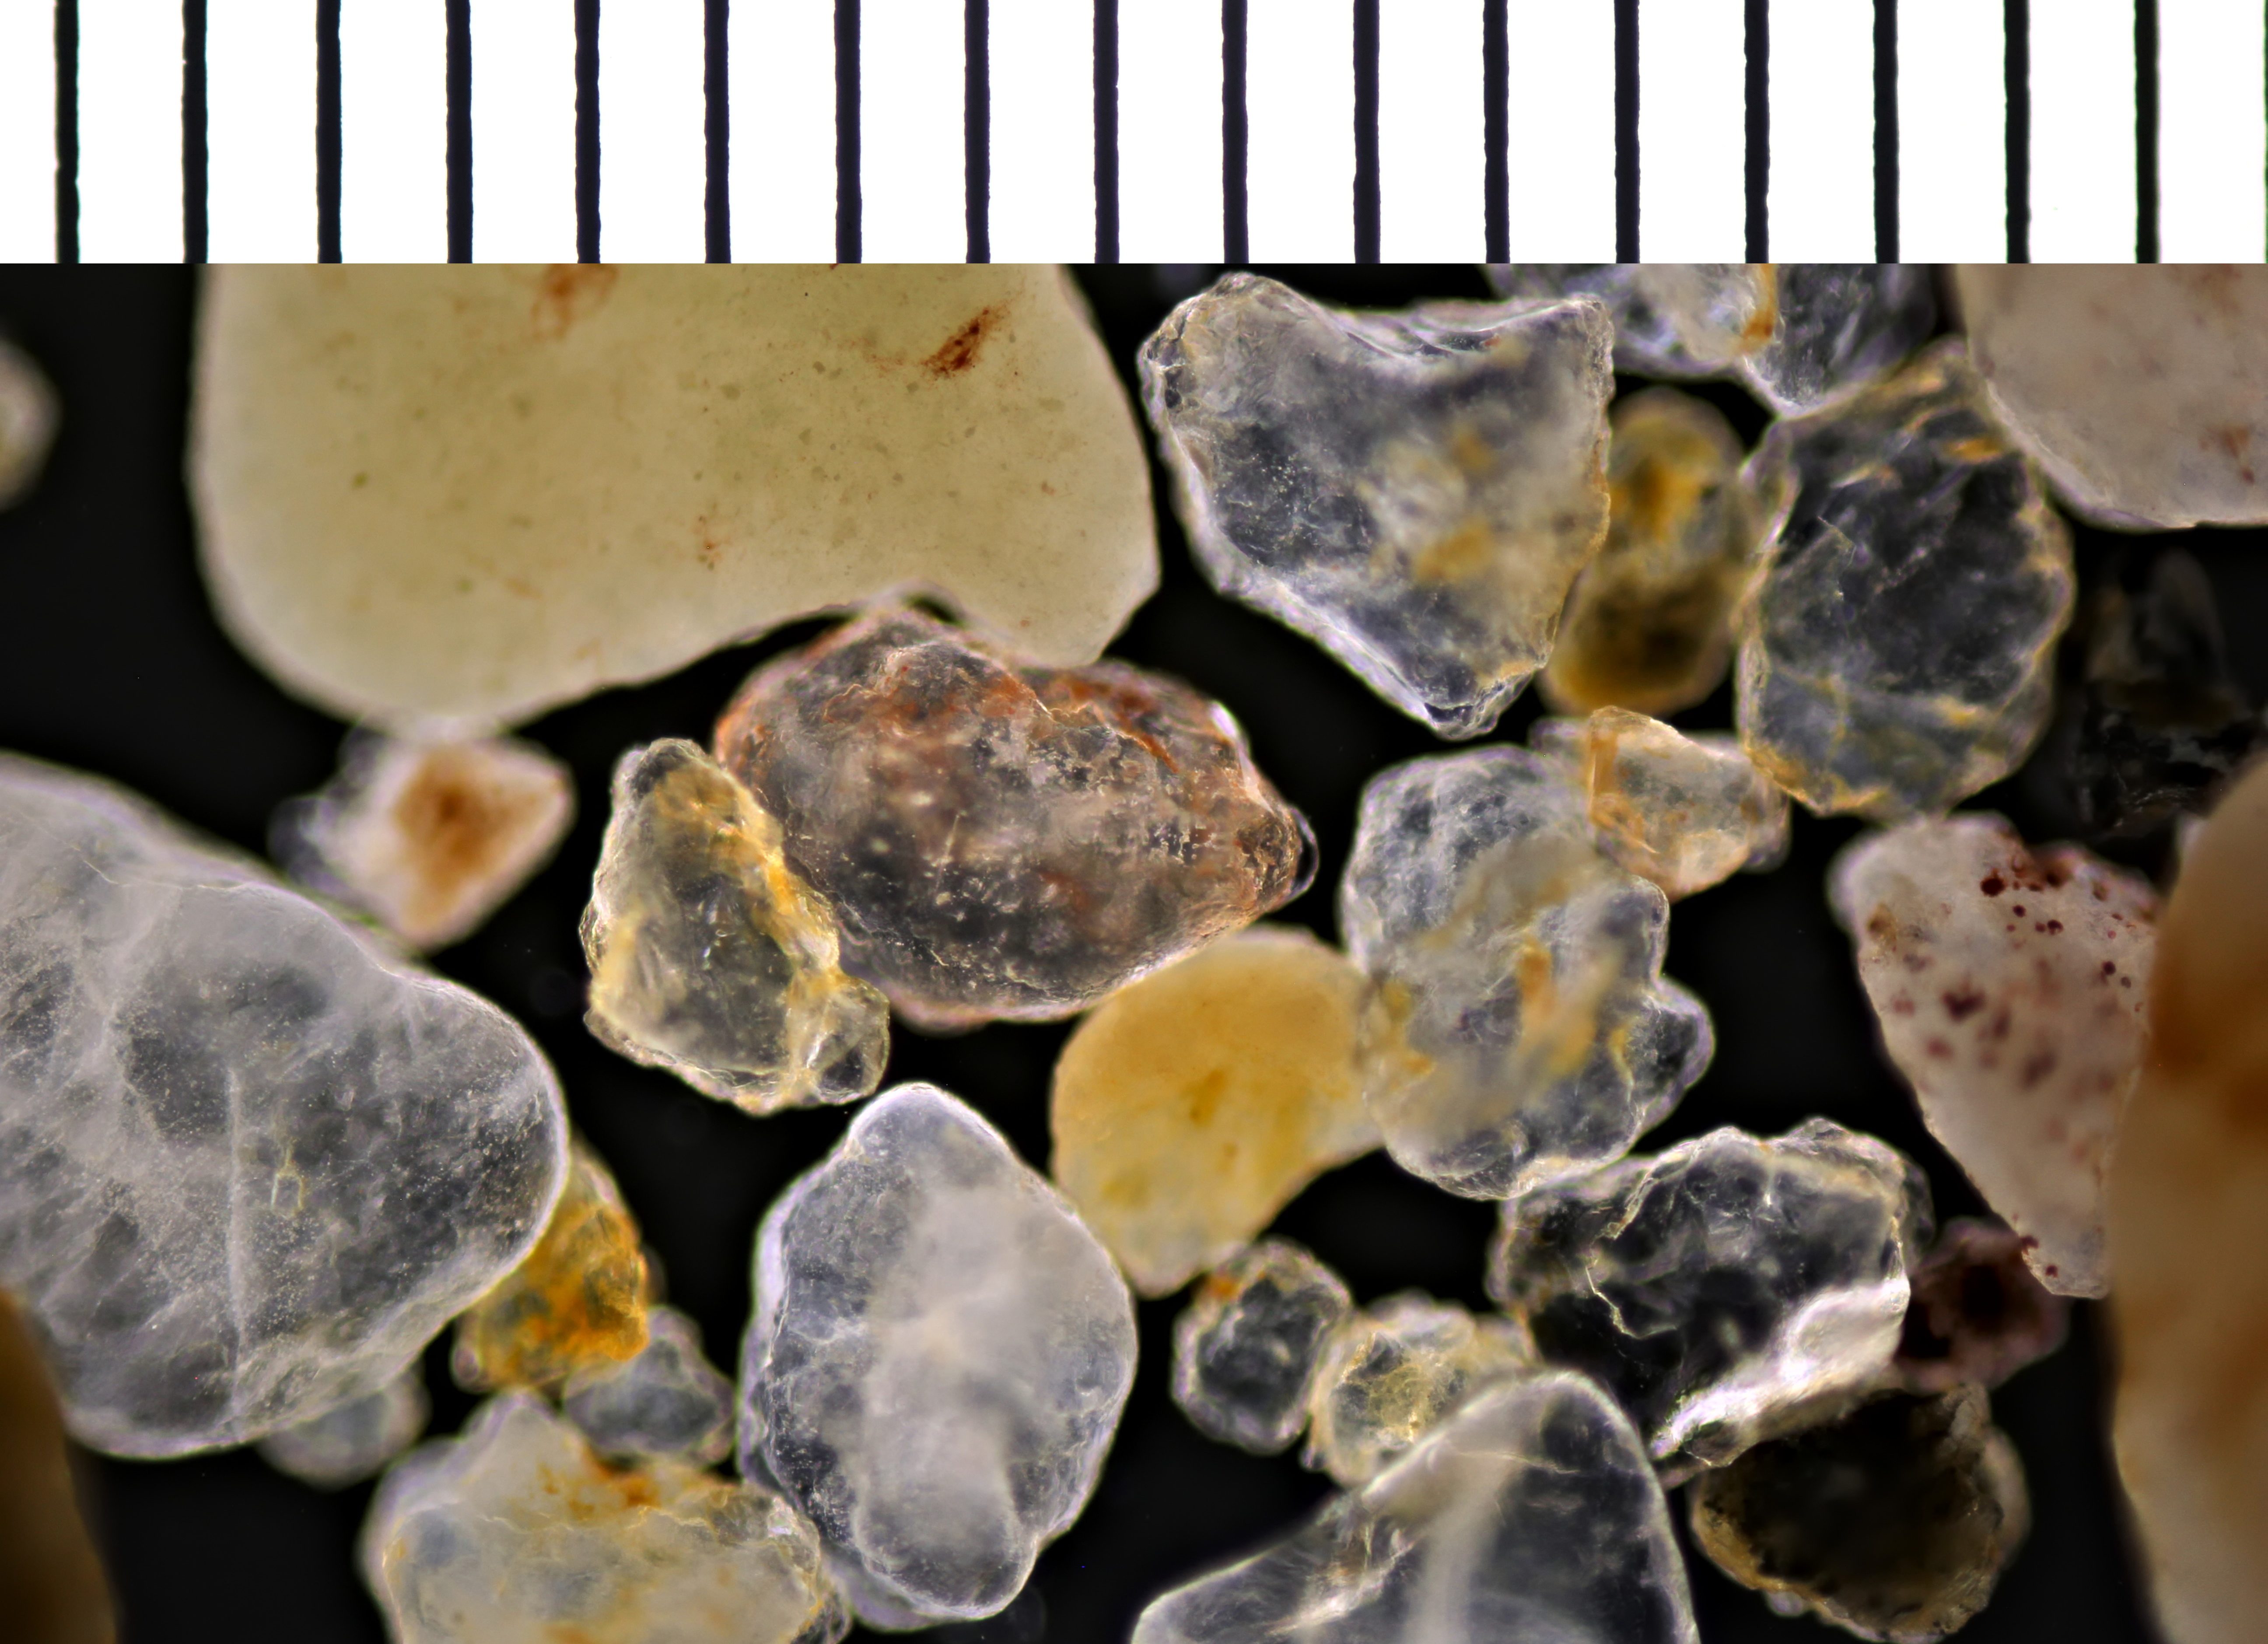
Also from Australia: sand as white as sugar and of a high purity. This sand consists almost entirely of quartz. Photographed with incident light. Objective: Leitz 4/0.12.
England
Sand from the English coast.

Sand from a beach at South Coast of England fotographed in brightfield illumination. Objective: Carl Zeiss 3.2/0.07.
Surinam
Sand from Surinam.
Sand from 'Berg en Dal', Suriname. Fotographed with a combination of brightfield illumination and incident light. Objective: Carl Zeiss Neofluar 6.3/0.20
This photo of wet sand was taken with a Zeiss-Winkel 2.5/0.06 objective connected directly to the Olympus PEN E-PL1 camera using an adapter.
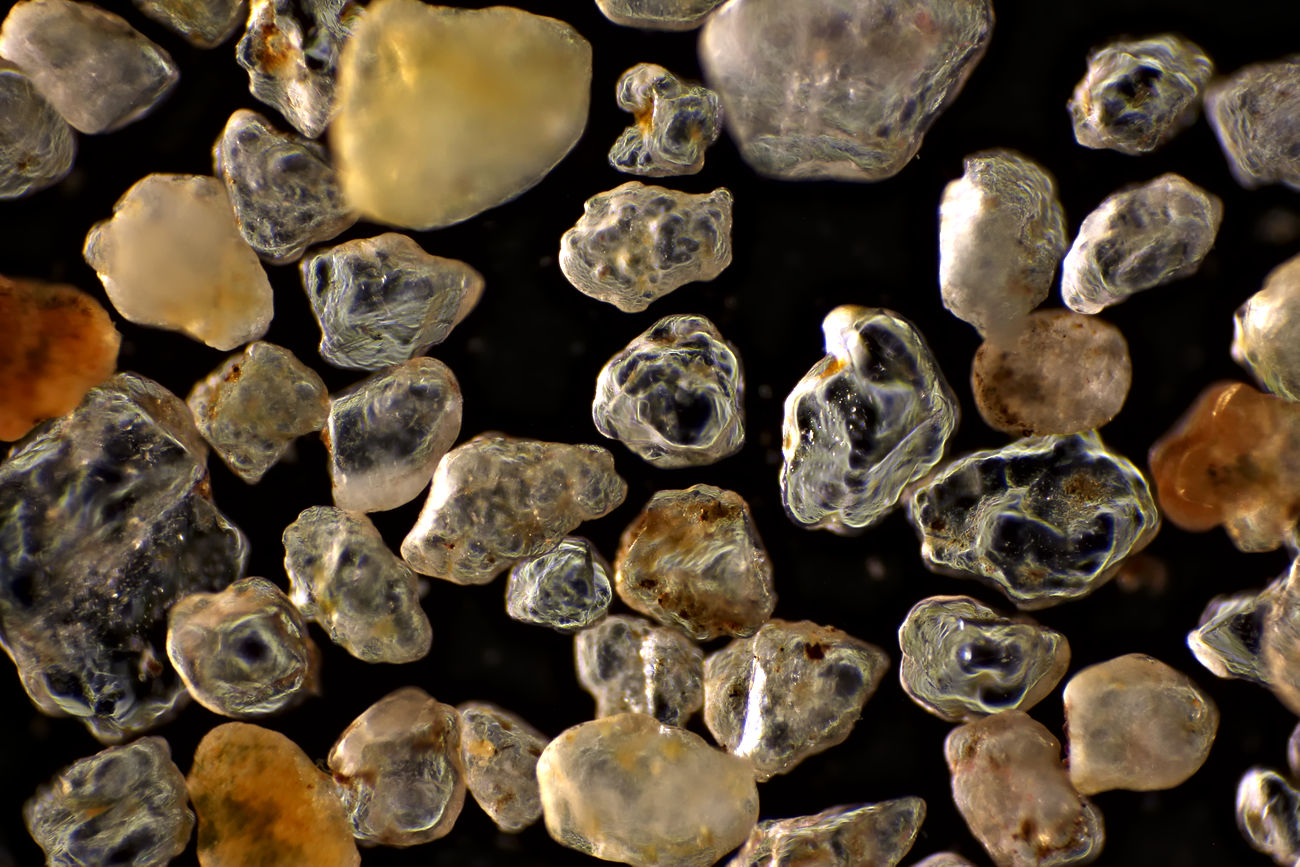
Madeira
I brought this sand from a beach in Funchal. The sand has a volcanic origin and the beaches there are black.
Black sand from a beach in Funchal photographed with incident light from one side. Direct projection with a no-name plan 4/0.10 objective.
The same sand as in the previous photo, this time photographed with a combination of incident light (from one side) and darkfield with a dry Leitz darkfield condenser. Direct projection with a generic plan 4/0.10 objective.
Black sand from a beach in Funchal photographed with incident light from one side in combination with a white background. Direct projection with a no-name plan 4/0.10 objective.
Netherlands
Sand from different locations in the Netherlands.

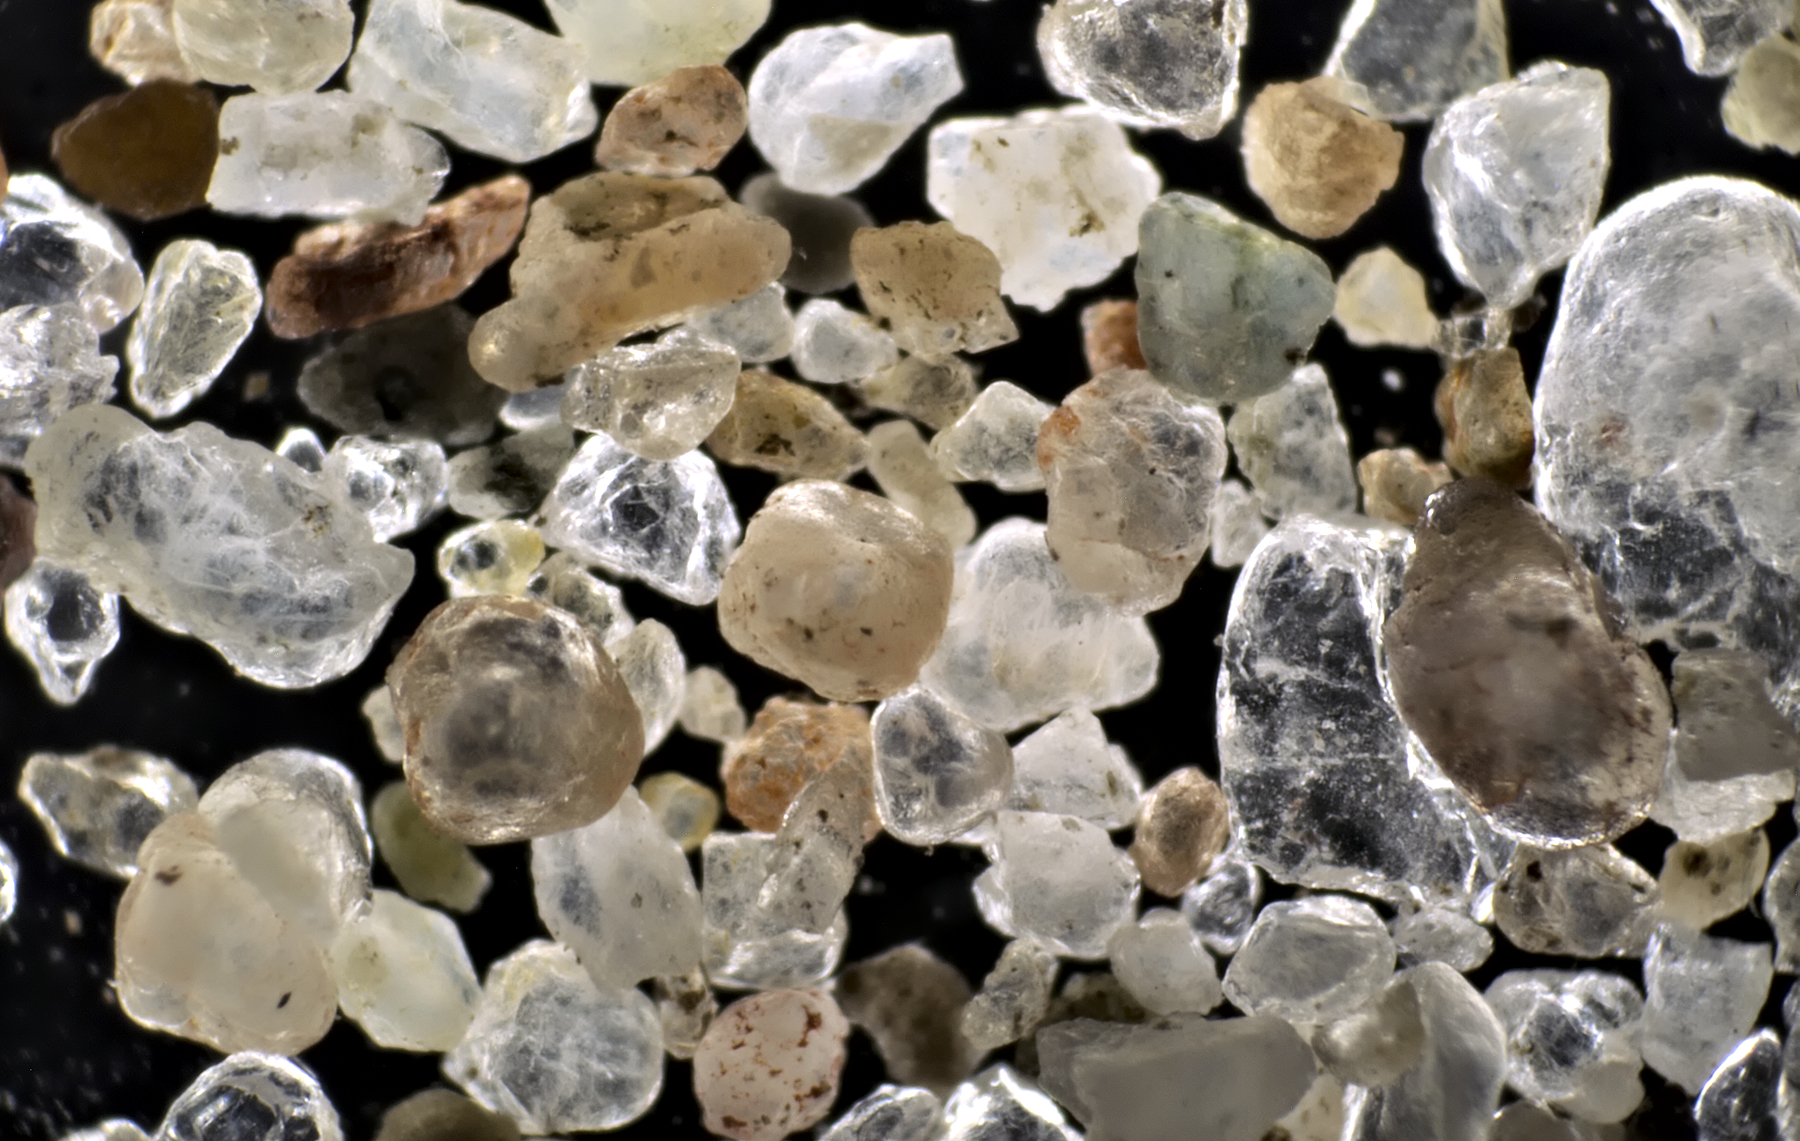
Sand from the Kennemerduinen, location ‘t Wed. Fotographed with a combination of brightfield illumination and incident light. Objective: Leitz 4/0.12.

Sand from location ‘Vossenberg’, Meijel (Limburg). Fotographed with incident light. Objective: Leitz 4/0.12.
Sand from a beach at Texel, location 'Mok'. Fotographed with darkfield illumination. Objective: Carl Zeiss Neofluar 6.3/0.20.
Sand from a beach at IJmuiden photographed in brightfield (left, Carl Zeiss 3.2/0.07) and darkfield (right, Zeiss Neofluar 10/0.30).
Sand from a construction site at a road fotographed with incident light. Objective: Carl Zeiss Neofluar 6.3/0.20.
Sand from Kijkduin fotographed with a combination of darkfield illumination and incident light. Objective: Carl Zeiss Neofluar 6.3/0.20.
This construction sand was lying behind my house and I was surprised by the diversity of colors the sandgrains had. Photographed in darkfield illumination with Olympus 4/0.10. Camera: Nikon 1 J1.
The same construction sand as in the previous photo, also in dark field illumination, but now photographed with Zeiss-Winkel 2.5/0.06. Camera: Olympus PEN E-PL1.
Once again the construction sand, again photographed in darkfield but now with Carl Zeiss 3.2/0.07 by means of direct projection. The image of the objective was projected onto the sensor of a Canon 600D without the intervention of an eyepiece or projective.
Germany
Photos of sand from various locations in Germany.
While on vacation in Jena, I came across this pile of sand on the street. Of course, I had to photograph it with a Carl Zeiss Jena lens. The photo on the right was taken with a CZJ 8/0.20 objective using direct projection and darkfield illumination, the image width is 1.75 mm.
The sand from Jena photographed in darkfield illumination with Olympus 4/0.10 using direct projection.
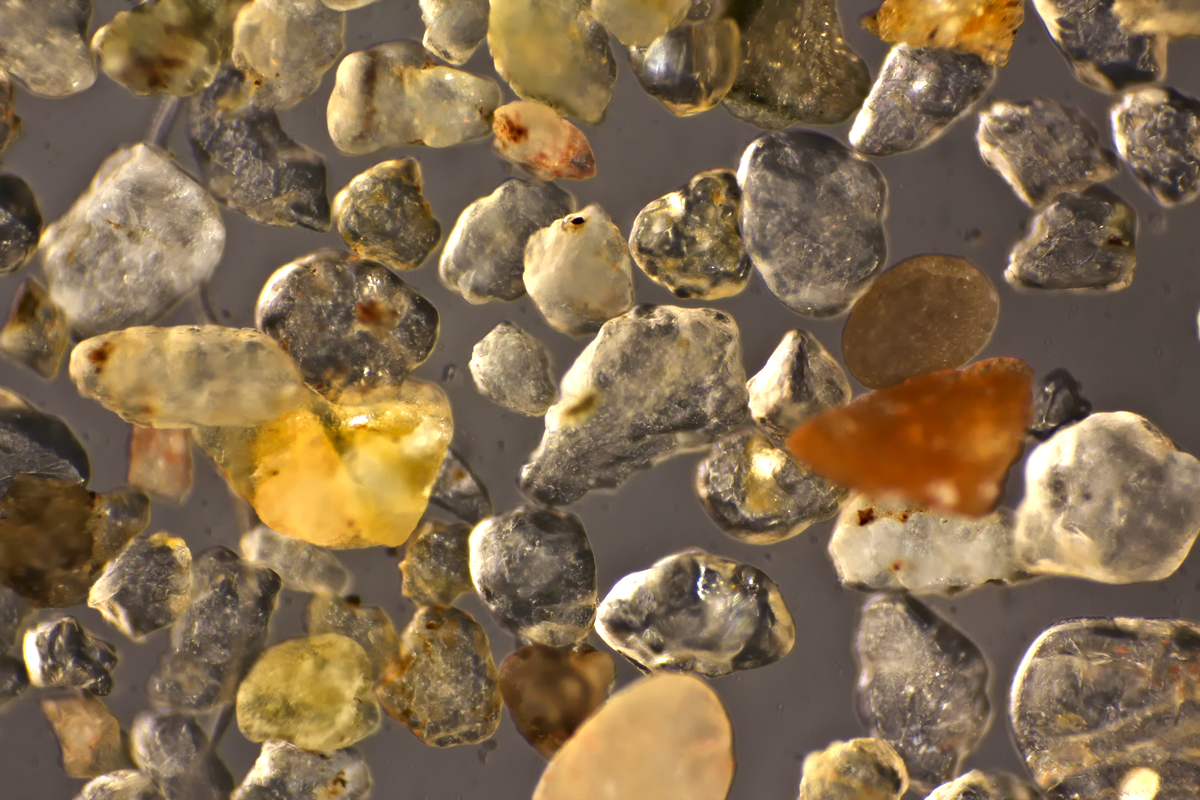
Namibia
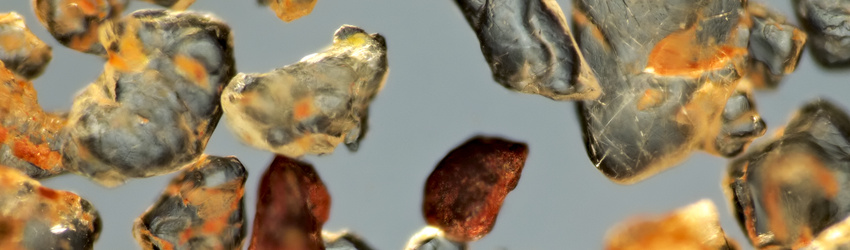
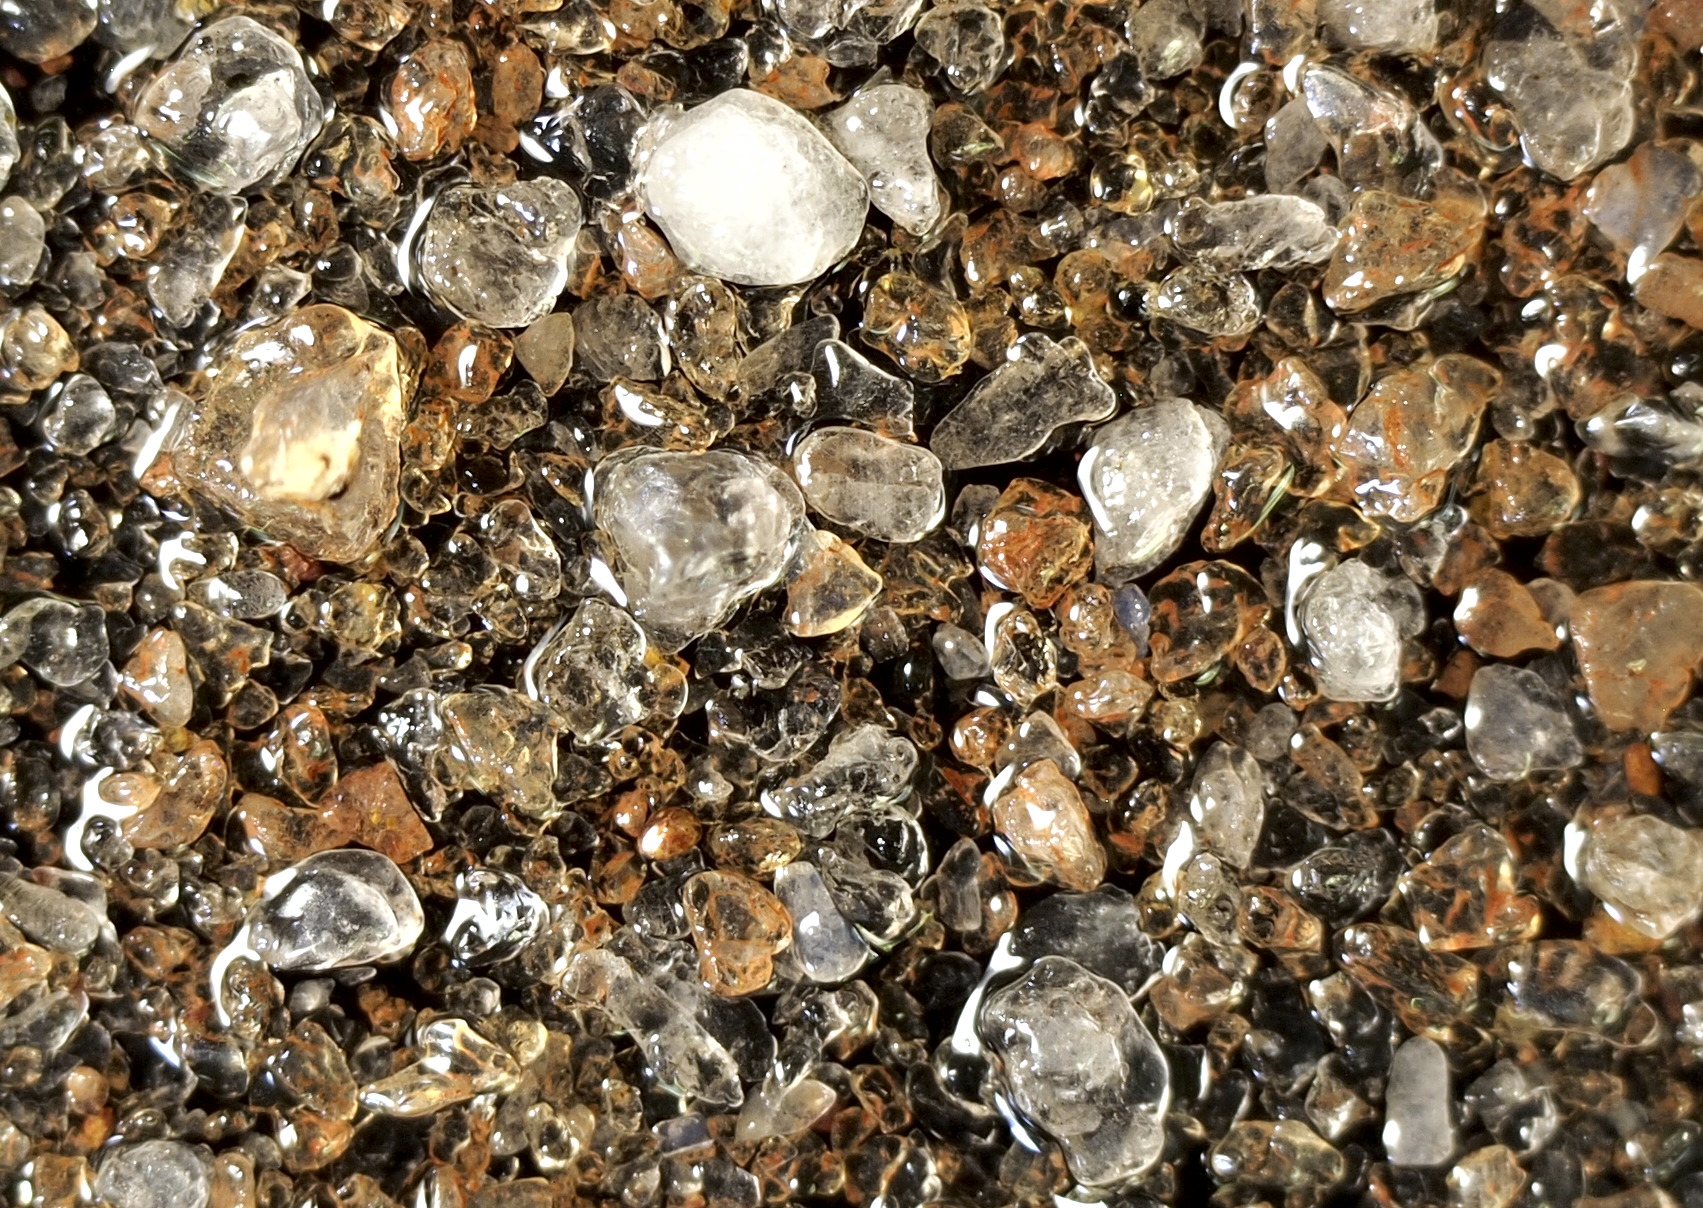
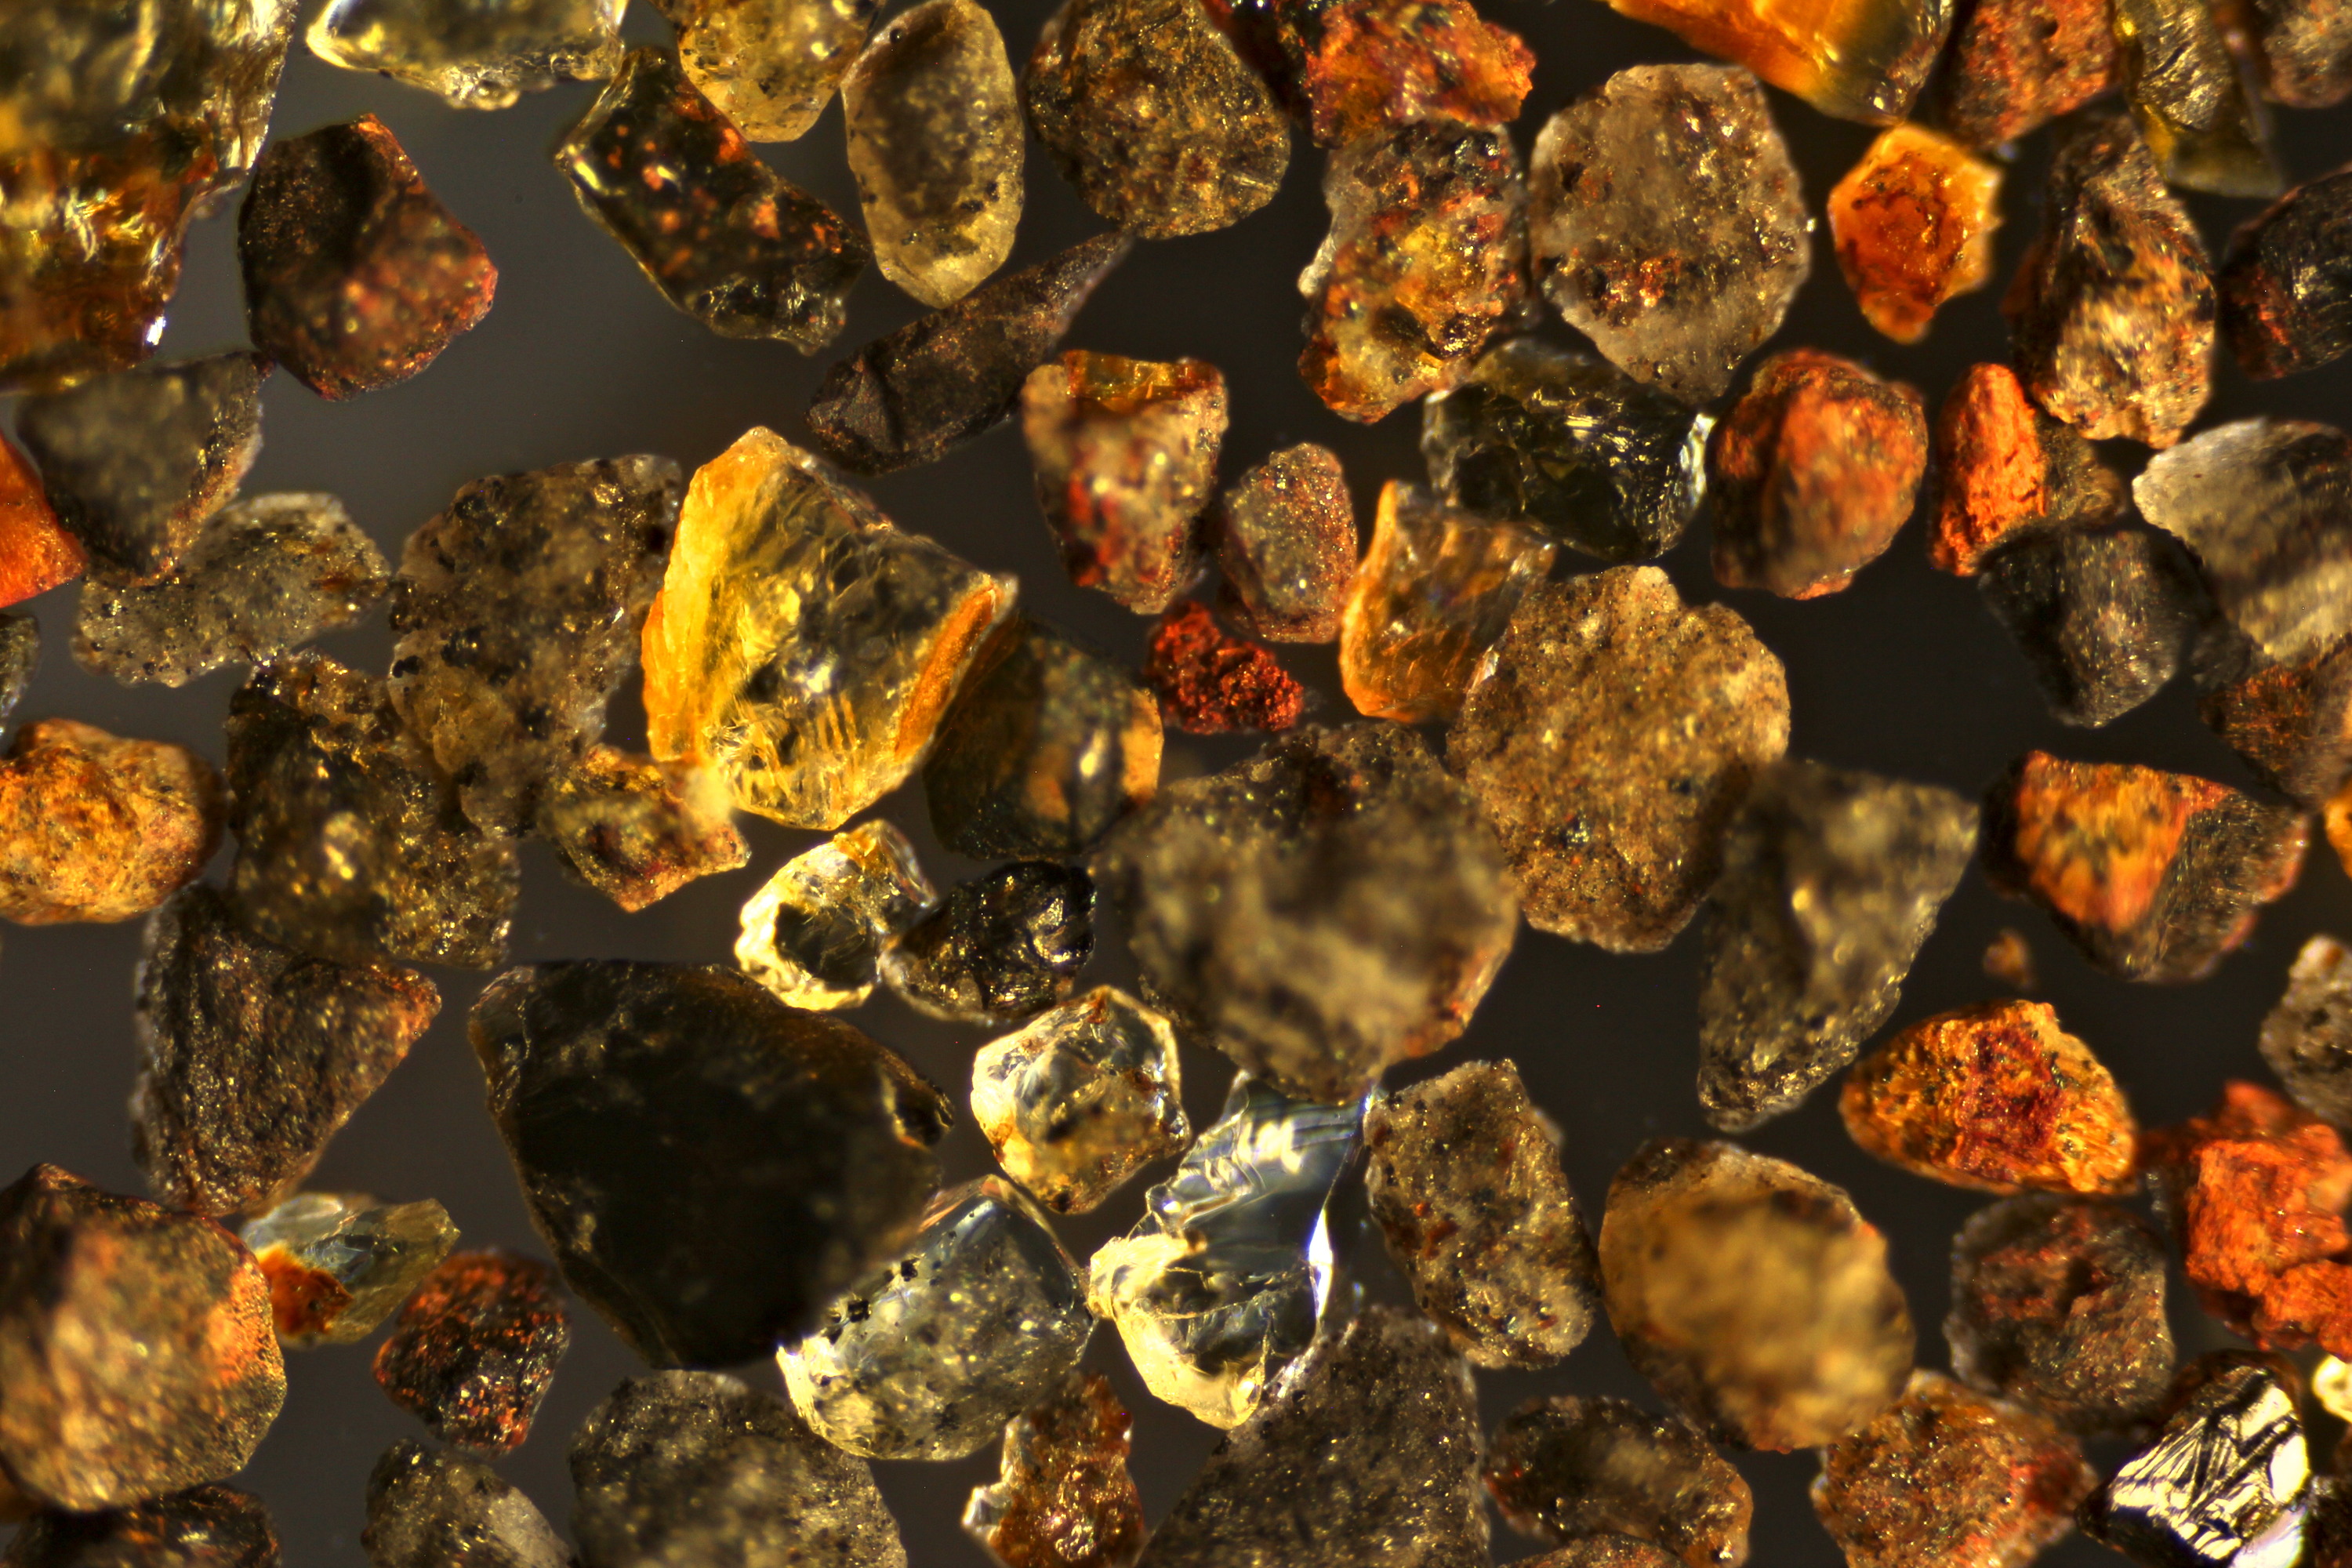
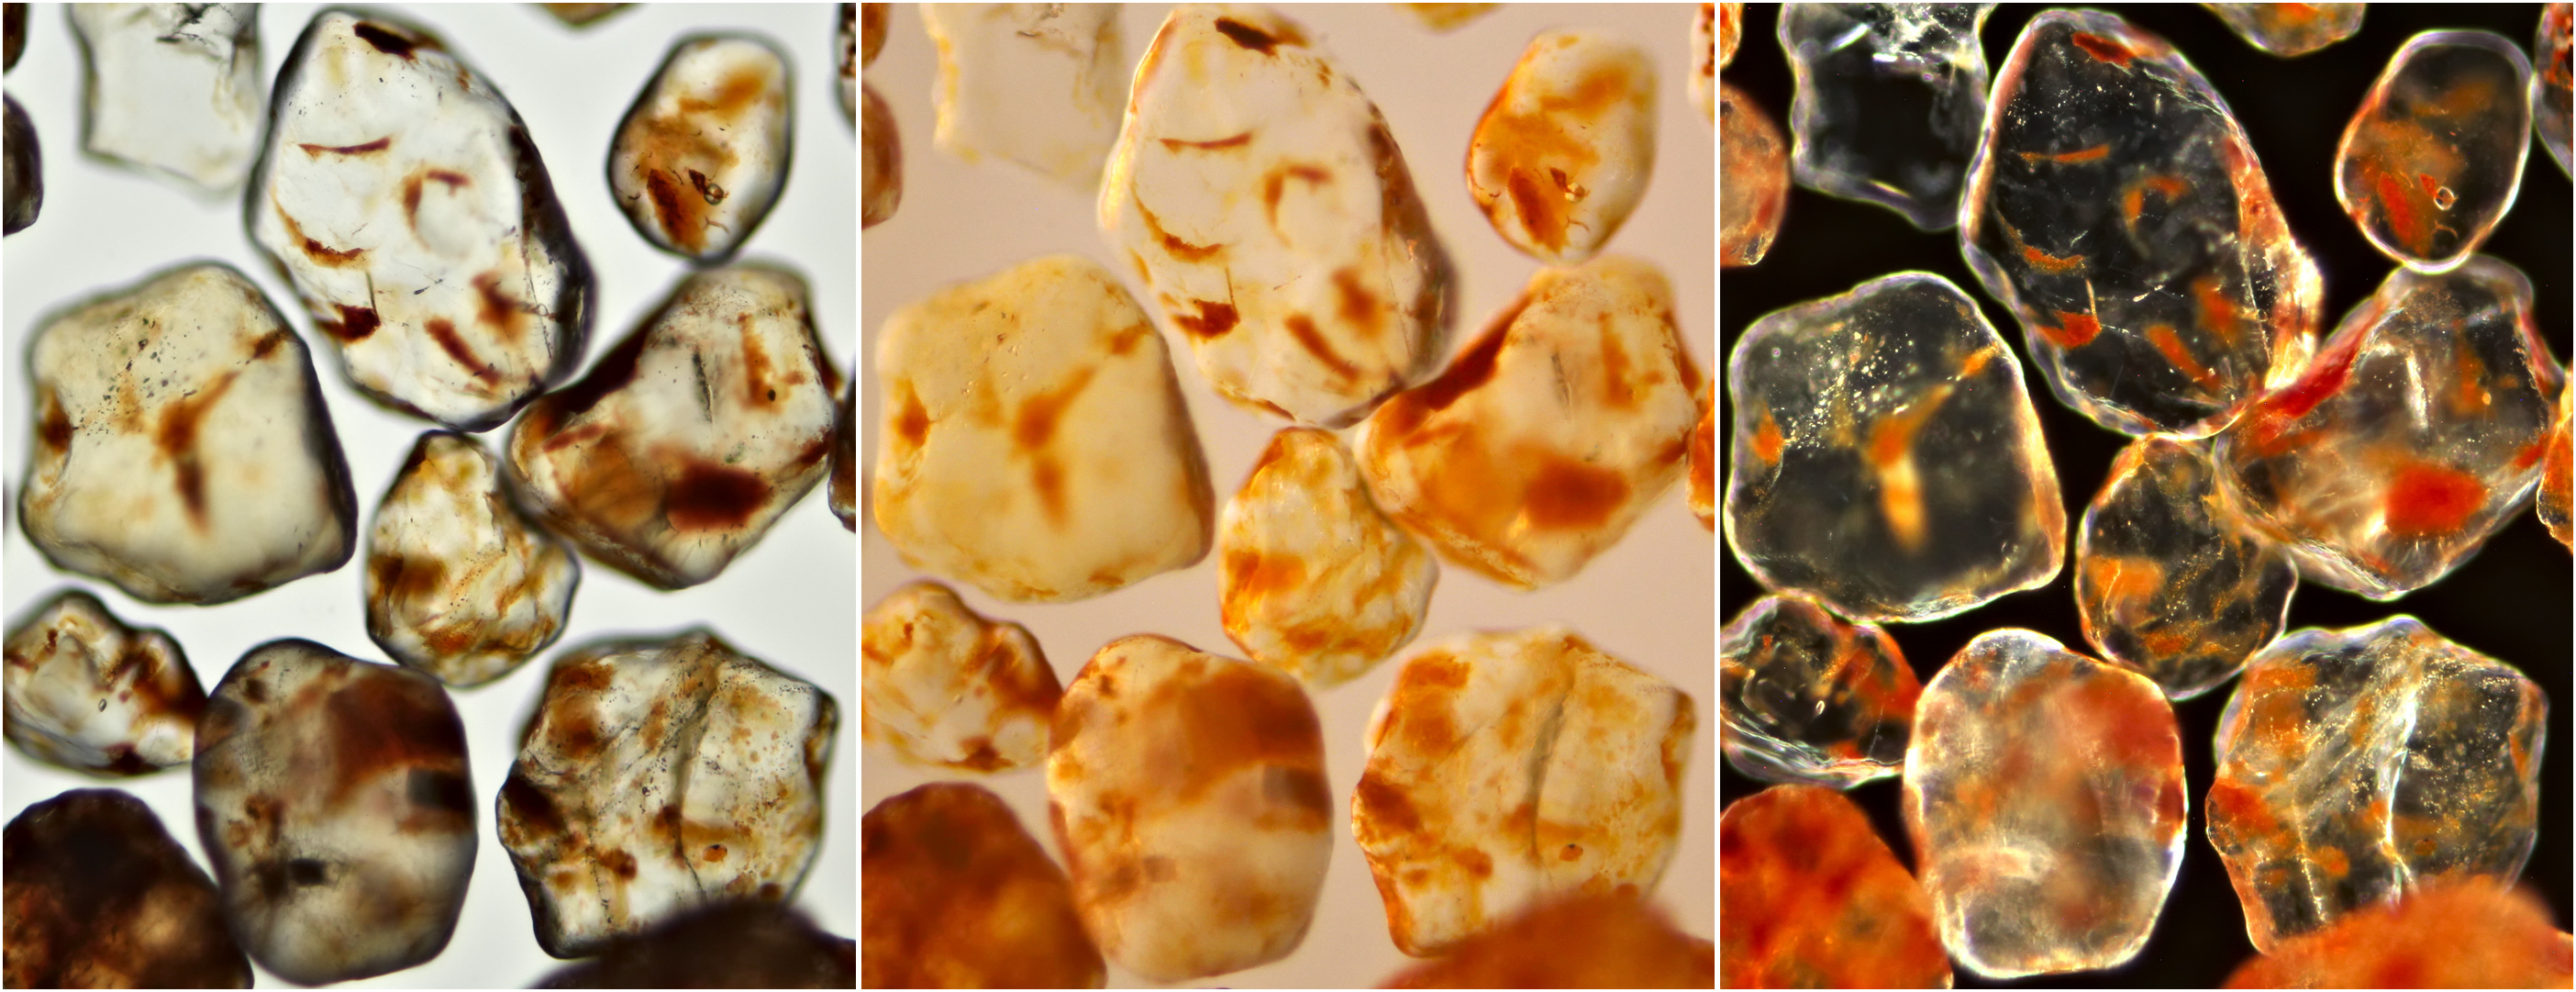
From a family member I received some red sand that was collected at Namib-Naukluft National Park, Namibia. Under the microscope it's a colourfull sight.
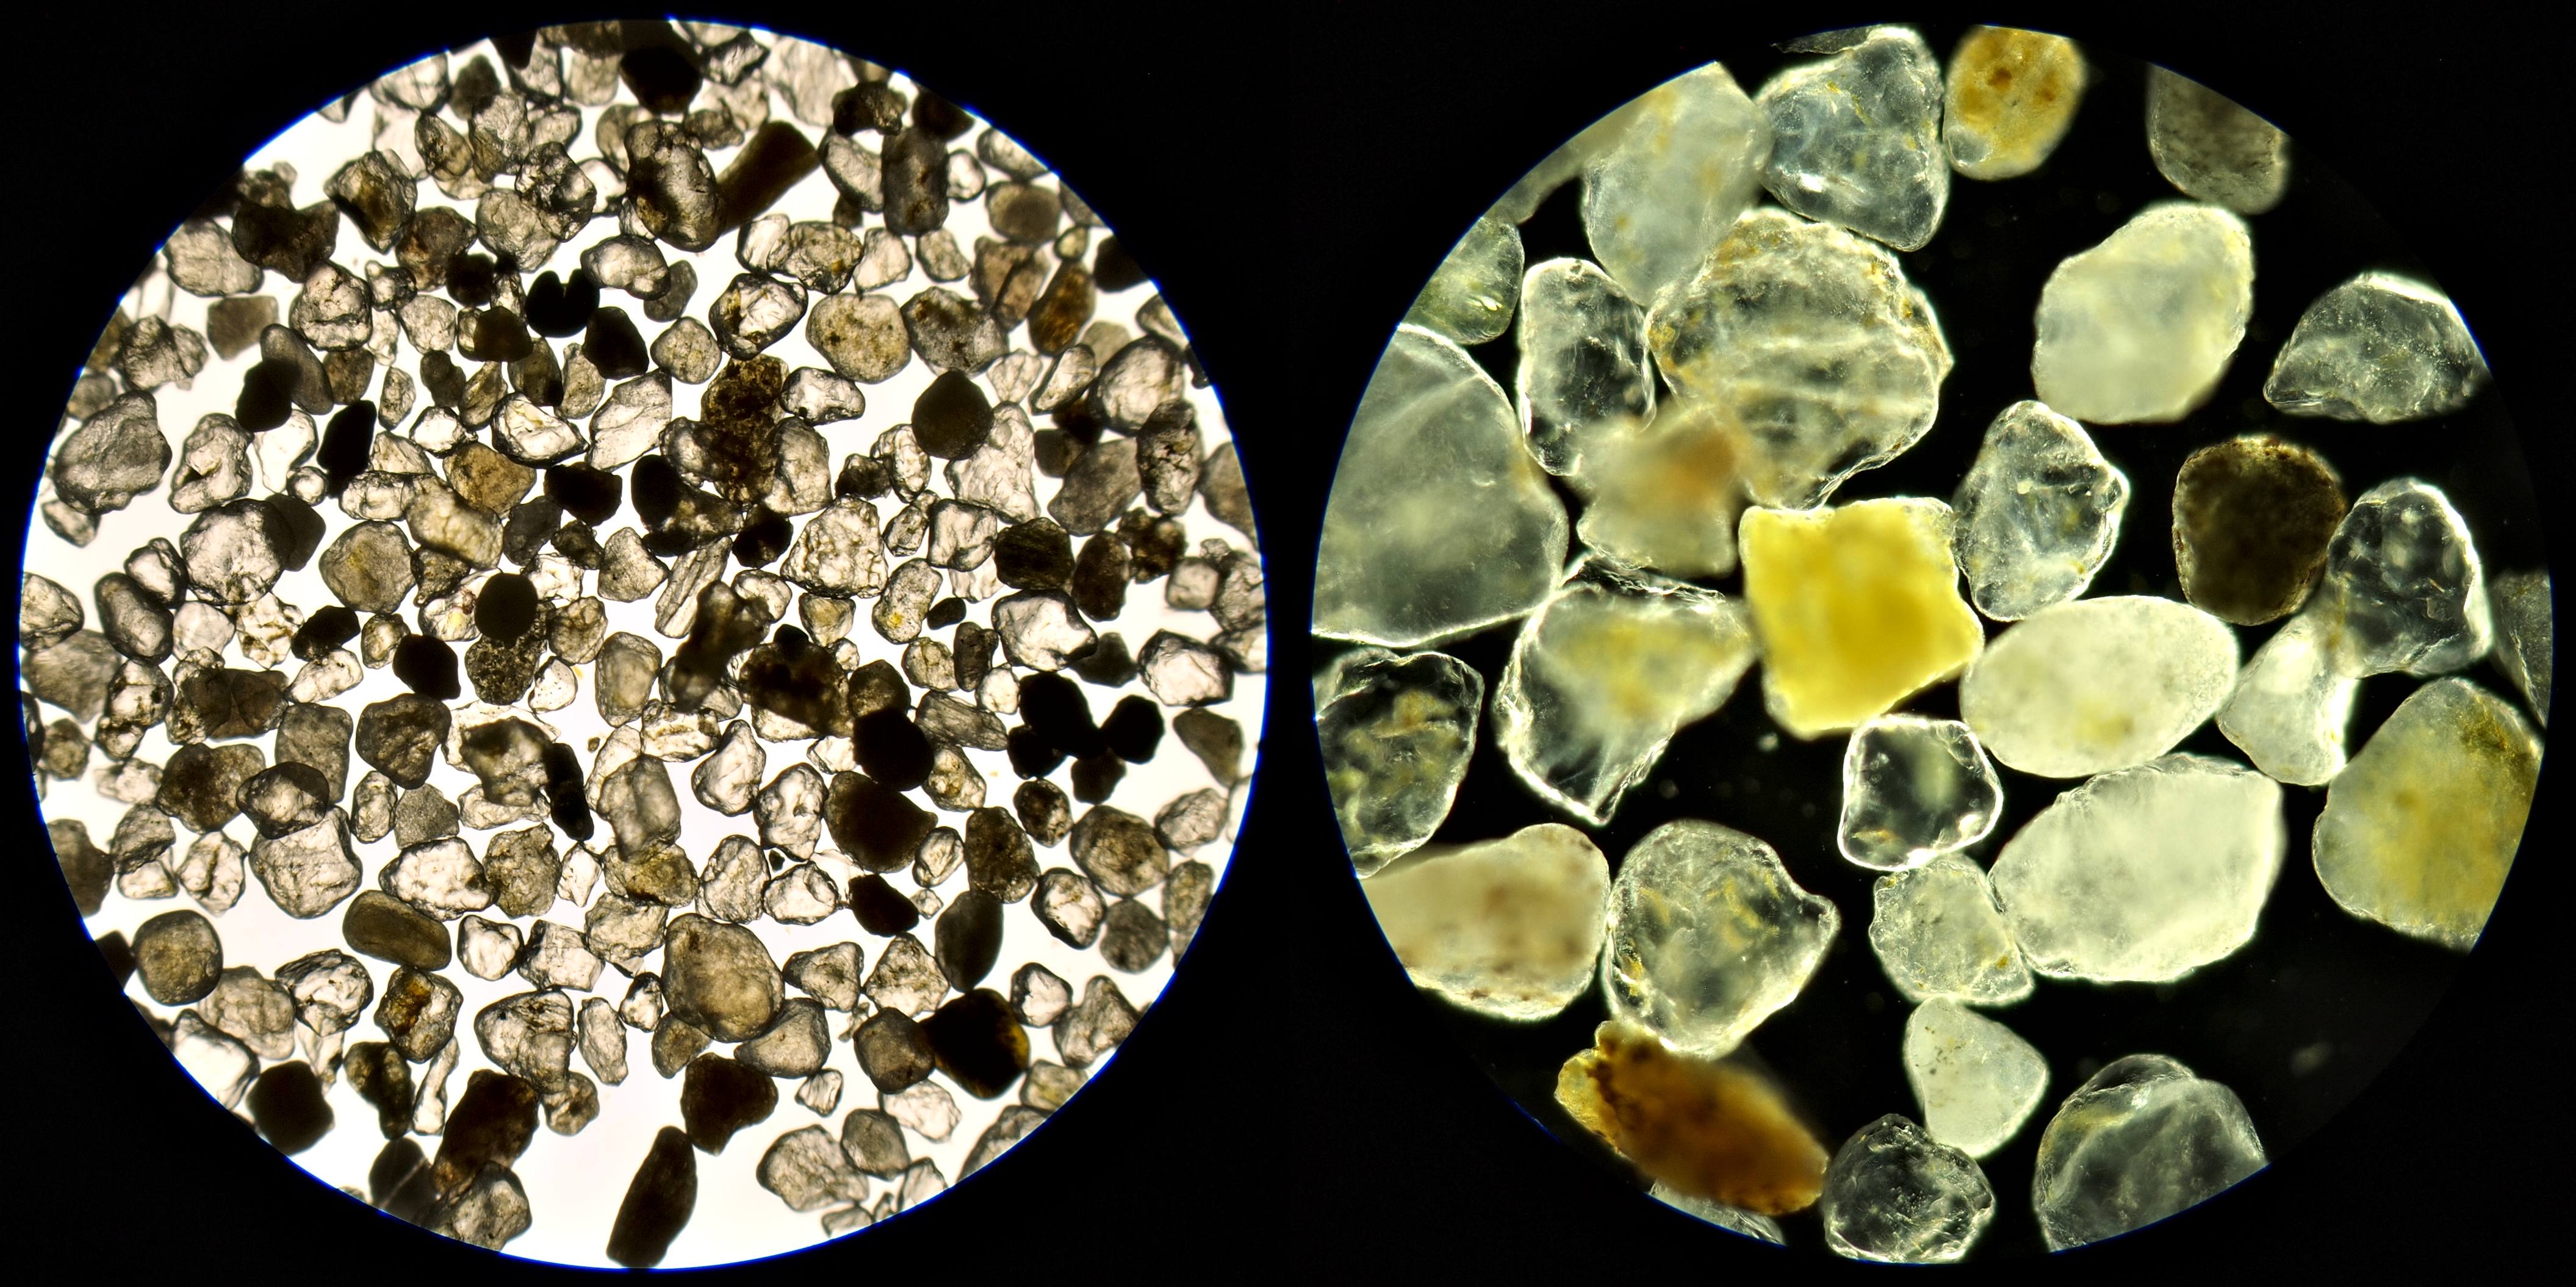
Red sand from Namib-Naukluft National Park, Namibia. Photographed in brightfield (left) and darkfield (right) with Olympus 4/0.10.
Technique
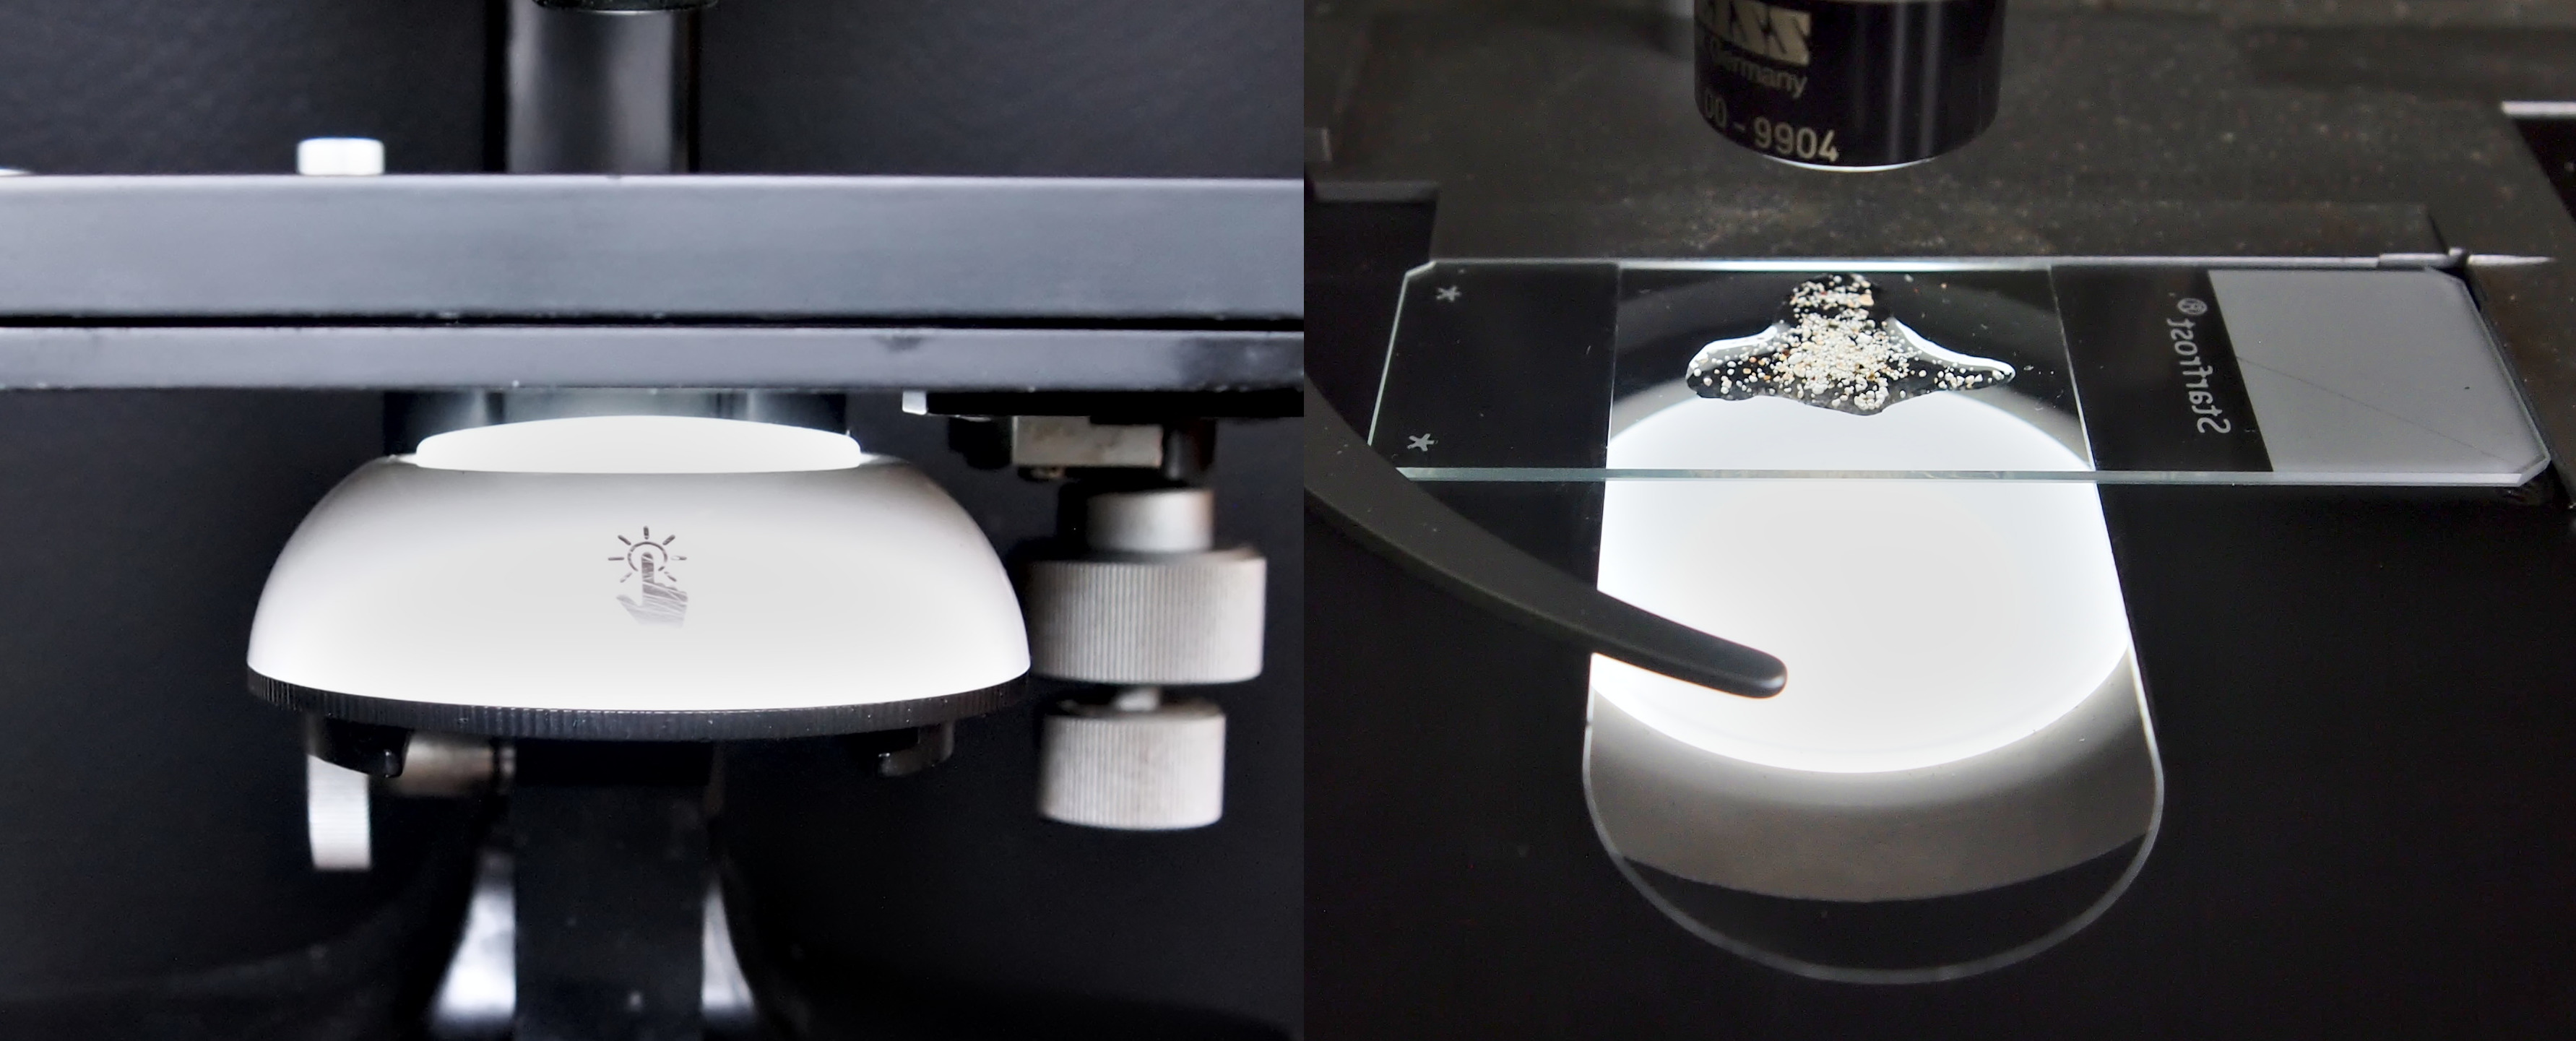
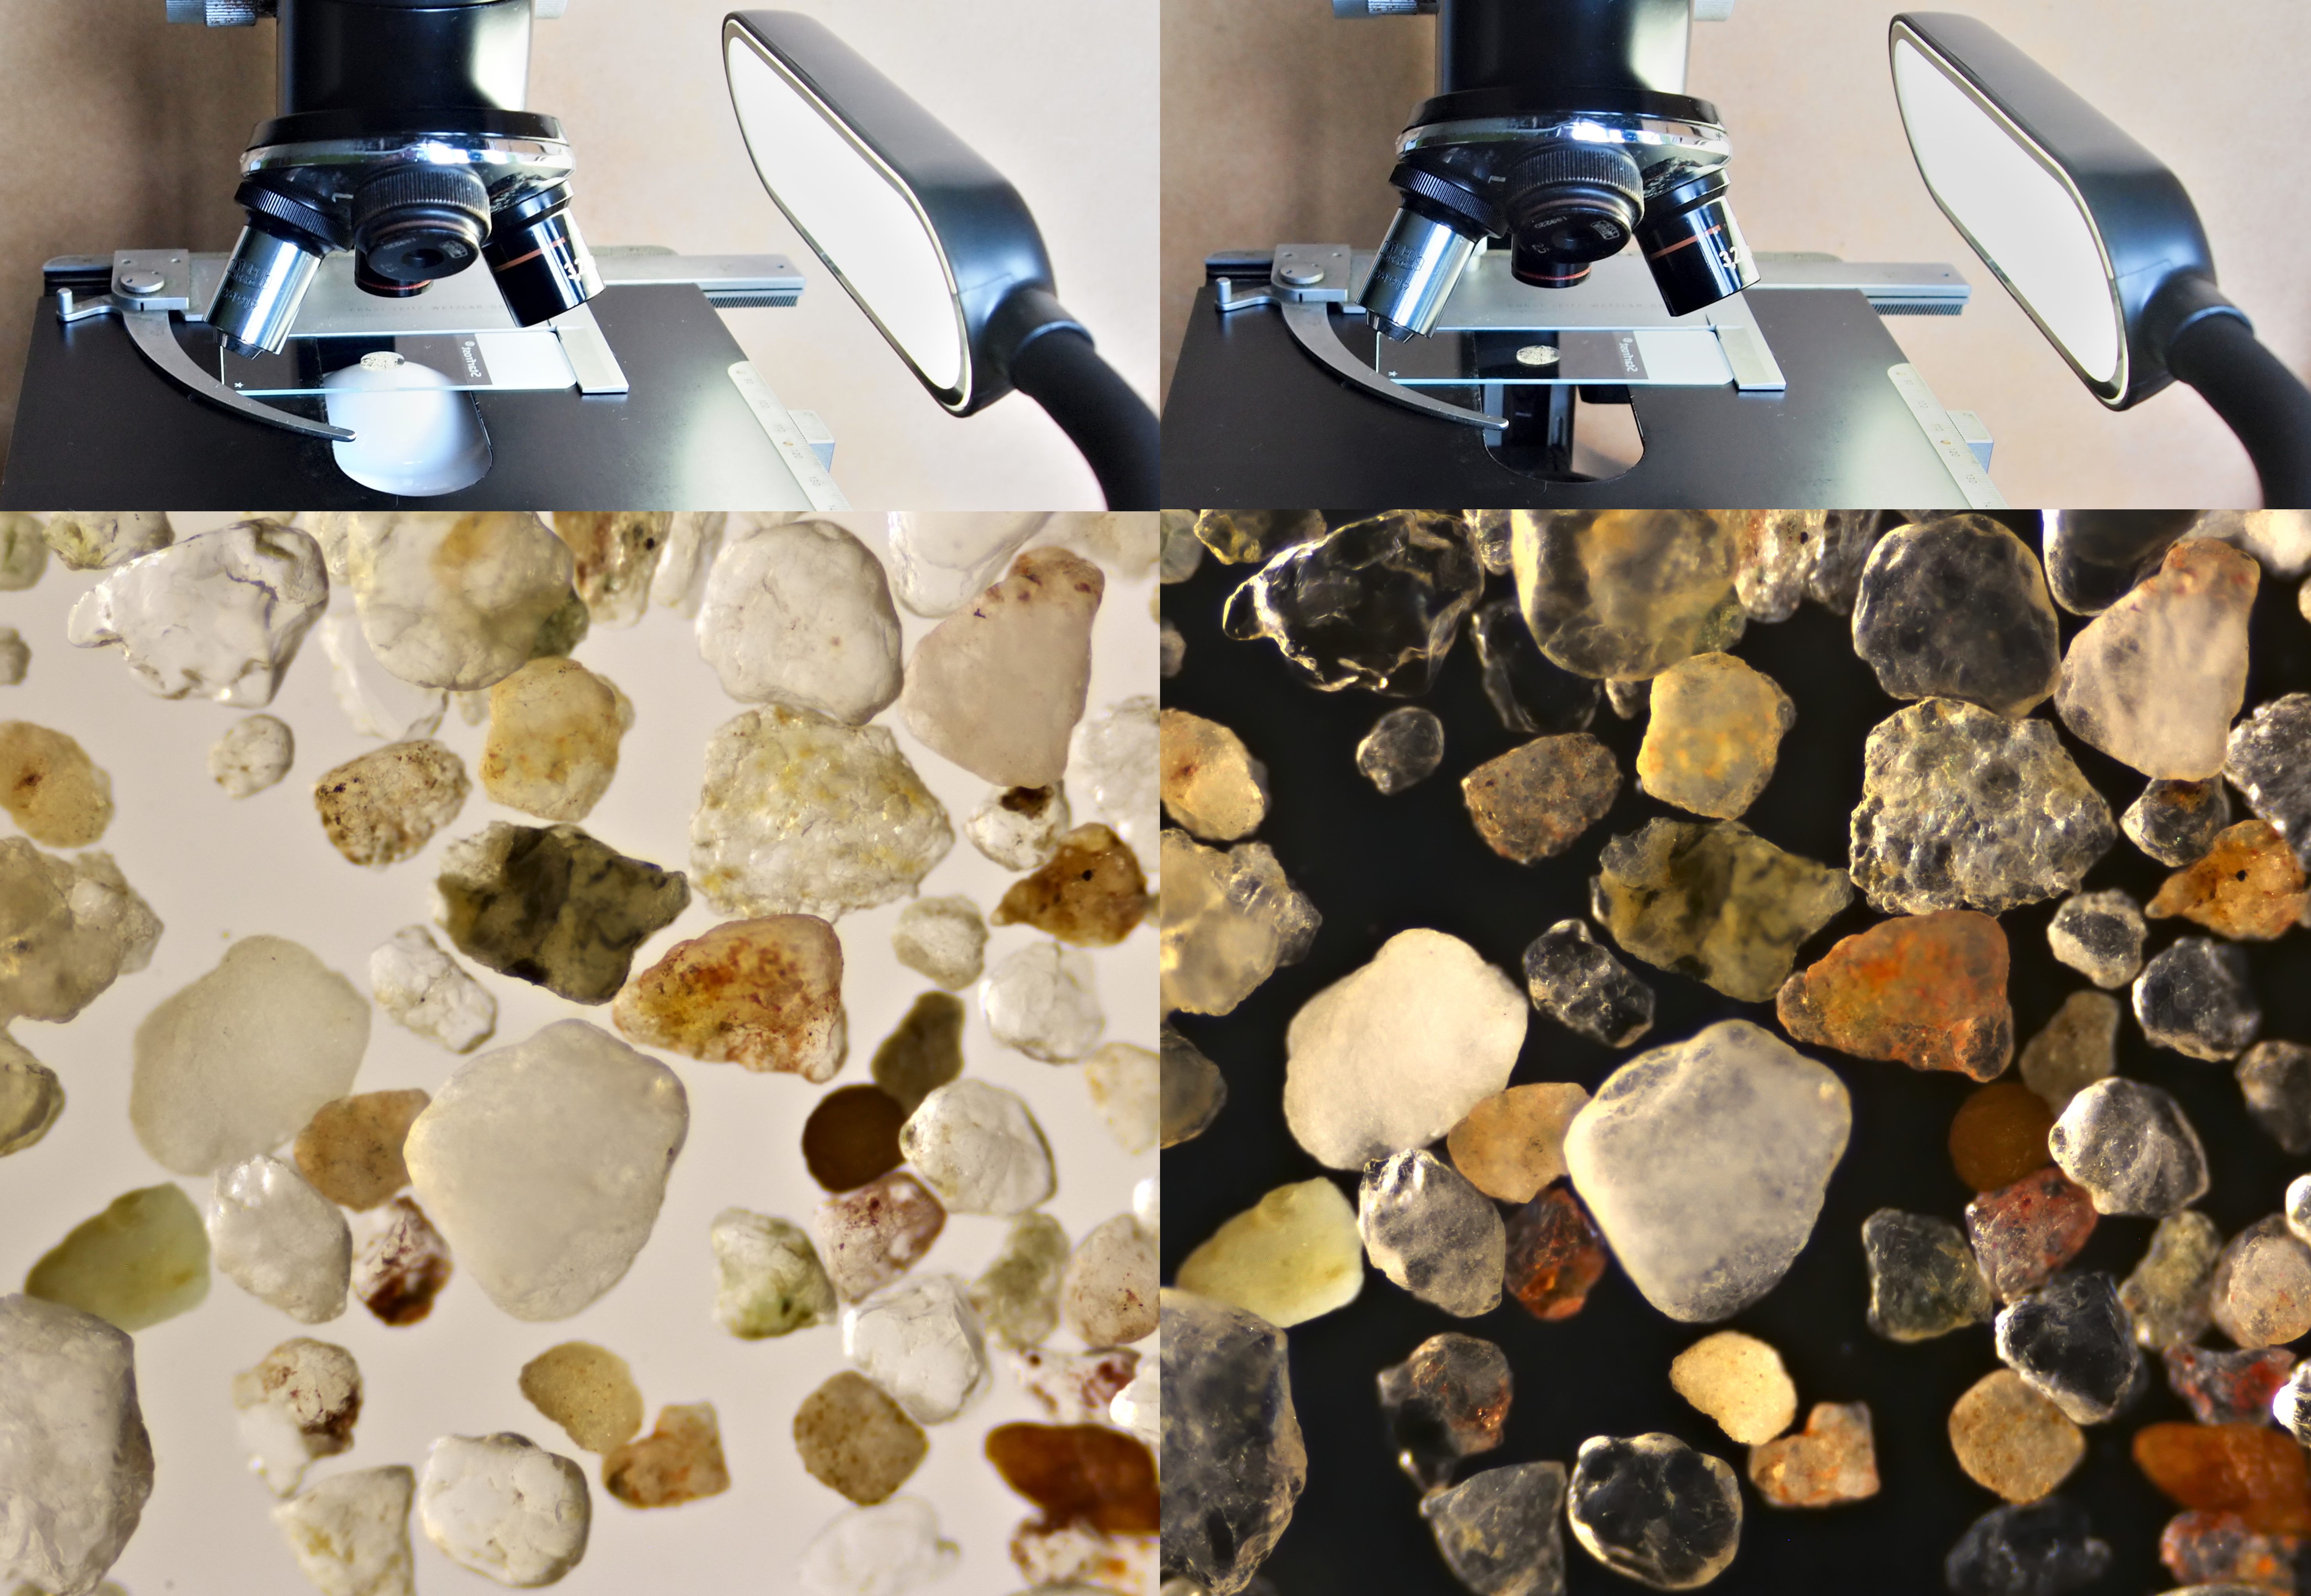
Before I put sand under the microscope, I wash it with tap water. I add some water to the sand in a jar and then shake it. I let the sand grains settle for a while and then pour off the water. I do this a few times until the water remains clear. Plant remains and other contamination usually float to the top and are removed in this way. I suck up some of the washed sand with a pipette and put this on a slide. Because the sand is suspended in water, the sand grains become more transparent.
For sand photography I use objectives 2.5x - 10x, depending on the grain size and the effect I want to achieve. I usually use normal achromats and some of them are fully corrected, i.e. they can be used for photography with or without an eyepiece. Some examples of fully corrected objectives are Zeiss-Winkel 2.5/0.06, Carl Zeiss 3.2/0.07 and Olympus 4/0.10 (37 mm parfocal length). I usually use these objectives with an Olympus P10x eyepiece that then serves as a projection eyepiece. Some post-focusing is always necessary. I also photograph sand with the objectives mentioned by means of direct projection: the image of the objective is projected onto the camera sensor without the intervention of an eyepiece or projective. This is not possible with every microscope because with some microscopes, disturbing reflections can occur due to the lack of optics in the photo tube. One of the microscopes I use for direct projection is a black Leitz microscope, the Laborlux II, from which I've removed the tube lens. The distance from the objective mount on the nosepiece to the bayonet mount of the CANON EOS 600D is approximately 185 mm.
When I photograph sand in brightfield illumination, I usually do not use a condenser. I then use a Noviplast LED lamp on batteries as a light source. This gives a diffuse light that illuminates the entire aperture of the objective. I place the lamp on the condenser holder and this is set as high as possible. For darkfield lighting I use a darkfield condenser or just a black circle that I place on the LED lamp.
Illumination of sand with a Noviplast LED lamp. Left: LED lamp placed on condenser holder. Left: slide with sand in water.
Street sand photographed with brightfield illumination (left) and darkfield illumination (right). Both illumination techniques show different details. The colours and the 'glassy' character of the sand grains are particularly visible in darkfield. Objective: Carl Zeiss 3.2/0.07.
Illuminations
I experimented a bit with different illumination techniques. I noticed that some combinations of different illumination techniques can give interesting results. The colors in sand grains, for example, become more visible with darkfield illumination or with incident light at an angle. For incident light, I usually use a Jansjö LED lamp (IKEA) where I apply a diffuser or a piece of paper to get a more diffused light. This reduces disturbing light reflections.
The effect of different lighting techniques becomes clear in the following images. Here I illuminated the sand in different ways and I also tested combinations of different illumination techniques. I also looked at the effect of the color temperature of the light source. The Jansjö LED lamp normally gives a yellowish light that can be corrected with a blue filter to create white light. However, with a higher color temperature, the sand grains appeared to have less pronounced colors.
Sand from the Kennemerduinen photographed with Leitz 4/0.12 and illuminated in different ways. Upper 3 images, from left to right:
1. darkfield illumination,
2. brightfield illumination
3. oblique illumination.
Lower 3 images, from left to right:
4. Jansjö with blue filter, illumination from 1 site
5. Jansjö with blue filter, illumination from 1 site combined with brightfield illumination
6. Jansjö without blue filter, illumination from 1 site combined with brightfield illumination
It is striking that transparent sand grains with the combination of bright field illumination and illumination from one side appear very dark, as if they are black (images 5 and 6). This, of course, does not correspond to reality. Actual color differences are better represented with pure incident light (illumination from 1 side), brightfield and darkfield illumination.
There are many ways to illuminate sand, and it's recommended to experiment. The background and type of light have a significant impact on how the grains look. Currently, I'm using a diffuse LED lamp with a large surface area, as shown below.
Left: Sand photographed with incident light from the side and a white background. The white background has a dome-shaped surface, which reflects more light toward the specimen in the center than at the edge. Right: illumination without the white background. This creates a dark-field effect. The sand was photographed using direct projection with a Leitz Laborlux II and a generic Plan 4/0.10.
Australian sand photographed with different illumination techniques. Left: brightfield illumination. Center: incident light with a white background. Right: darkfield illumination using a dry Leitz darkfield condenser. Objective: Olympus 10/0.25, direct projection.
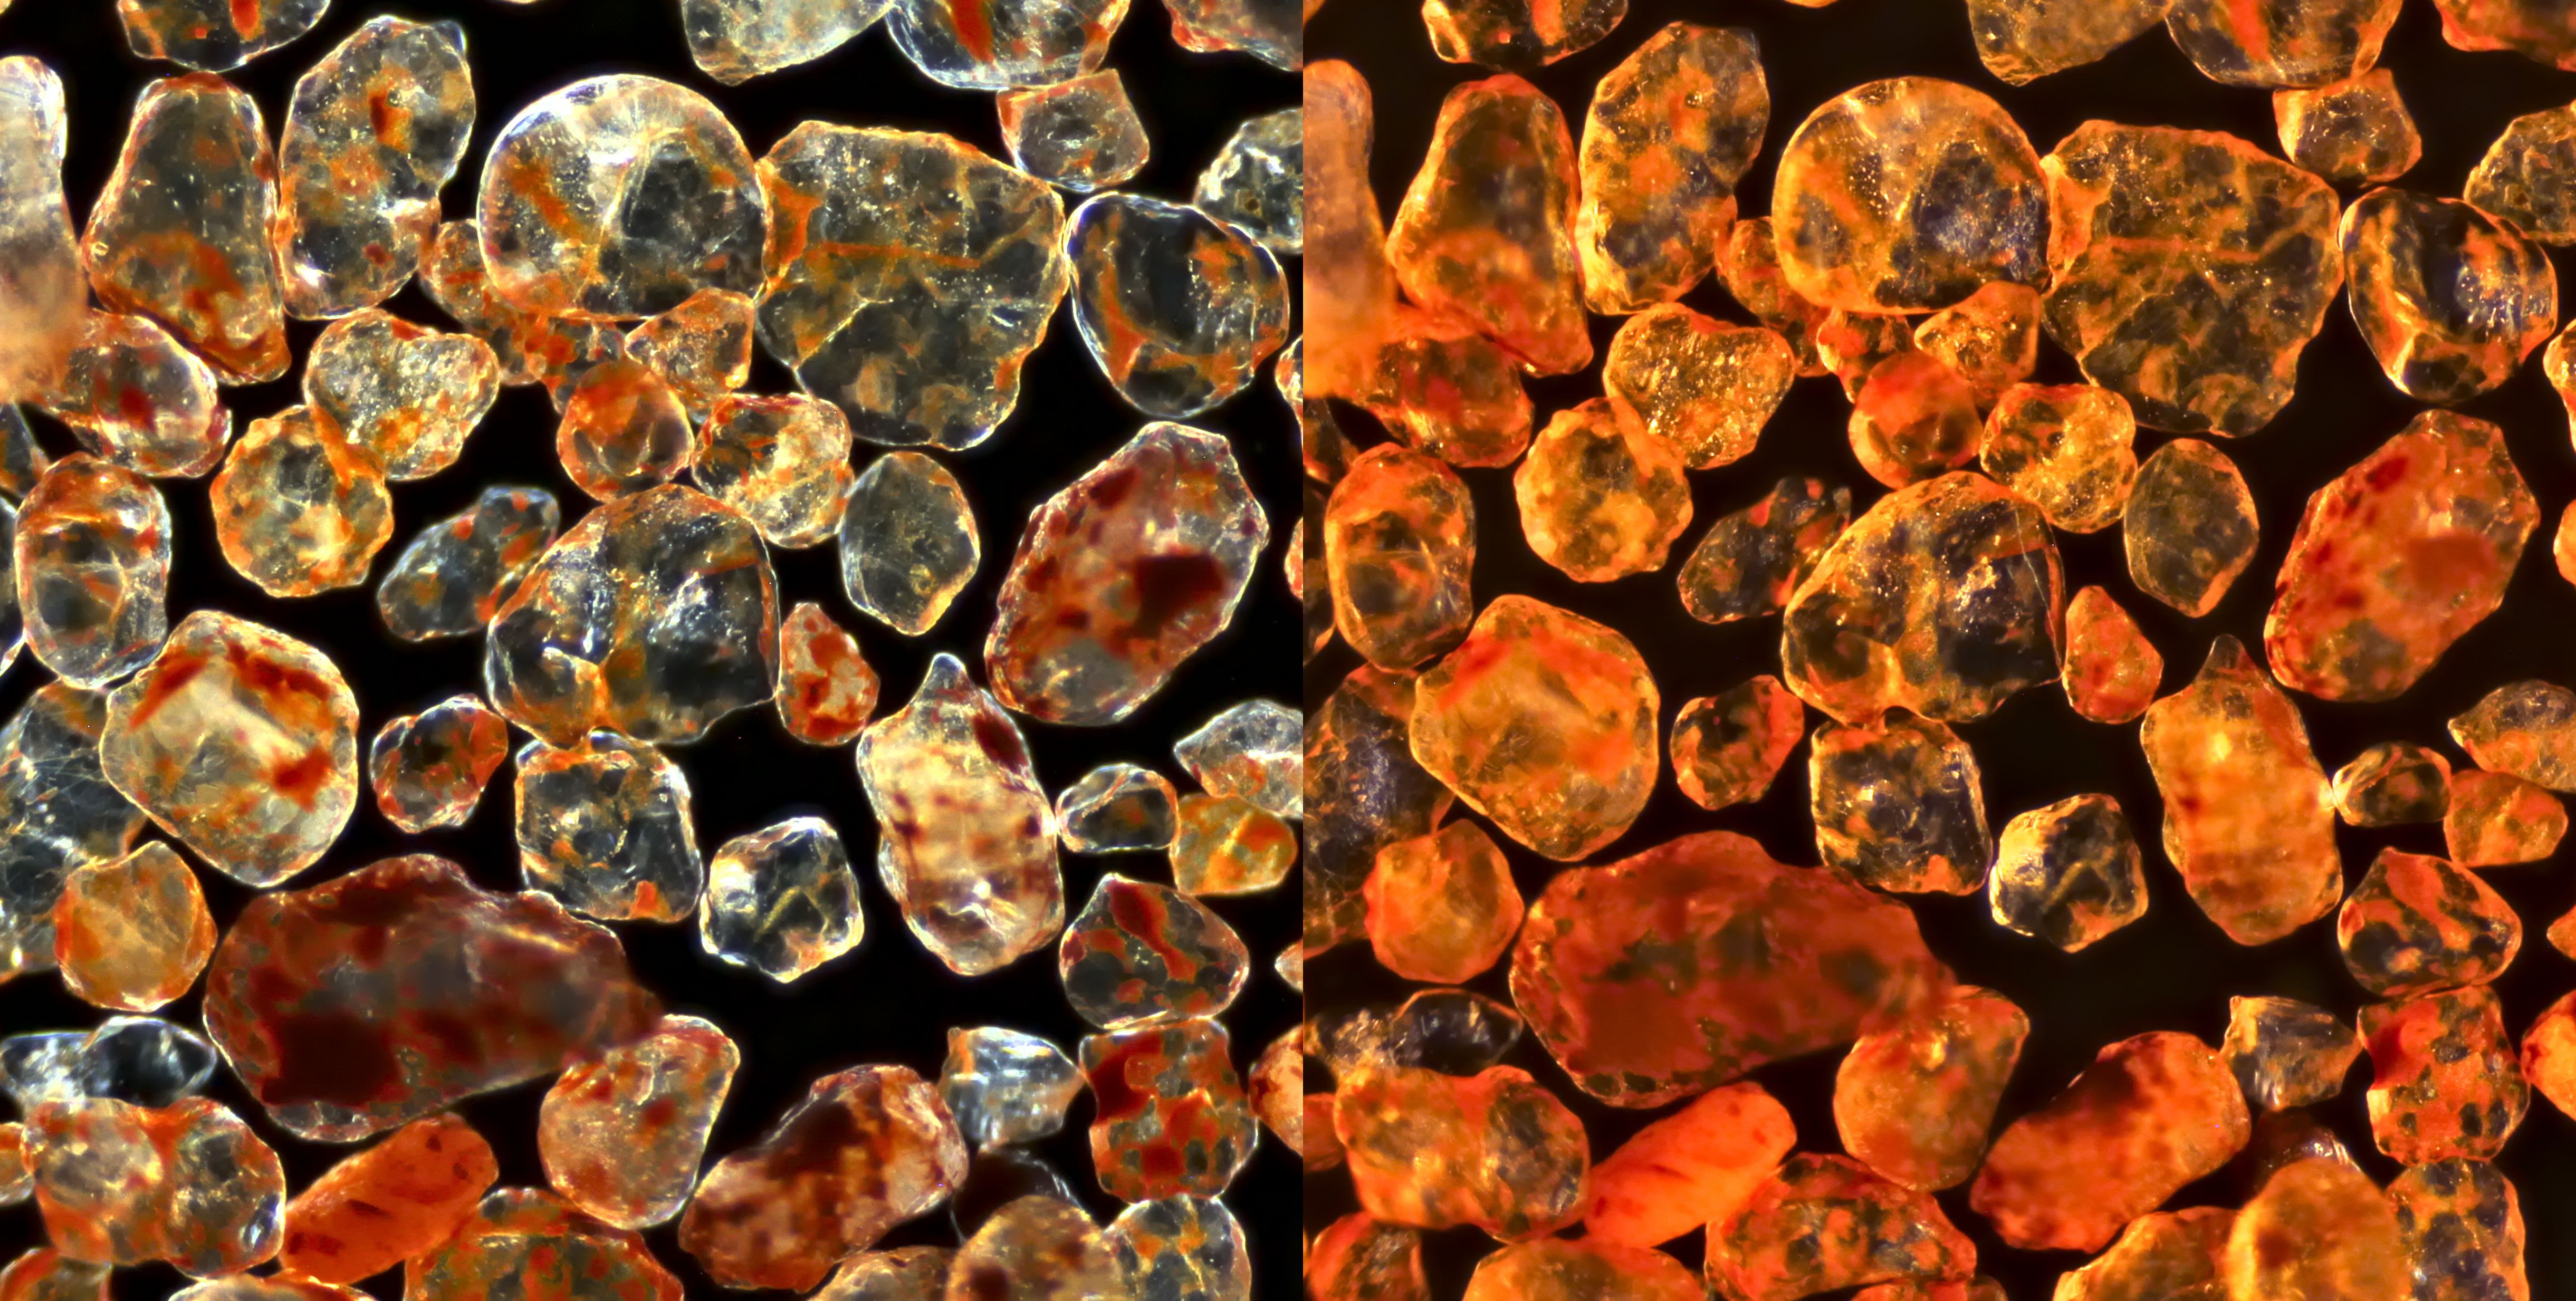
Zand uit Australië gefotografeerd in donkerveld-belichting (links) en opvallend licht met een zwarte achtergrond (rechts). Voor het donkerveld werd een droge Leitz donkerveld-condensor gebruikt. De kleur-nuances zijn beter zichtbaar met donkerveld-belichting. Objectief: Plan 4/0.10.
Direct projection
Lately, I've been photographing sand exclusively using direct projection. The lenses used for this purpose must be fully corrected, meaning they don't require correction from a compensating eyepiece. Many older achromats with magnifications of 2.5x-10x are suitable for this. All Leitz and Olympus achromats 2.5x-10x with a 37 mm parfocal length require little to no correction. For Zeiss-Winkel, these are the 2.5/0.06, 4/0.10, and 10/0.25 objectives. There's only one Carl Zeiss objective suitable for direct projection: the 3.2/0.07. The lower-magnification, older Carl Zeiss Jena achromats with short barrel can also be used without an eyepiece. For generic optics, it's generally true that all achromats ≤ 10/0.25 can be used without correction. As soon as an objective is better corrected than a normal achromat, correction by an compensating eyepiece is necessary. This applies to almost all plan achromats, (plan) fluorites, and (plan) apochromats. There will, of course, always be some exceptions.
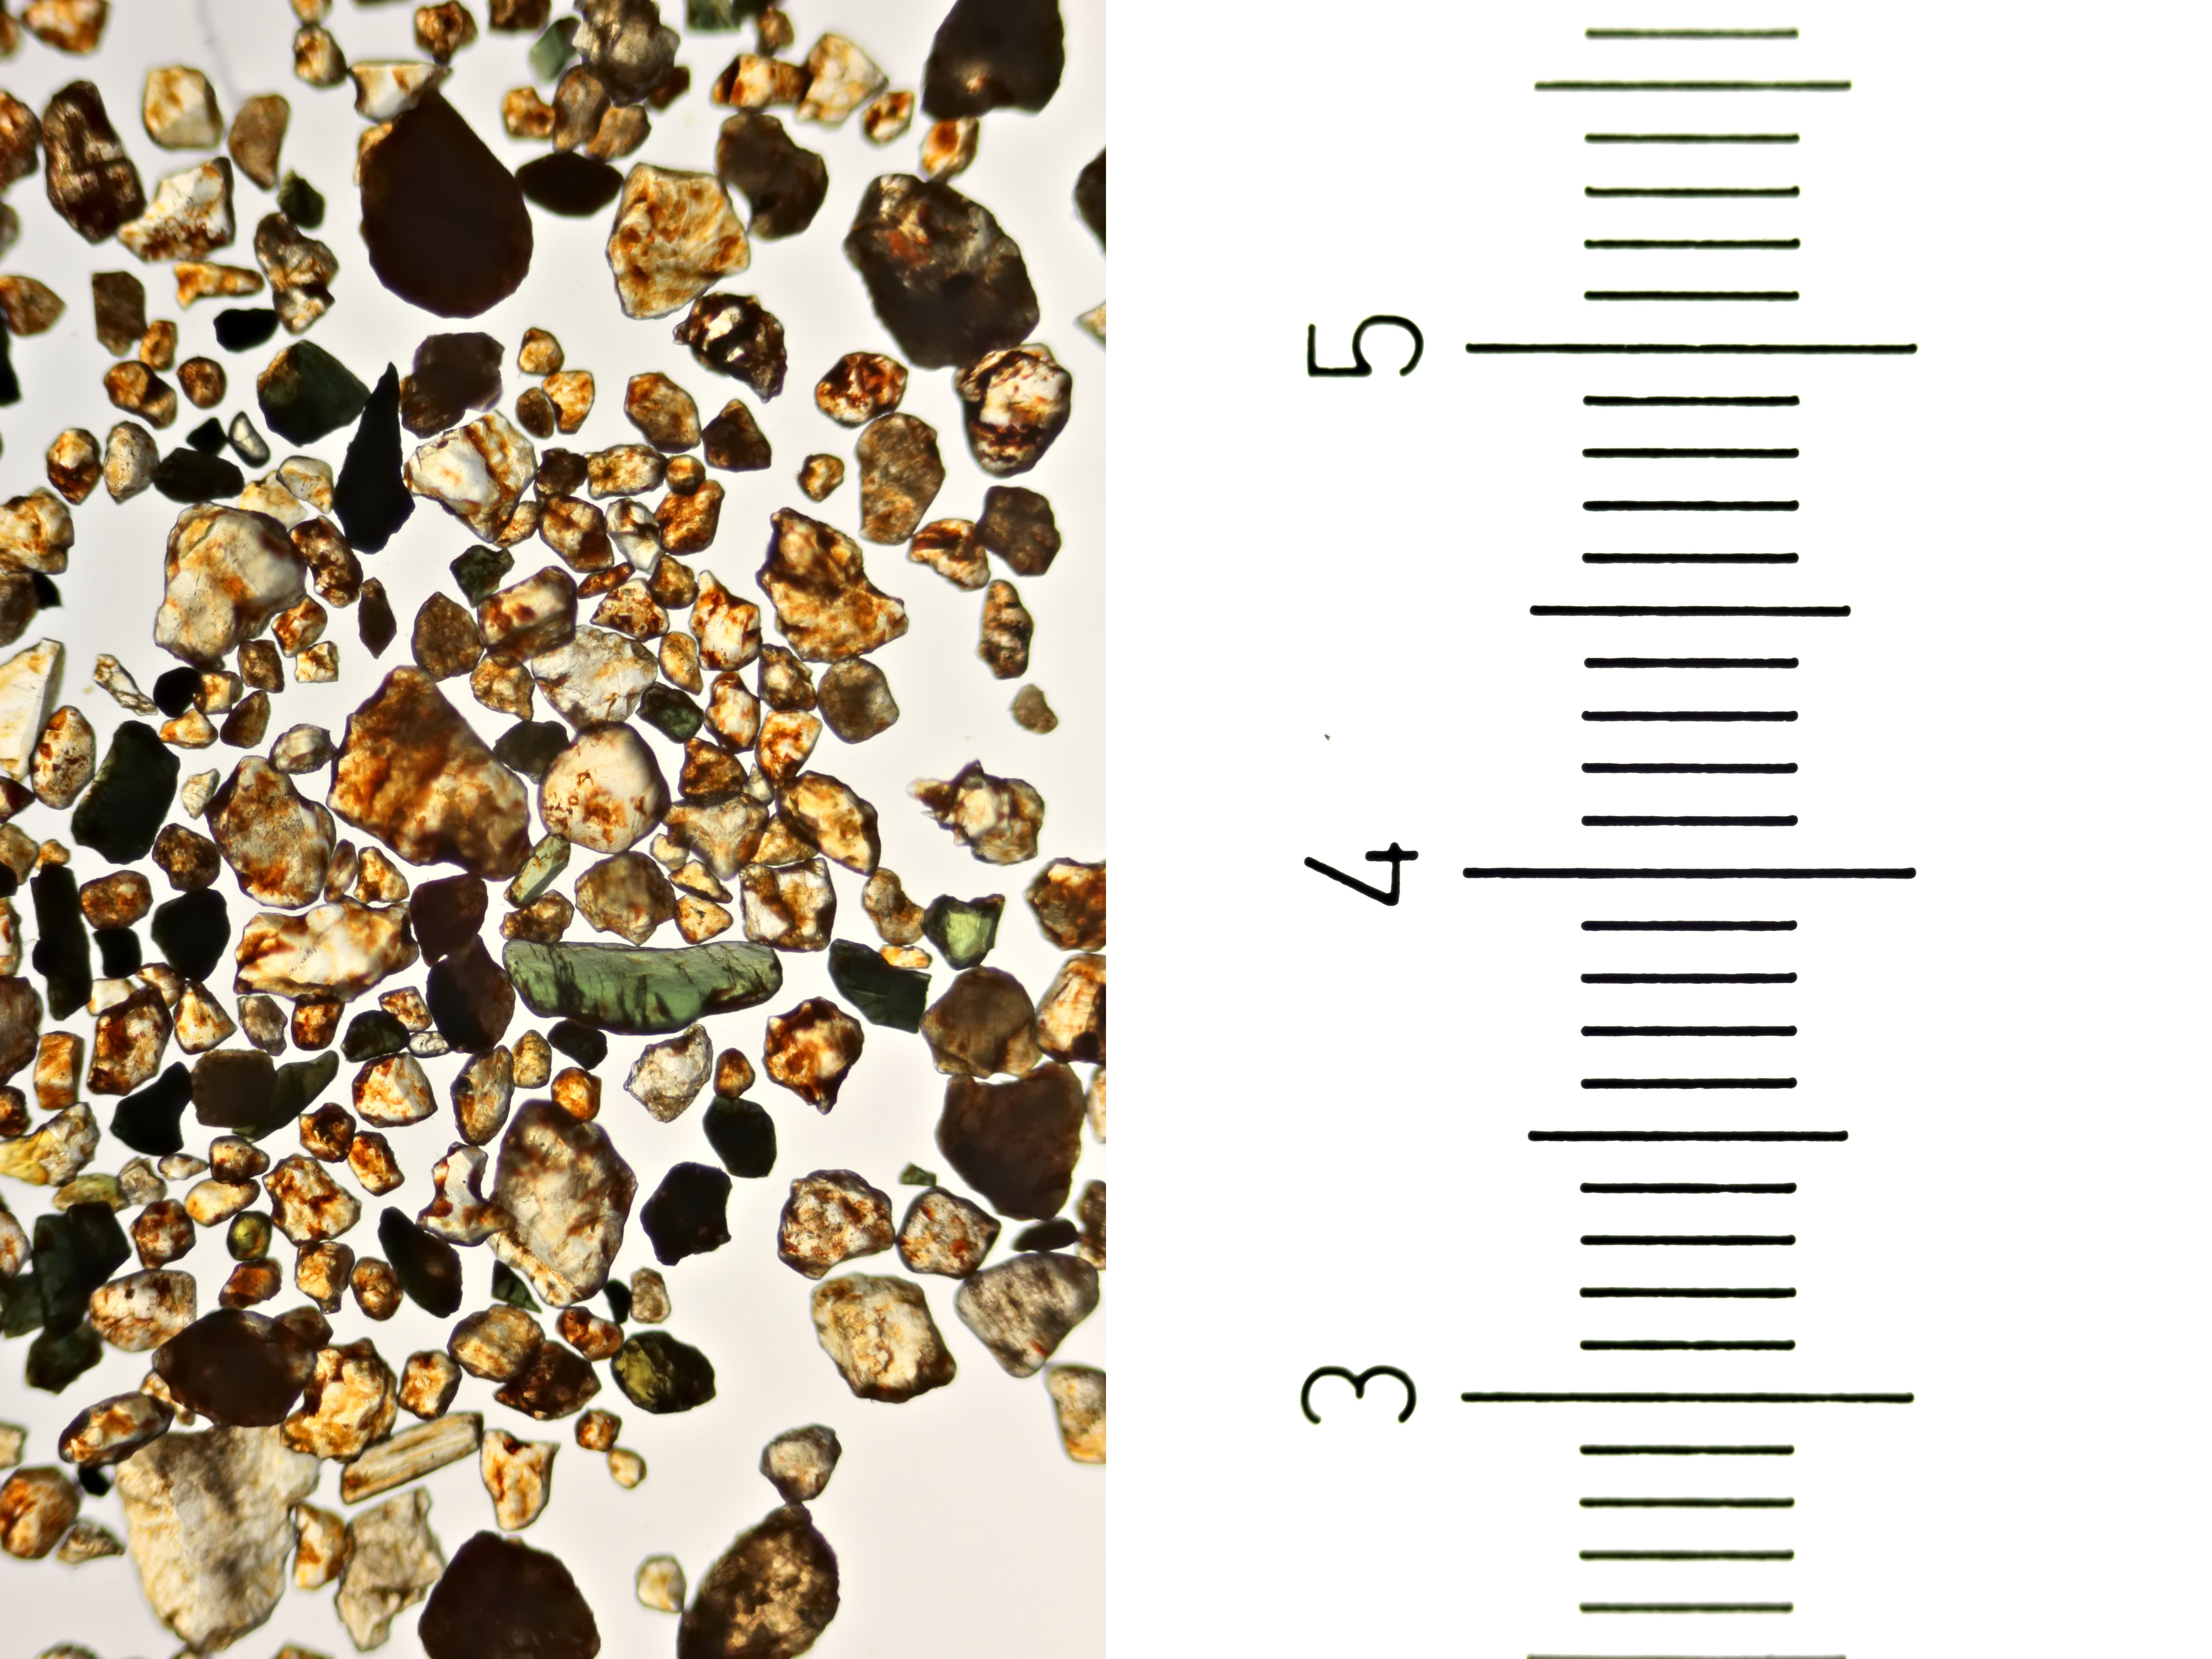
Sand from Namibia (left) and an eyepiece micrometer (right) photographed using direct projection with an Olympus 4/0.10 objective. The eyepiece micrometer reveals that this objective does not need correction; there is no chromatic aberration visible, only a slight edge blur because this is not a plan-corrected lens. The graduations (distance between two lines) are 100 μm.
Sand from Namibia (left) and an eyepiece micrometer (right) photographed using direct projection with an Olympus 10/0.25 objective. Here too, no chromatic aberration is visible towards the edges. The graduations (distance between two lines) are 100 μm.
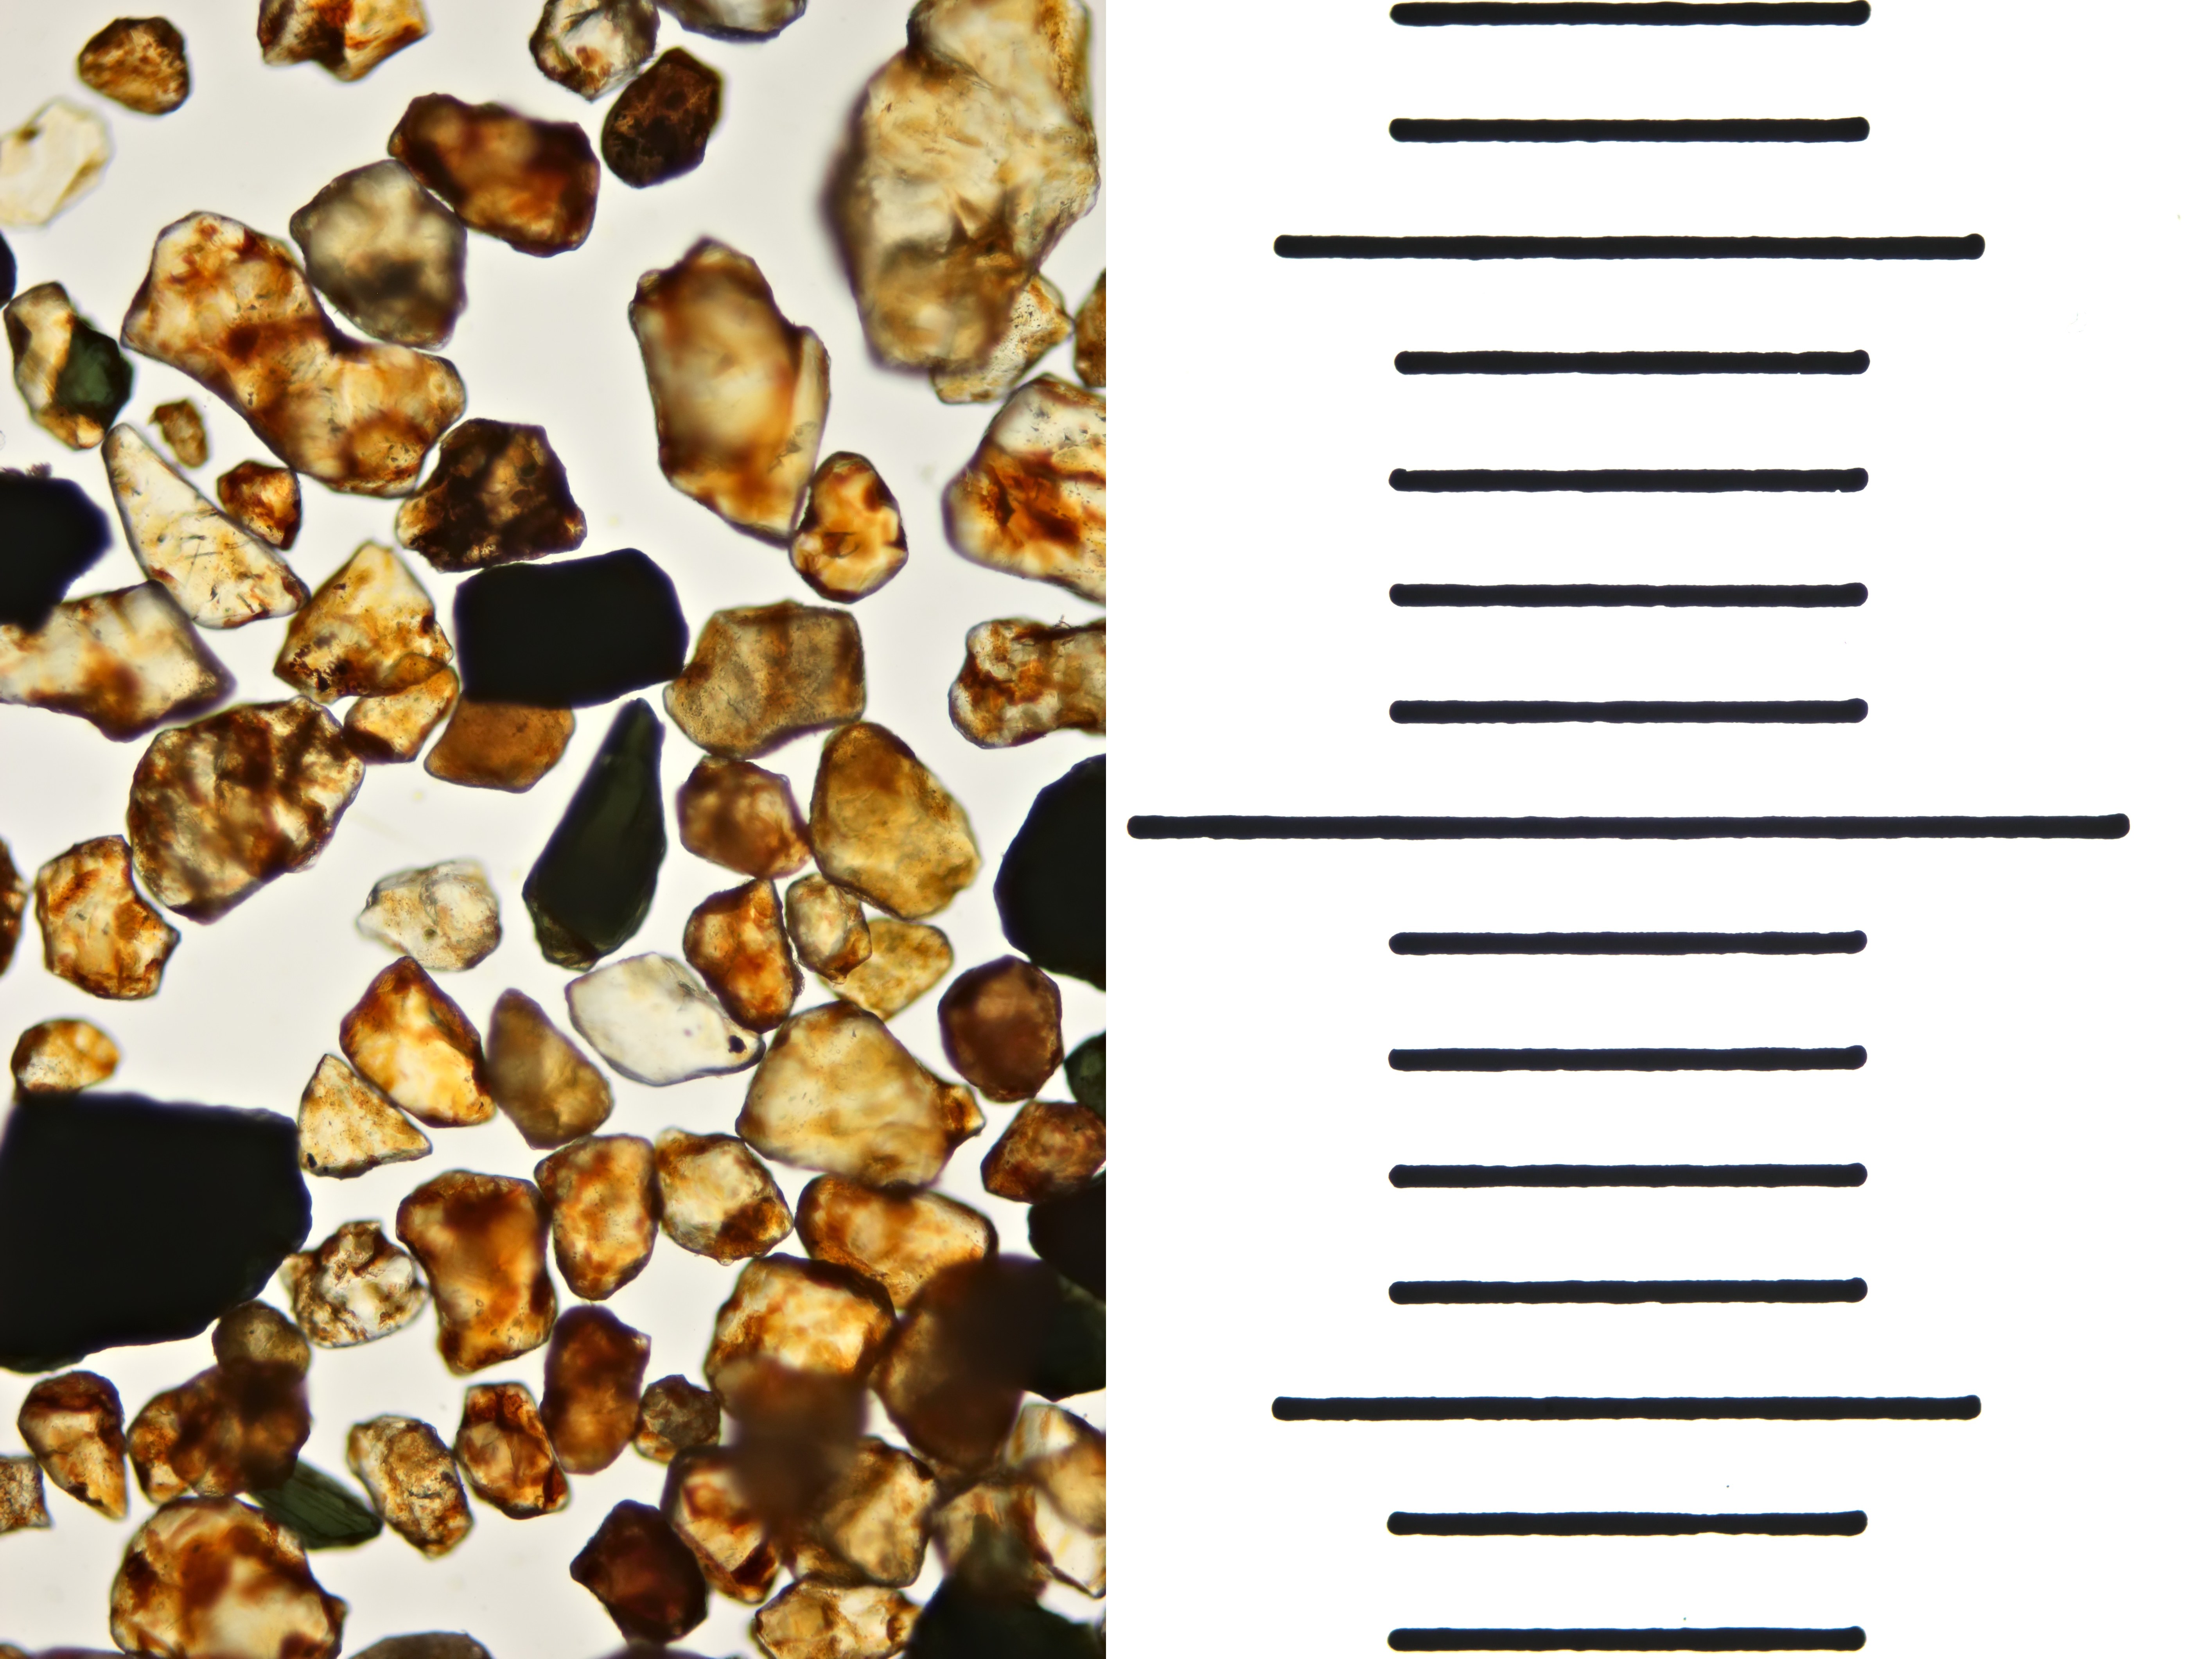
Eyepiece micrometer and sand photographed using a Carl Zeiss Jena 8/0.20 objective and direct projection. The eyepiece micrometer shows that there is virtually no chromatic aberration. The distance two lines is 100 μm.
Conclusion
To best capture the visual characteristics of sand, various lighting methods are needed. The most suitable lighting method depends on the sand type. Transparent sand grains are best observed with transmitted light (brightfield) and darkfield illumination. Less transparent sand grains are best photographed with incident light against a black background. In transparent sand, the colors are rendered very well with darkfield illumination.