Introduction
Anyone wishing to perform microphotography by projection using a system camera will soon encounter the problem of how to connect the camera to the microscope. Current commercial microscope adapters are completely unsuitable for connecting a system camera to a microscope with finite optics. These adapters do not take into account the fact that the image from the microscope objective needs to be corrected. Furthermore, it is usually not possible to set the correct distance from the projective or eyepiece to the camera sensor. The IHAGEE adapter that I have discussed frequently is only available on the second-hand market, and it can be difficult to find one that is complete.
I have found an adapter that somewhat resembles the IHAGEE and can be ordered new via the internet. It is a telescope adapter from Bresser with the following specifications: 1.25"/2"+T2 thread. The inner diameter is too wide for a standard 25 mm microscope tube, but there is a solution for this as well: a piece of tubing with the correct inner and outer diameter. The telescope adapter has an inner diameter of 32 mm. Cardboard, tape, or a piece of rubber tubing can be used to fill the space between the adapter and the microscope tube. The adapter can then be attached to the tube using the internal clamping ring. A system camera can then be connected immediately via a T2 ring and optionally an intermediate ring. With this adapter, the distance from the projective to the camera sensor can also be varied so that parfocality can be adjusted. A very stable coupling of camera to microscope is possible when performed correctly.
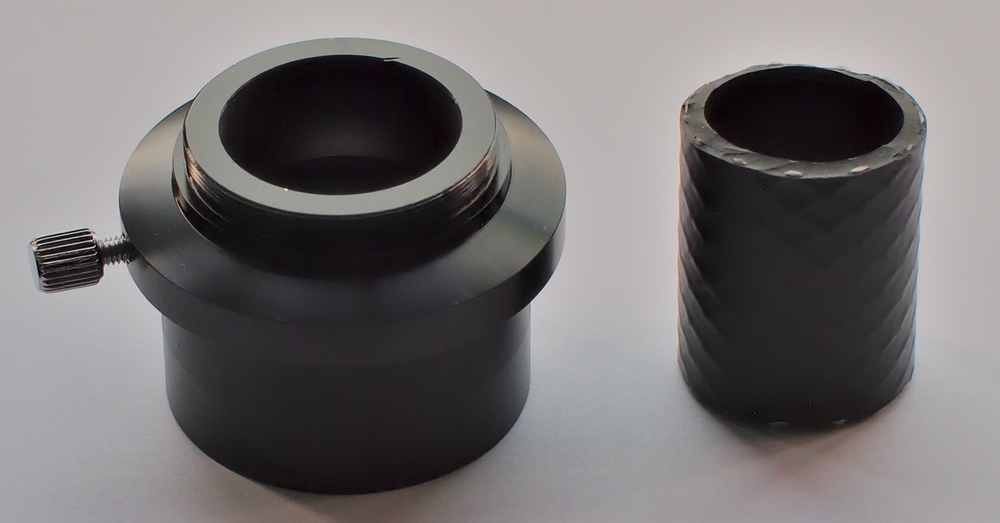
Left: Bresser telescope adapter. Right: piece of tubing with an inner diameter of approx. 25 mm and an outer diameter of 31 mm. The outer diameter of the piece of tubing must be such that the adapter clamps more or less securely even before the clamping ring is tightened. However, it must be possible to slide the adapter over the microscope phototube without much effort.
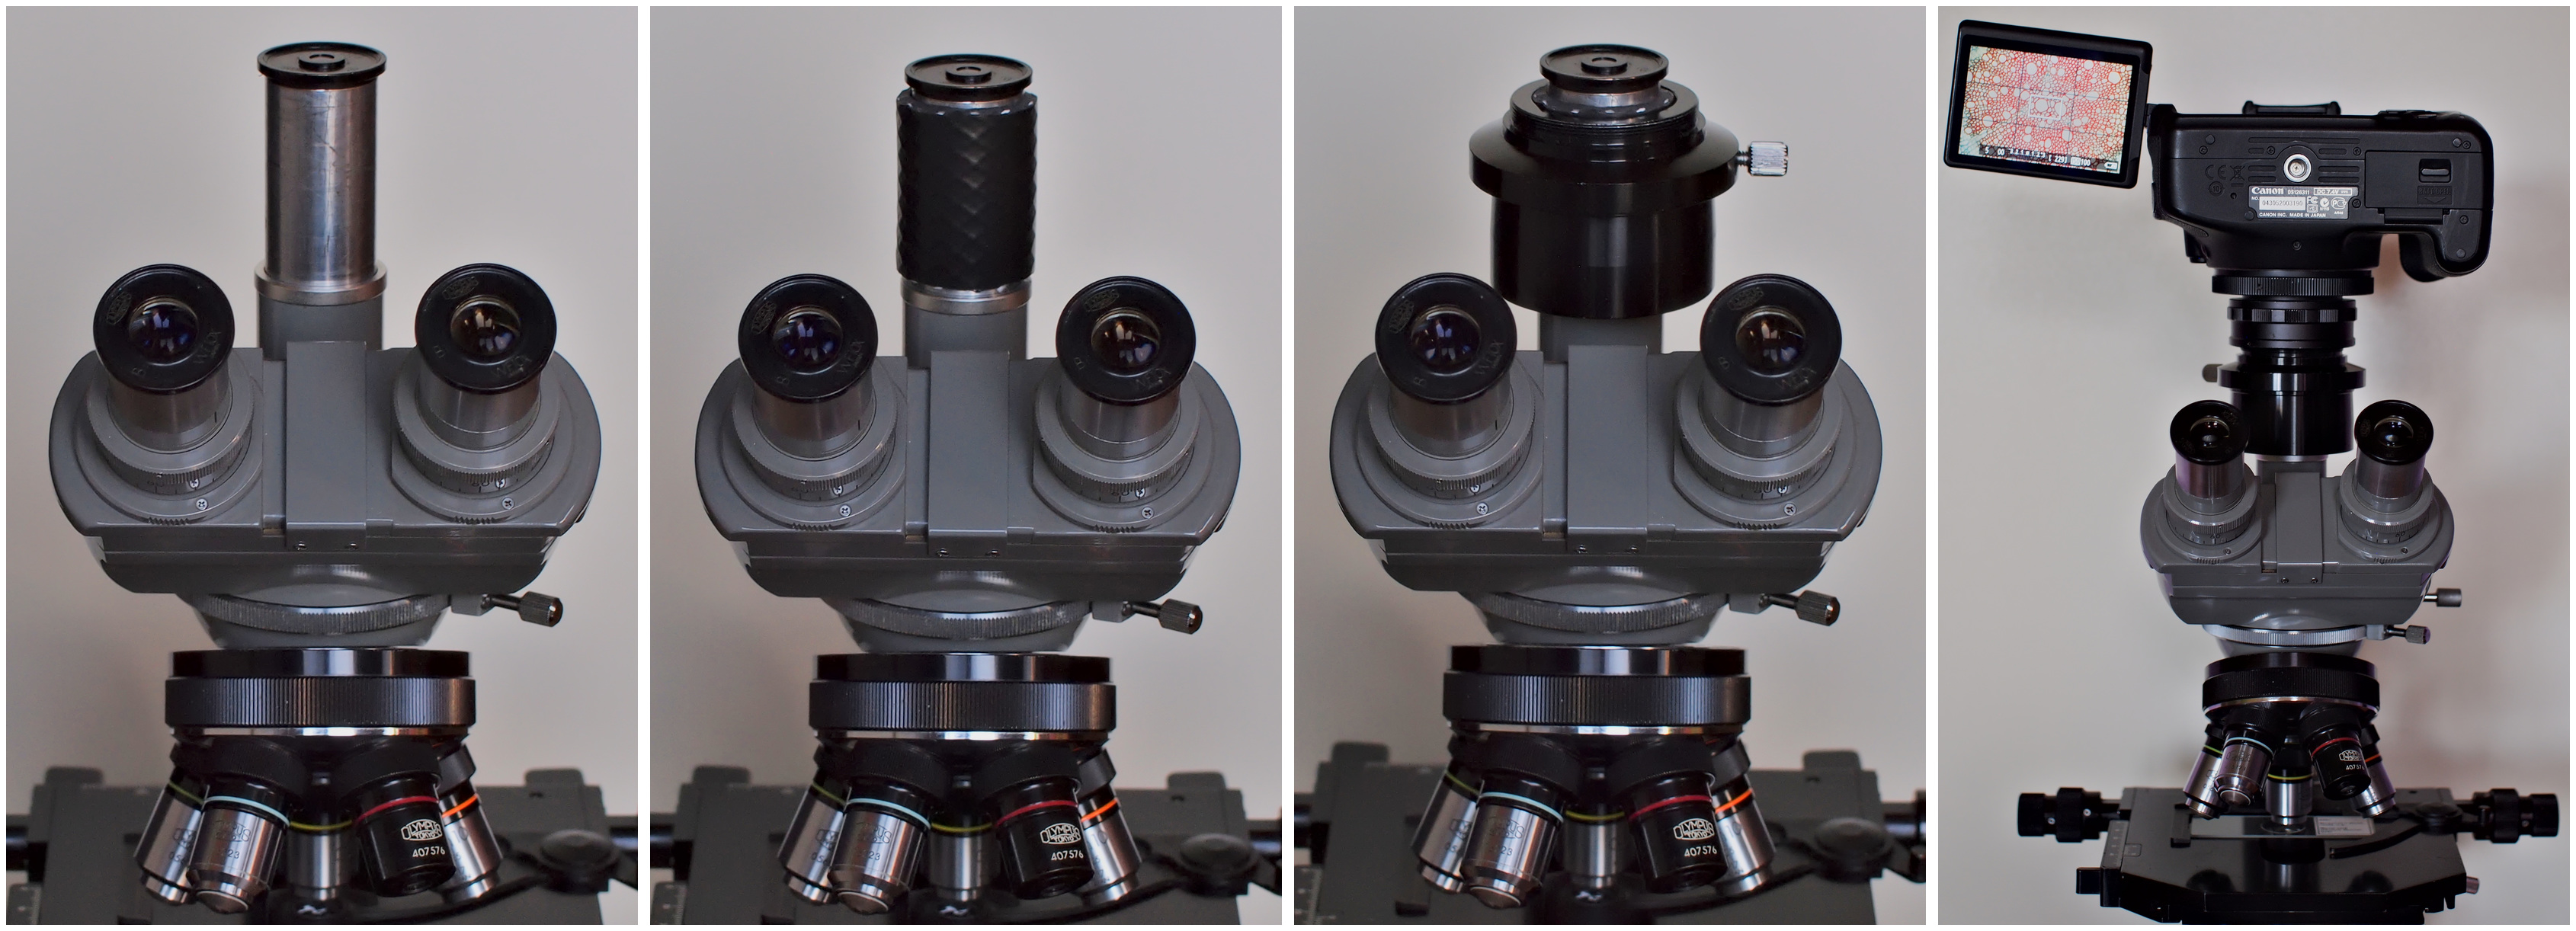
Connecting the Canon 600D camera to an Olympus E microscope. Image 1: Olympus E trinocular with standard 25 mm phototube. Image 2: A piece of rubber tubing is fitted around the phototube. It is important that the adapter is slid completely over the rubber tubing to ensure a stable assembly. Image 3: Telescope adapter is attached. Image 4: Connection of the Canon 600D using a T2 ring and extension ring. Of course, a higher T2 ring can also be chosen here so that no extension ring is needed. A higher T2 ring or extension ring will give more room for optimising the distance between camera and projective.
For anyone planning to buy a microscope and engage in serious photography, it is recommended to purchase a microscope with a standard 25 mm (outer diameter) tube. With microscopes featuring such a tube, connecting a system camera is generally much easier than when a special photo tube is present. The Olympus BH2, for example, has a non-standard photo tube where you can only connect a camera via special additional parts; the method described here does not work with it. No matter how good this microscope is, if you do not have the right parts, it is a real hassle to attach a camera to it, and moreover, the photography setup of the BH2 is only designed for Olympus NFK projectives. Furthermore, the later trinocular Zeiss tubes (e.g., tube 47 30 28) are a ‘no go’ as far as I am concerned, because they are not flexible enough to experiment and photograph with various projectives. There is not enough room to vary the distance between projective and camera.
For the following setup, I used a horseshoe stand, an Olympus GB. This microscope features an extendable tube that allows the mechanical tube length to be adjusted. For visual observation and photography, the tube should be set to 160 mm. A ring surrounds the tube, which can be conveniently used in combination with the telescope adapter. The adapter with the camera can be placed on this ring without the aforementioned piece of tubing; the ring holds the assembly in place. Be careful that the extendable tube does not sag downwards; if it moves very smoothly, secure it with tape if necessary. This camera setup is very flexible because you can easily remove the camera at any moment for visual observation or changing eyepieces/projectives. The camera rests loosely on the ring but in a reasonably stable manner. Good photos can be taken without any issues when using the self-timer. Those who desire a more secure connection can again attach a piece of tubing around the tube.
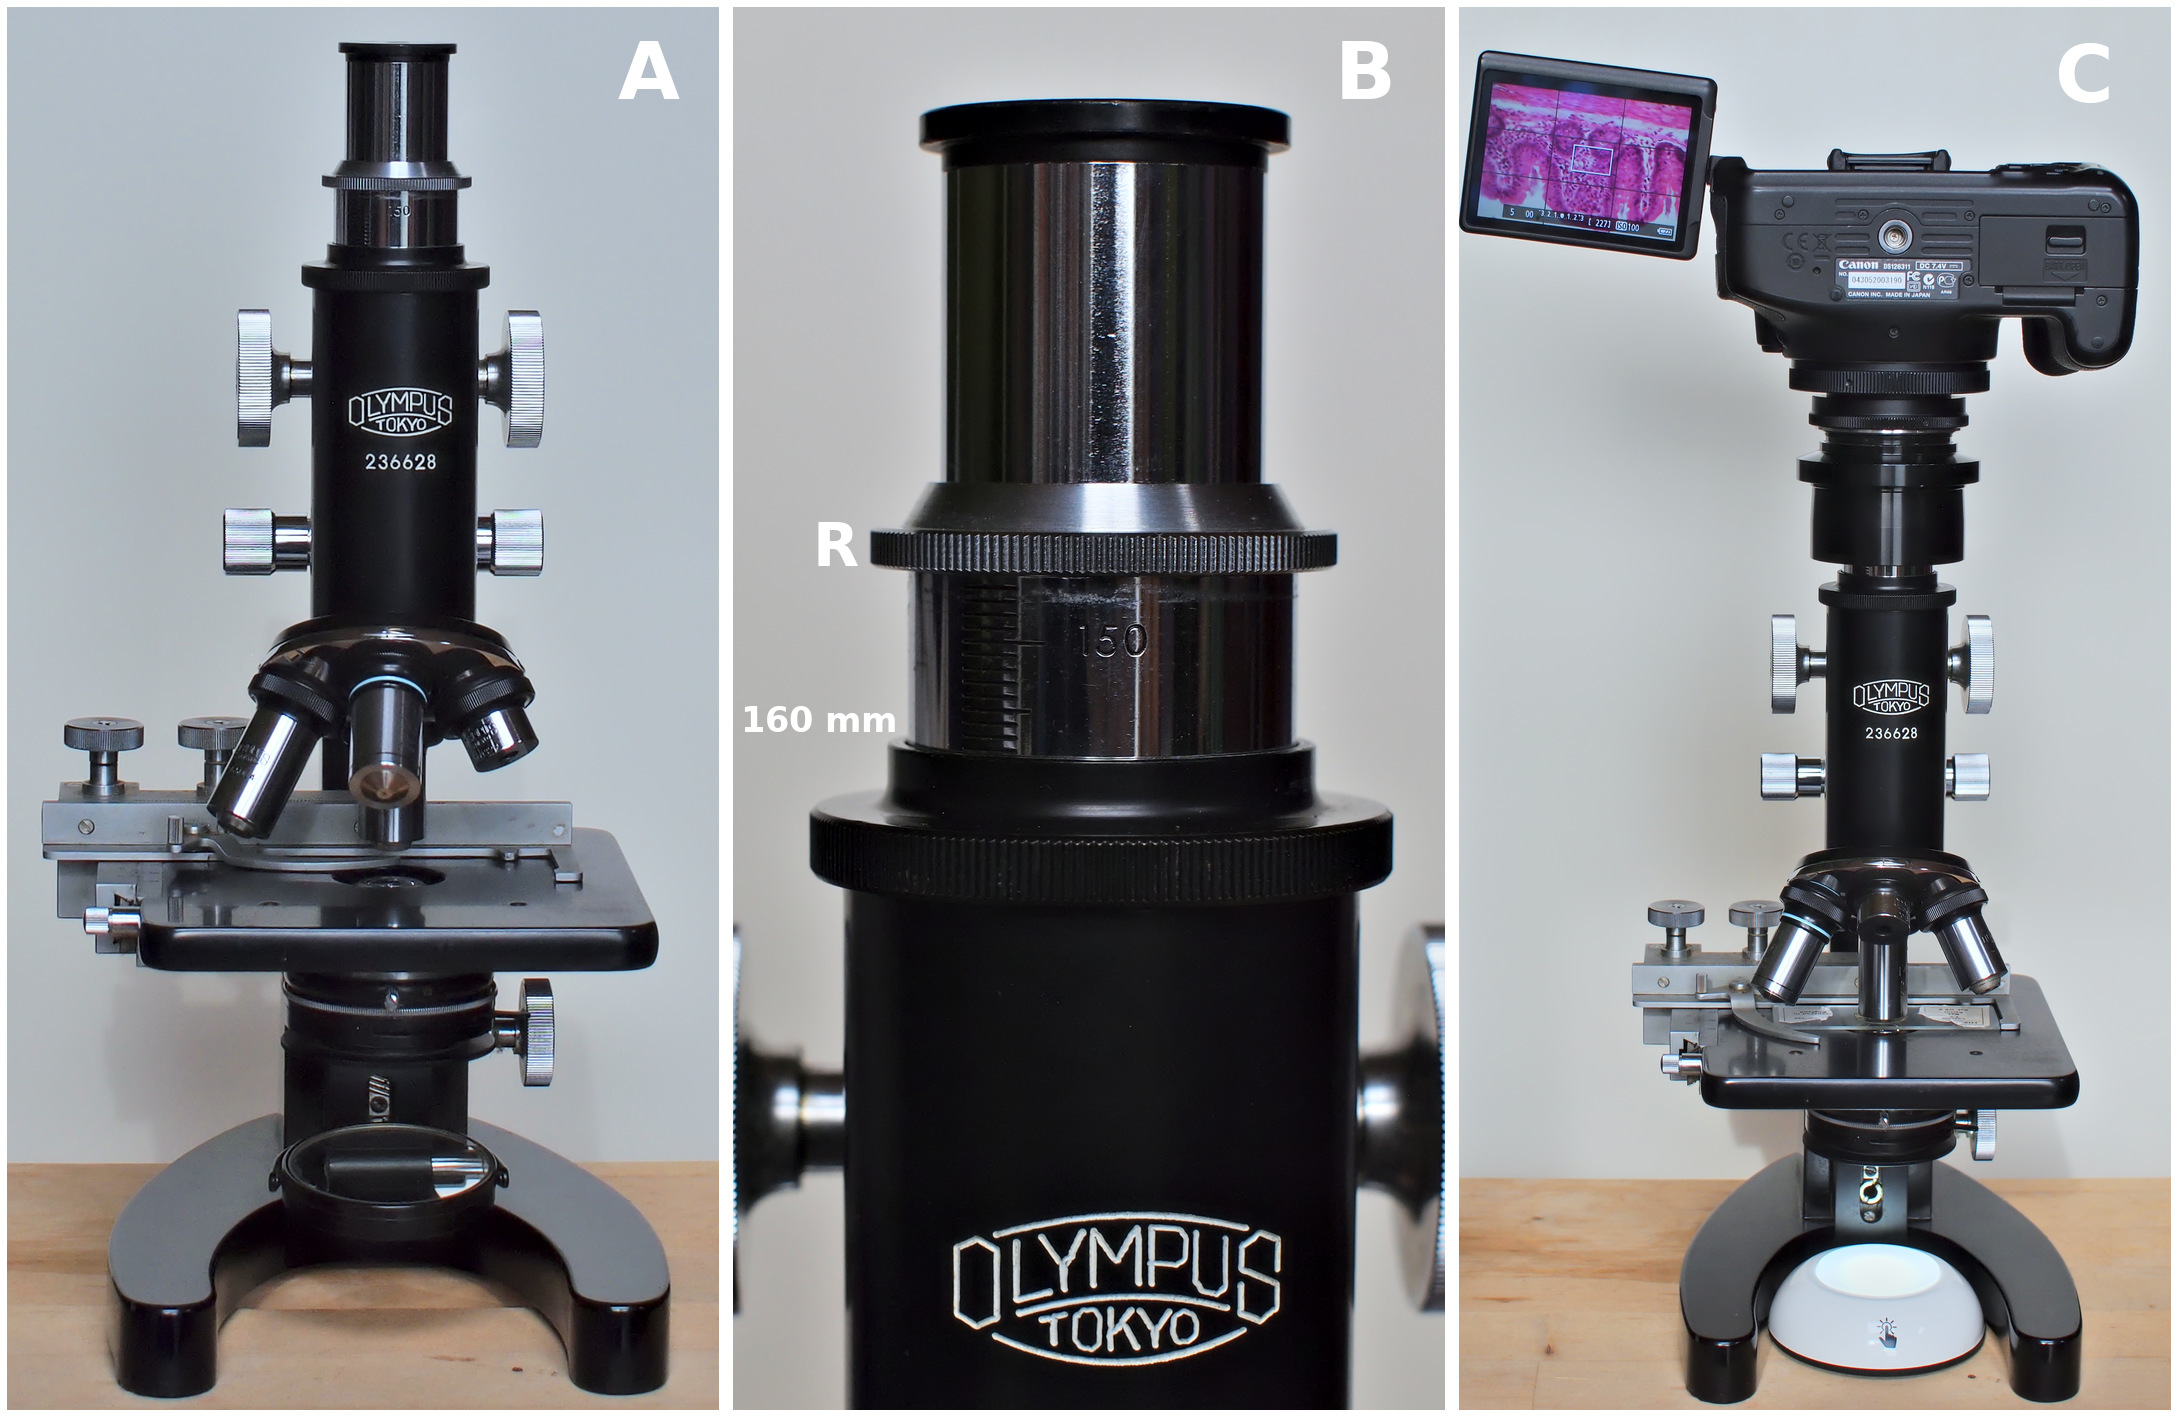
Photographic setup with the Olympus GB. A: Olympus GB with extended tube. B: Tube set to 160 mm and the ring (R) on which the adapter rests. C: Canon 600D connected to the telescope adapter via a T2 ring and an extension ring. The extension ring is optional and depends, among other things, on the camera model: without the ring, there was excessive vignetting with the Canon 600D; with a smaller sensor, there will be less or no vignetting. The mirror has been replaced by a battery-powered diffuse LED lamp, which provides excellent illumination.
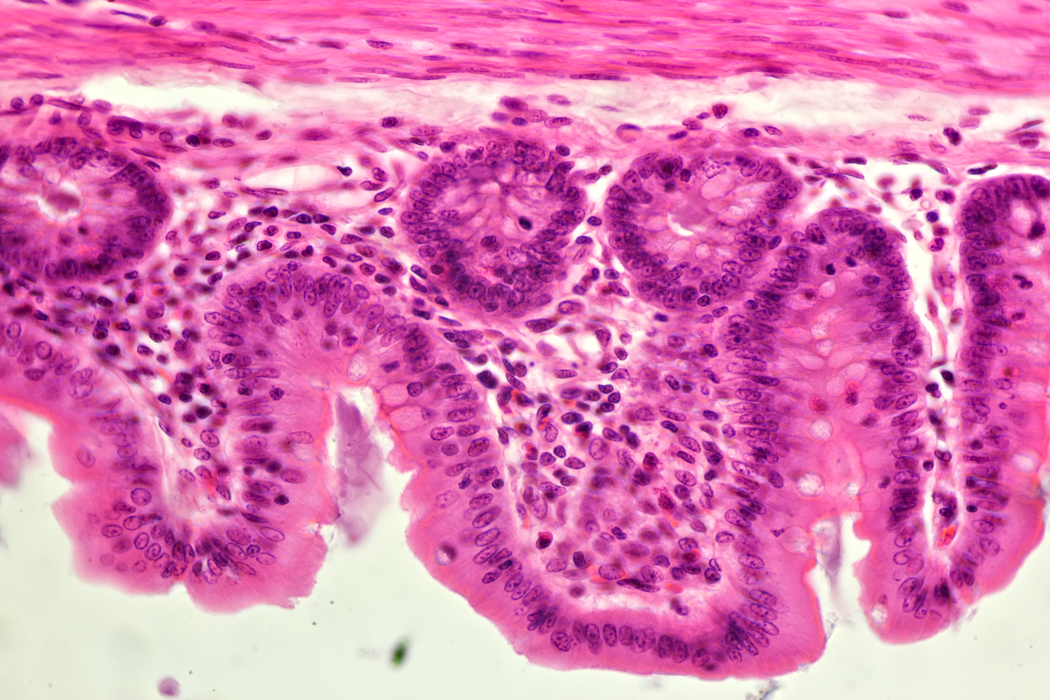
A histological slide (cecum, rat) photographed with the above setup. Objective: Olympus F40/0.65.
Conclusion
With a currently available telescope adapter, it has proven possible to easily and stably attach a system camera to a microscope with a standard 25 mm tube.